Blog>How-To Guides>How to fix a cracked sink
Last updated: 14 June 2023

How to fix a cracked sink
In this post, we'll guide you through how to fix a cracked sink and a chipped sink - using two slightly different methods for each predicament. In no time at all, your sink will be good as new.
Why fix a cracked sink?
We use our bathroom and kitchen sinks multiple times a day. A cracked or chipped sink is a frustrating problem that quite literally stares you in the face until it's fixed.
But a damaged sink has practical implications too. Even the slightest crack can allow water to seep through, causing leaks and costly water damage.
The good news is, fixing a cracked or chipped sink is something you may be able to do yourself.
How to repair a ceramic sink that's chipped
This section explains how to fix a chipped ceramic sink.
If you still have the broken piece of sink, you can use an epoxy adhesive to fix it. However, don't worry if not, it's still possible to remedy a chipped sink with an epoxy putty.
Tools and supplies
An epoxy adhesive (can be purchased from your local DIY store)
Sandpaper
Clean cloths
A clean surface to mix the adhesive (an old tile works well)
Disposable gloves
5 steps to repair a chipped sink
Take your sandpaper and lightly rough up the areas that are to be bonded together: the chipped area and the piece that's chipped off
Next, using your clean cloth, clear away the dust so your work area is completely clean and dry
Refer to the manufacturer's instructions to prepare the epoxy adhesive. Typically, this involves mixing a resin and hardener together
Then apply the adhesive to the chipped area and insert the chipped piece, using gentle pressure to ensure a snug fit
Finally, gently wipe away any excess adhesive with a clean, damp cloth and allow it to dry for the recommended time
See the tradespeople we've checked and recommend for your job
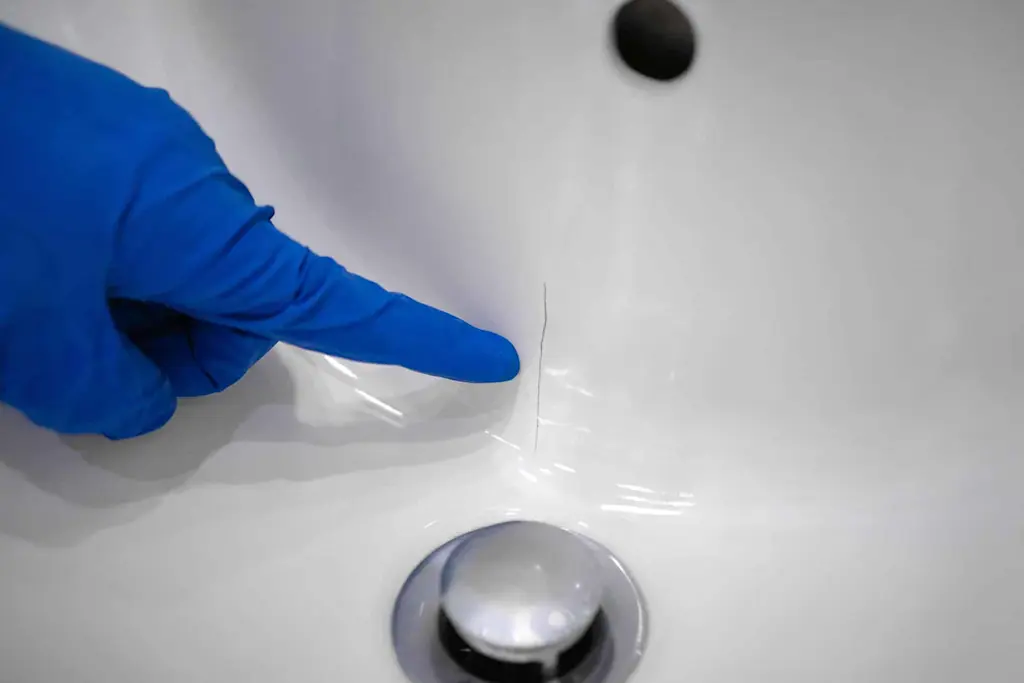
How to repair a hairline crack in your sink
A hairline crack in your sink is often caused by a heavy object being accidentally dropped into it. Frustrating as it is, don't panic, hairline cracks can be fixed. Here's how:
Tools and supplies
An epoxy putty (can be purchased from your local DIY store)
A crafting knife and putty knife
Sandpaper
Clean cloths
All-purpose surface cleaner
Disposable gloves
5 steps to repair a hairline crack in a sink
Dirt and grime can accumulate in a hairline crack, so the first job is to clean the area thoroughly with a cloth and an all-purpose surface cleaner
Next, cut a piece of epoxy putty roughly the same size as the crack you're filling
Mix the epoxy putty together as per the manufacturer's instructions
Apply the putty to the cracked area and use a putty knife to smooth it over
Referring to the manufacturer's instructions, sand the putty gently until it's flush with the surface of the sink. Allow to dry
The same process can be used for kitchen sink crack repair and bathroom sink cracks.
Find a specialist ceramic sink repair firm near you
No time to complete this job yourself? No problem. Simply search our leading directory to find a specialist in your local area. Just add your postcode to the box below.
More How-To Guides


See the tradespeople we've checked and recommend for your job