Blog>How-To Guides>How to install security cameras: A step-by-step guide
Last updated: 24 September 2020

How to install security cameras: A step-by-step guide
Installing a security camera in your home is an effective safety measure. CCTV cameras for homes not only offer tangible deterrents to potential criminals, but they also offer peace of mind and crucial evidence in the event a crime is committed on or to your property.

In 2018/19, the UK reported over 422 thousand burglaries. Although this trend is steadily decreasing due to better safety measures, the high numbers are still alarming enough to warrant preventative action. That’s why this ‘how to install security cameras’ guide is going to tell you everything you need to know about installing home surveillance systems and keeping your property secure.
Installing a security camera in your home is an effective safety measure. CCTV cameras for homes not only offer tangible deterrents to potential criminals, but they also offer peace of mind and crucial evidence in the event a crime is committed on or to your property.
Choosing a home security camera
When it comes to choosing your outdoor security camera, there are various types on the market that can make things confusing. Whether your home CCTV system is wired, wireless, Bluetooth, sensor-activated or otherwise, it’s best to work out your options so you can make the right decision.
If in doubt, ask for professional advice before you buy. Otherwise, you could find yourself fitting the wrong camera solution for your needs, such as a rechargeable battery-operated camera that’s tricky to remove when you need to charge it, or a wireless camera that’s out of range of your home Wi-Fi.
Box cameras

One of the most simple and common CCTV cameras, box cameras, can be used indoors or outdoors. Like their namesake, they are shaped like a rectangular cuboid.
PTZ cameras
PTZ stands for Pan, Tilt and Zoom, which is what these cameras all do. They’re handy for tracking movement and surveying a wider area of interest, and they can be programmed to zoom in on suspicious targets.
Day/Night IP cameras
Both an indoor and outdoor option, day/night IP cameras can be used in low light environments for greater protection and recognition in shadier places. The ‘IP’ stands for Internet Protocol, which means it can transmit a digital signal over a data network. This also means they come in wireless options and can run on your home Wi-Fi.
Make sure you select the right camera to cover any ‘high risk’ areas for potential night-time intrusions. If you want detailed images that are actually usable, you may need to upgrade cameras that are in areas of low/no light to ensure the images are of a high enough quality to be useful.
Thermal cameras
High-tech and imposing, these cameras are excellent for sensing heat signals to distinguish people from objects. They work in complete darkness and through fog, dust and smoke.
Bullet style cameras
Like its namesake, these bullet options package a camera, lens and housing in one. This means they’re a compact home security camera option that requires less servicing. They are also more eco-friendly and work well in low-light.
Fisheye/Panoramic cameras
Also known as dome security cameras, fisheye styles come in various makes and models. They are more discreet and good for environments that get dirtier, such as your kitchen or back garden. If you choose a wide dynamic type, they can handle almost any level of lighting by automatically balancing the pixels. They also make great indoor cameras.
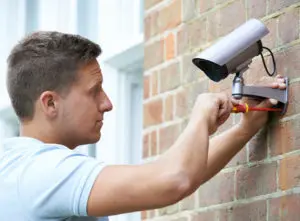
How to install home CCTV
Now you’ve picked a camera that’s right for you, it’s time to install it. It’s worth noting that wireless vs. wired installations work differently. While Wi-Fi cameras are far easier to install, wired cameras are more reliable.
If you’re installing a wired surveillance system yourself, read through step one to seven. If you’ve bought a wire-free CCTV camera, skip step four to six.
Step 1: Gather your tools
What’s a technician without their tools? To ensure your CCTV installation goes off without a hitch, there are a few items you’ll need.
These include:
An ethernet cable
A power drill with various bits (drive, spade and regular)
Steel fish tape
Sticky tape (preferably masking tape)
A monitor, mouse and keyboard
Balus (needed to convert an analogue system to digital, which we highly recommend)
Step 2: Consider the best installation location
Decide where you’d like to set up your camera. All wired cameras connect directly to the digital video recording (DVR) box that records and stores your surveillance footage. The DVR box is plugged into a power outlet, which is then connected to the monitor so you can view what your outdoor camera picks up.
Some key considerations include:
Where’s the best place for both easy installation and good area coverage? For example, mounting a camera under a soft-lit overhang means you can track your cables through your loft.
What’s the condition of your walls? If you want your security camera system on the outside wall of your house, there are layers of brick and mortar you need to get through and special tools you’ll need for the job.
How close is your wired surveillance system to a power supply? If you are wire-free, this is less of a consideration.
Step 3: Measure and mark the installation points
Prepare the installation process by measuring and marking the areas your camera is being secured. These include:
The hole your camera cable/s will feed through
The holes for the mount where the screws will fit and secure your surveillance cameras
Top tip: Template stickers will make this process a lot easier!
Now it’s time to drill your pilot holes where the mounting screws will go. Once they're done, drill a large (very large) hole in the centre for the camera cable to feed through.
Step 4: Run your cables to each camera
Now you’ve drilled your holes, you need to run your cables to each of your camera locations. This essentially means tracking the cables through your house and drilling holes through ceilings, walls and anything else that gets in your way (we kid).
It’s best to start in your attic and work your way down. Keep to the corners and edges of your house to ensure everything stays neat and tidy.
To make this process easier, use your best friend, aka fish tape. By taping the end of your cable to the fish tape and threading it through hard-to-reach areas, you can make light work of this fiddly chore. If you only have one camera, this process is pretty straightforward.
What you should have at the end of this endeavour is a piece of cable that’s ready to connect to your camera.
Note: You may have to crimp your own connectors if your home security camera system didn’t come with its own.
Step 5: Run your cables to the DVR box
Back the way you go! Now you need to run the cables to your DVR box. It’s the same process as Step four, except you might take a different route depending on where you’re capturing and storing your surveillance footage.
Once that’s done, you’re onto the easy bit.
Step 6: Install your camera
After your cable run, installing your security camera will feel like a breeze. All you need to do is connect your camera to the cable hanging out of the hole you made in Step three. Feed the excess wire back into the hole and then it’s just a case of screwing in the camera with the mounting screws in your kit.
Top tip: Wrap your connections with electrical tape to avoid them accidentally disconnecting.
Step 7: Connect and set-up your DVR
You’re almost there! All you need to do now is connect your camera, monitor, DVR, mouse and keyboard. This is pretty straightforward and will have step-by-step instructions per home security camera purchase.
The last thing to do is set up your user interface. This usually includes a password, date and time, and your preferred capture settings. For example, depending on your camera, you may prefer 24/7 footage capture, motion capture or night-only capture. We’ll leave that up to you.
Top tip: Check your camera feeds to ensure they’re pointing where you want them to and adjust accordingly.
If this 'do-it-yourself' method sounds like a headache you could do without, then fear not. Our experts at Checkatrade will be happy to offer their professional installation services and get you up and running quickly and professionally.
How to hide security camera wires outside
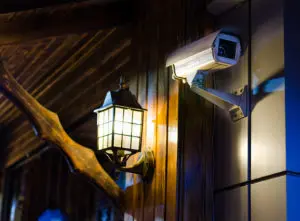
CCTV is an excellent tool for deterring criminals and keeping your house vandal-proof. However, if potential thieves can see the wires, they can cut or damage them to evade capture.
One simple way to avoid this potential is to hide your camera wires. That’s why we’ve outlined your options for hiding security camera wires outside.
Option one: Paint or cover them
If your wires run down the side of your house, a quick way to disguise them is with a lick of paint. Be sure to match the colour to your house so they’re less noticeable from a distance.
Another option is to cover them with cords or brackets. This makes it harder for intruders to break the power supply and acts as an added deterrent.
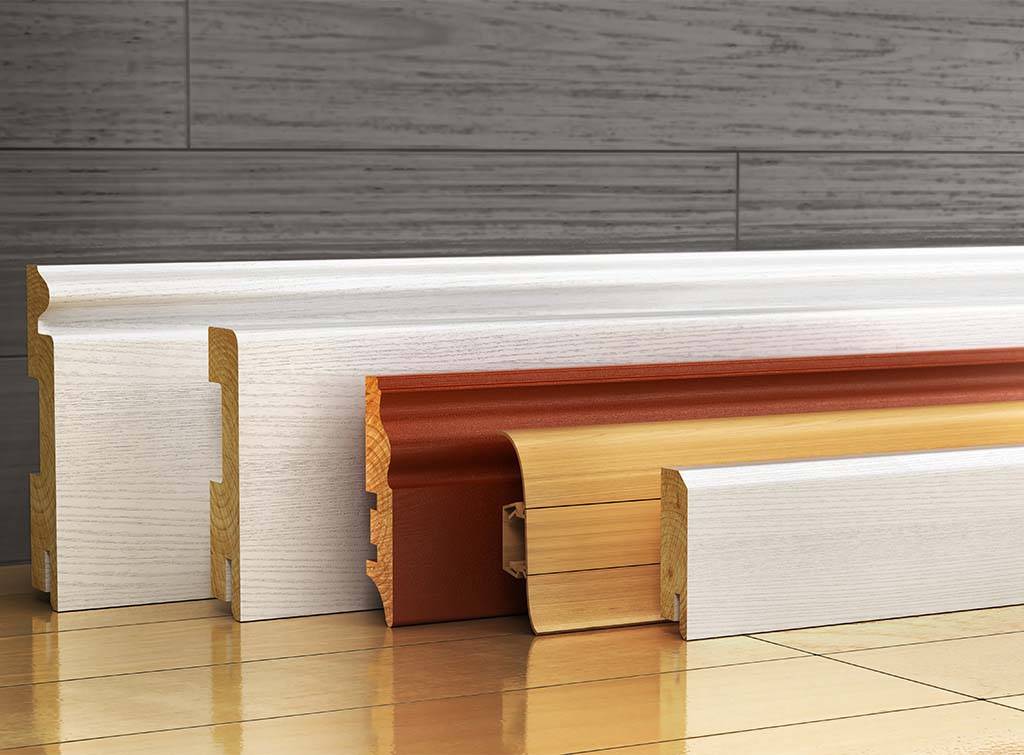
Option two: Run wires through the walls or ceilings
Whether you’re installing a CCTV camera yourself or hiring a professional, an easy way to avoid intruders cutting your camera wires is to run them through your house (as outlined in our step-by-step guide).
If you’re doing this, it’s also worth hiding the wires within the baseboards of your house. In fact, when it comes to redecorating your baseboards, consider installing your CCTV system at the same time (or vice versa).
Option three: Opt for a wireless security camera option
Although wireless security cameras for homes are less reliable, they are easier to install and require less maintenance and upkeep. You just need to mount them and change their batteries regularly.
How to reset a security light
One popular way to avoid a break-in is to install a motion-activated light. They are particularly useful if you go away a lot or live within a neighbourhood watch area. Darkness is a criminal’s ally, so taking that away is a powerful deterrent.
Motion sensors are either wired or wireless, which means resetting them depends on whether they need rewiring, a battery change or a fault fixing. The below steps will focus on wired motion detector lights that need a simple reset.
Step one: Identify the issue
Security lights are activated by movement. Some are so sensitive a hedgehog can trigger them; so if they stop working as effectively, it might be time to consider a reset.
Some issues include:
Motion sensors never turning on, even when people walk past
The security light staying on and never turning off, or turning off after a long period of time
Less sensitive than usual or only working sometimes
Step two: Check the breaker
All houses have a breaker panel. Sometimes they’re located in a basement, under the stairs or in an outhouse.
To reset a security light, find the circuit breaker that controls your motion sensor and flick it off. Leave for around 30 seconds and then turn it on again.
Check your motion sensor and see if the problem is fixed. If not, you may need to call a professional to come and check the wiring.
Step three: Check the light switch
If your motion sensor is wired to a light switch, it’s worth locating this and turning it off for a few seconds to see if that helps. If not, try flicking it on and off again four times. When the light comes on, switch it off again and wait for ten seconds before turning it on again.
This often resets the issue, but if not, you may need to call a professional to check the wiring.
How to set up a security camera

There are various components when it comes to home security cameras. Most will come with a manual and step-by-step guide on how to set up the recording equipment. However, we’ve outlined a basic guide that should work for most smart security cameras for homes.
Step one: Set up your system
Most wired surveillance equipment consists of a camera, monitor, DVR, mouse and keyboard. These are all connected together and work in harmony to provide your home with a robust security system.
Most IP cameras are connected to your computer via USB cables. Wireless or Wi-Fi cameras can also be connected to your computer or phone using Bluetooth, with the footage viewed on each of these devices.
Step two: Download the required software
All cameras come with their own software. Some connect to phones, others connect to your IP address, some connect to your Wi-Fi and some connect to all three. In order to run the surveillance, you need to download the appropriate software on your phone, computer or other devices to ensure the surveillance footage is captured.
Step three: Enter your information
All security camera equipment needs to be set up with your user credentials. Follow the on-screen instructions or the user manual to ensure your devices and software all work in harmony. You will then need to set the time and date, enter your information, and decide when and how you’d like to capture your footage (i.e. 24/7 via motion detection).
Step four: Sit back and relax
Now you’ve got everything set up and ready to go, you can enjoy greater peace of mind. Be sure to check your system regularly and stay on top of any alerts.
How to make your home (even more) secure from burglars
All read up on how to install security cameras? Your security camera system installation is one of several excellent ways to secure your home. However, if you’re still feeling a little exposed, there are several other things you can do to upgrade your home security system.
Secure windows and doors
Fit all your doors with a five-lever mortice deadlock, top and bottom bolts, and sturdy fittings. The same goes for your windows for extra security and peace of mind.
Hire one of our professional tradespeople to come and survey your locks and upgrade any security requirements as required.
Valuables out of sight
If possible, be sure to keep your valuables and prized possessions out of sight. Whether you keep them in a safe, in camouflaged storage, or somewhere that is less likely to catch the eye of potential thieves, prevention is better than cure!
Lights on a timer
Along with an exterior security light, another great way to deter potential burglars is to set up your interior lights on timers. These adapters can be bought from most hardware stores and are easy to plug-in and set up.
Stay on top of security system maintenance
Although this may sound obvious, getting into a regular habit of checking all your security systems will ensure you’re not caught unawares when it comes to replacements and upgrades. There’s no point investing in your security if it doesn’t work.
We hope you found this content useful. For more information about safeguarding your home, check out our blog or hire one of our professional tradespeople to conduct a review of your home.


See the tradespeople we've checked for your job