HOW-TO GUIDES
How to grout tiles
Updated 04/26
By: Laura Macdonald

The tiles are in place, you step back to admire the pattern, and everything looks neatly lined up. Then comes the final stage — grouting.
Getting this last step right is what gives the whole project its clean, finished look and, importantly, helps protect your new tiles from moisture and everyday wear.
This guide explains how to grout tiles properly, what tools you’ll need, how long grout takes to dry, and when it might be worth bringing in a professional.
What grouting tiles involves and why it matters
What grout to use for different rooms
The tools and materials you’ll need
How to grout the tiles step by step
How long grout takes to dry
Common mistakes that can affect the finish
When it’s worth hiring a professional tiler
What does grouting tiles involve?
Grouting tiles means filling the gaps between tiles with a specially designed material that hardens to form a seal.
It might seem like a small detail, but grout actually does more than people expect. It keeps tiles stable, prevents water from getting behind the surface, and helps the finished job look neat and uniform.
Without grout, tiles can shift slightly over time, moisture can seep into the joints, and dirt can build up in the gaps. So while it’s often the final step in the project, it’s one of the most important for long-term durability.
What grout should you use?
Choosing the right grout can make a big difference to how well the finished surface holds up, especially in rooms where moisture is likely, such as a kitchen or bathroom.
Cement-based grout is fairly typical, but there are a few variations designed for different conditions.
Common grout types include:
Cement-based grout: a reliable, widely used option for walls and floors. It’s suitable for most rooms and relatively straightforward to work with
Flexible grout: often recommended for floors, underfloor heating, or areas where slight movement is expected. It helps reduce the risk of cracking over time
Water-resistant or mould-resistant grout: a good choice for bathrooms, kitchens, and utility rooms where moisture is expected. These products help keep grout lines looking cleaner for longer
Ready-mixed grout: handy for smaller jobs or repairs. It saves on preparation time but can be more expensive than powdered grout
If you’re grouting tiles in a bathroom or shower area, choosing a mould-resistant grout from the start is a great way to save a lot of maintenance later on.
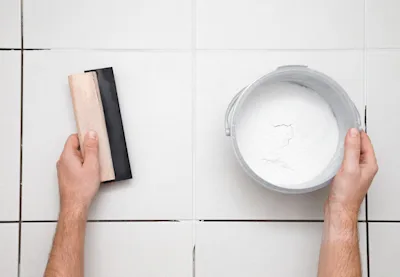
Tools and materials you’ll need
Most grouting jobs don’t require specialist equipment, but having the right tools nearby makes the process smoother and far less frustrating.
Essential tools and materials:
Tile grout
Grout float (or rubber spreader)
Bucket
Clean water
Sponge
Cloth or towel
Protective gloves
Mixing tool (such as a wooden stick, trowel, or drill-mounted mixing paddle)
Helpful extras:
Grout sealer
Knee pads
Old towels or dust sheets
It’s worth setting everything out before you begin. Once the grout is mixed, you’ll want to keep moving steadily rather than stopping to hunt for tools.
Things to consider before you start grouting
Grouting usually feels like the final push to finish a tiling job, but pausing here to make a few small checks before you apply the grout can help ensure a much more satisfying end result.
Make sure the tile adhesive has fully set
Rushing this stage is one of the most common causes of loose tiles or cracked grout. Most adhesives need at least 24 hours to cure before grouting begins.
Think about moisture and ventilation
Bathrooms and kitchens tend to hold more moisture in the air, which can slow drying times. In humid rooms:
Grout may take longer to dry
Extra ventilation can help
Using the shower too soon can weaken the joints
Allowing a little more drying time is usually the safest approach.
Check the tile surface is clean
Dust, adhesive residue, or debris left in the joints can affect how well the grout bonds. A quick wipe-down before starting often prevents problems later.
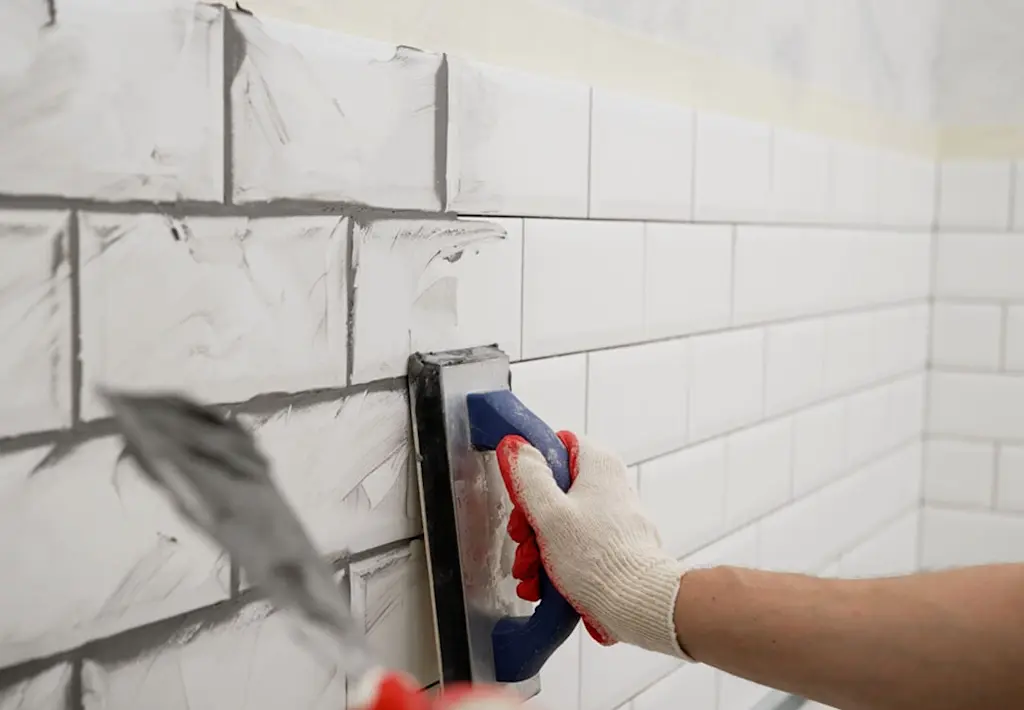
How to grout the tiles
The process of grouting the tiles is usually straightforward once you get into a rhythm. Most people find it a little awkward at first, but it quickly becomes a steady, repetitive task.
Working in small sections helps keep things manageable and prevents the grout from drying too quickly.
Step 1: Prepare the tile surface
As mentioned earlier, before mixing any grout, make sure the area is ready. Check that:
The adhesive has fully dried
The joints are free from dust and debris
The tiles are clean and dry
This simple preparation step often makes the biggest difference to the final finish.
Step 2: Mix the grout
Follow the instructions on the packaging and aim for a smooth, paste-like consistency.
The mixture shouldn’t be too runny or too stiff. A texture similar to thick yoghurt is usually about right.
It’s best to mix small batches at first, especially if this is your first time grouting.
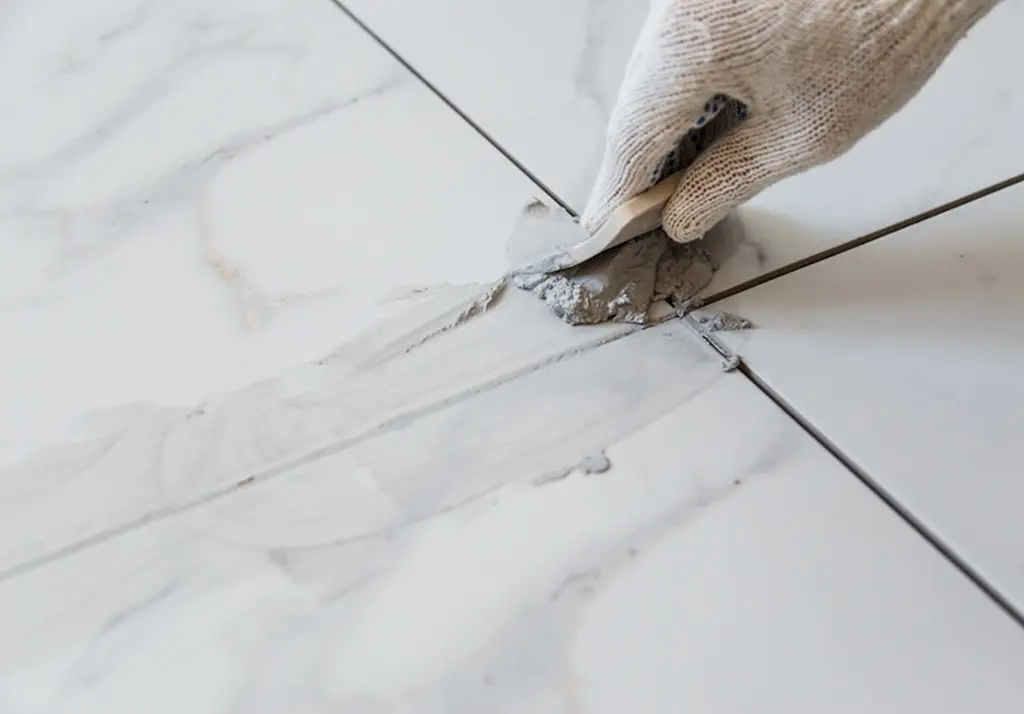
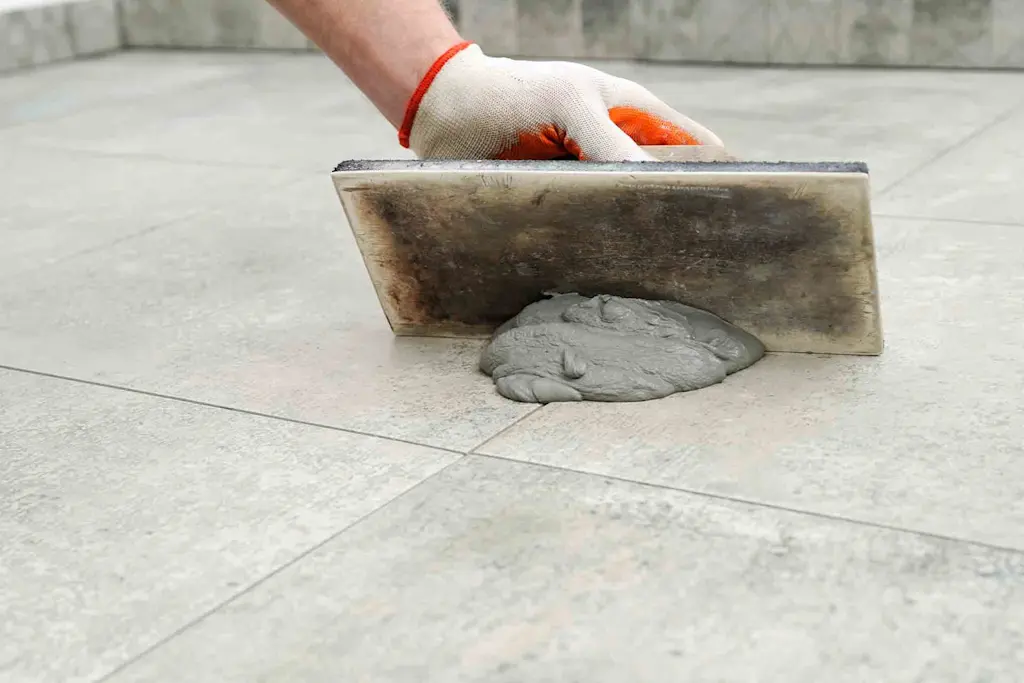
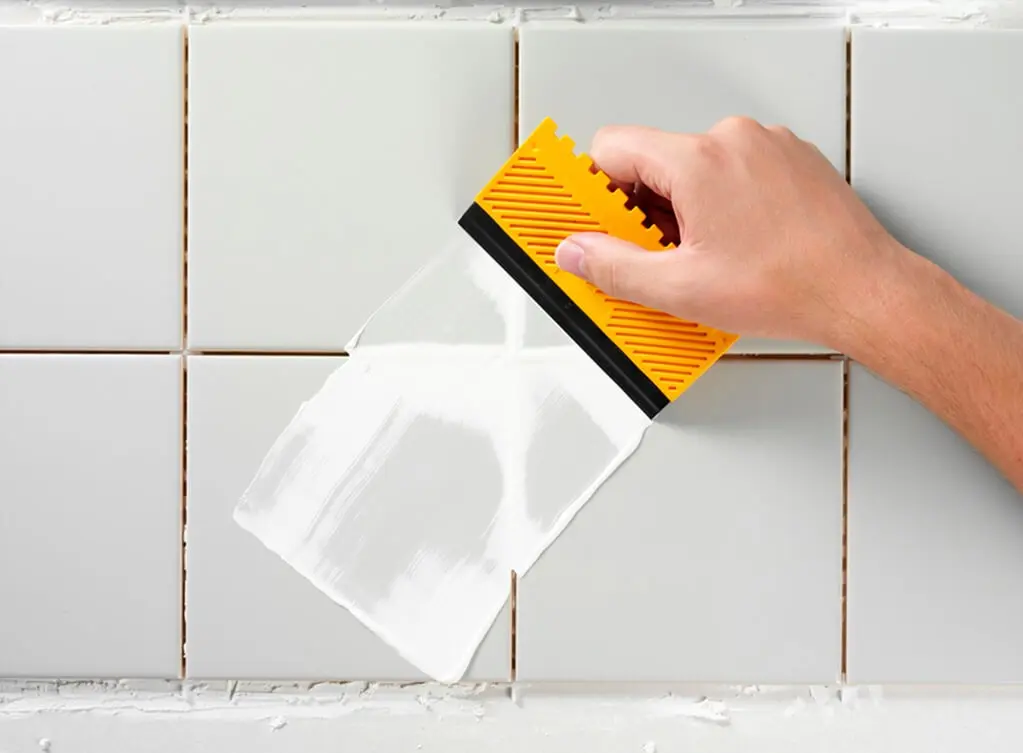
Step 3: Apply the grout
Using a grout float, spread the grout diagonally across the tile surface, pressing it firmly into the joints.
Working diagonally helps push the grout into the gaps and prevents it from being dragged back out again.
Don't rush this part — steady pressure usually produces the neatest results.
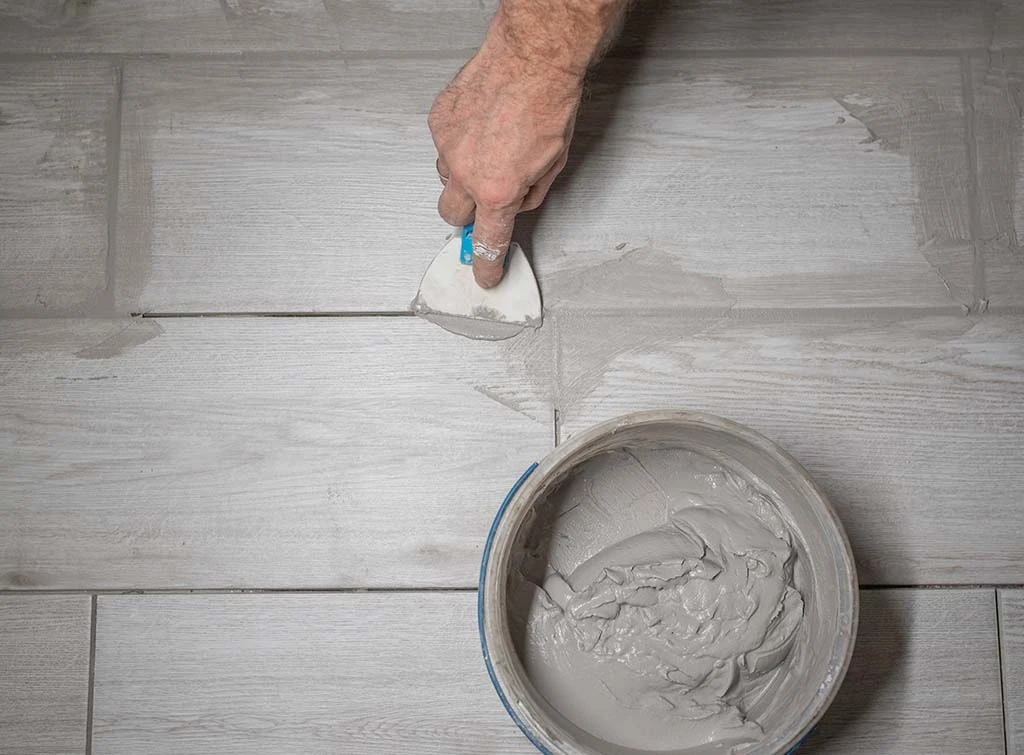
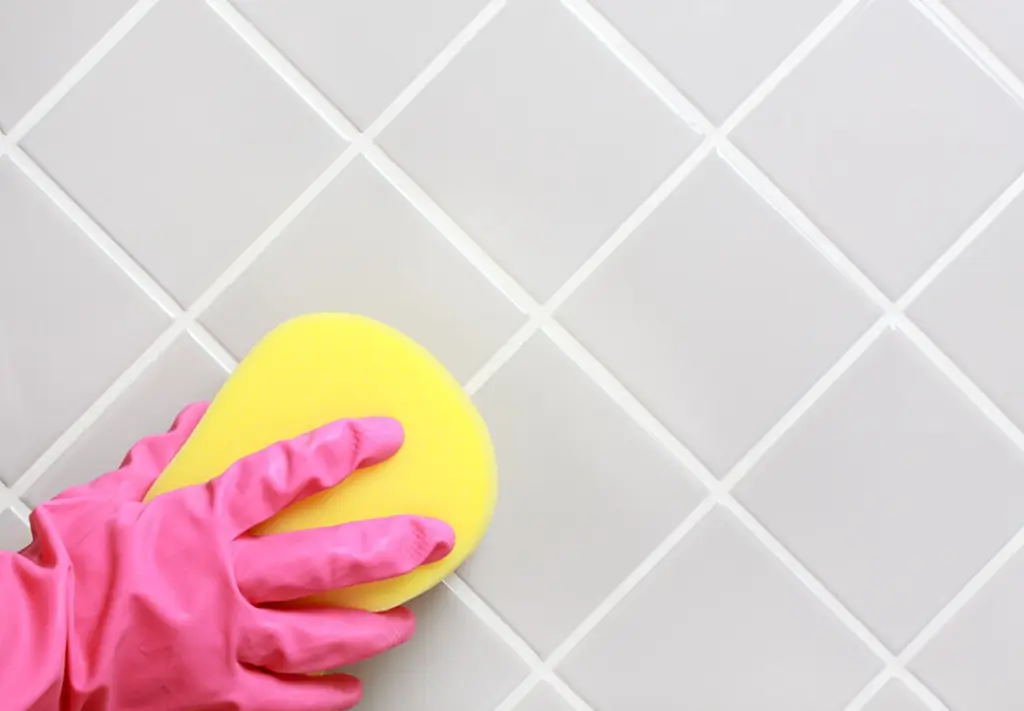
Step 4: Remove excess grout
After filling the joints, use a damp sponge to wipe away excess grout from the tile surface.
Rinse the sponge regularly in clean water and keep the movements gentle. The aim is to clean the tiles without pulling grout out of the joints.
This stage can feel slightly messy at first, but it does become easier once you get used to it.
Step 5: Allow the grout to set
Once the joints are filled and cleaned, the grout needs time to harden properly.
Try to avoid touching the surface or exposing it to water during this stage.
Grout can feel dry on the surface quite quickly, but it still needs time to cure underneath. Giving it that extra time helps prevent cracking later.
Step 6: Polish the tiles
After the grout has started to set, a light haze may appear on the tiles. This is normal.
A dry cloth or soft towel can be used to gently buff the surface and restore the clean finish.
How long does grout take to dry?
This is usually one of the main questions people want to know, especially when the room is nearly ready to use again.
In typical conditions:
Grout becomes touch-dry in around 24 hours
Full curing usually takes 48 to 72 hours
Bathrooms and kitchens can take slightly longer, particularly if the room is humid or poorly ventilated. If in doubt, leaving the grout to dry a little longer is always the safer option.
Common grouting mistakes to avoid
Most problems with grout aren’t about the grout itself, they usually come down to timing or preparation. Some of the common mistakes include:
Grouting before the adhesive has fully set
Mixing grout too wet
Leaving excess grout on the tile surface
Rushing the drying time
Skipping grout sealing in wet areas
These are all easy mistakes to make — especially when you’re keen to finish the job — but taking things steadily and not skimping on the prep work usually produces the best results.
How much does it cost to grout tiles?
Costs can vary depending on the size of the room, the type of tiles, and the condition of the surface.
Smaller jobs, such as a splashback or repair, are usually completed quickly. Larger areas, like full bathrooms or kitchen floors, naturally take longer.
Typical factors affecting cost include:
Size of the tiled area
Condition of existing grout
Tile type and layout
Access and preparation work
For a more detailed price breakdown, see our guide to regrouting costs.

Can you grout tiles yourself — and should you?
Grouting is often one of the more approachable parts of a tiling project, and many homeowners complete it successfully with basic tools and a bit of patience.
That said, it can be more time-consuming than people expect, particularly when working on larger areas or intricate tile patterns.
DIY grouting is usually suitable if:
The tiles are already properly installed
The surface is stable and even
The room is a manageable size
You’re comfortable working steadily and carefully
It may be worth hiring a professional if:
The area is large or complex
Tiles are expensive or delicate
The room is heavily exposed to moisture
Previous grout has failed or cracked
Sometimes, bringing in help simply saves time and reduces stress, especially when you’re keen to finish the room and move on.
Thinking about hiring a professional?
Here’s what recent Checkatrade customers said about hiring a tiler:
“Rory from SFL tiling has just finished tiling our shower room walls and floor and we are very happy with the results. From first contact with Rory we knew we had chosen the right guy for the job, we had a few other quotes and the price was similar but Rory was just so easy to get on with. I am extremely fussy to a point that it winds me up, but tiling is one of a few things that I have to leave to a professional person and I'm glad I did. Rory was punctual, very tidy, and had some good ideas for finishing the room. I would fully recommend SFL tiling to others.” Verified reviewer, S F L Tiling, (Location SO40)
“Daniel did a great job on our kitchen tiling and was a pleasure to deal with from start to finish. A quick response and quote, a fair price and every detail checked before and during the work. Great communications, punctual, quick work, tidy and all round no fuss. Highly recommended.” Verified reviewer, Dal tiling Ltd, (Location BN12)
Find experienced tilers near you
If the job starts to feel bigger than expected, or you’d prefer the reassurance of an experienced hand, a professional tiler can usually complete your grouting project efficiently and ensure a long-lasting finish.
With Checkatrade, tradespeople are:
Checked - Every Checkatrade member must pass up to 12 checks and commit to upholding the Checkatrade Standard
Reviewed - Over 6.2 million reviews have been published on Checkatrade about real jobs, on everything from communication, tidiness, timekeeping, and quality of work
Guaranteed - Jobs booked through Checkatrade are covered up to £1,000 (T&Cs apply)
Enter your postcode to browse checked and reviewed tilers working in your area.
Find a tiler near you
FAQs
Common grouting mistakes include grouting before the adhesive has fully dried, mixing grout too wet, and rushing the drying time. Taking things steadily and following preparation steps usually prevents most problems.
A utility knife can sometimes be used carefully to remove small sections of grout, but a grout rake is designed specifically for this task and is usually safer and more effective.
Yes, most split face tiles still require grouting to stabilise the installation and prevent moisture from entering behind the surface.
A mild bathroom cleaner or specialist grout cleaner is usually effective to help tackle mould. Products designed to target mould without damaging grout are typically the safest option.
Yes, wood effect tiles still require grout between the joints to keep them stable and protect the surface from moisture.
Some tiles and grout types benefit from sealing, particularly in wet areas like bathrooms. Sealing helps protect the surface from stains and moisture.
Yes, grout is essential. It stabilises tiles, prevents movement, and protects the surface from water and dirt.
A damp sponge followed by a dry cloth usually removes grout residue from the tile surface effectively. Gentle cleaning prevents disturbing the joints.
Yes, mosaic tiles require grout just like larger tiles. Because the gaps are smaller and more numerous, careful application is especially important.
Grout typically becomes touch-dry within 24 hours and fully cures within 48 to 72 hours. Humid rooms may require slightly longer drying times.
See the tradespeople we've checked for your job