Blog>How-To Guides>How to paint a new kitchen
Last updated: 6 March 2024

How to paint a new kitchen
It’s much easier to get a flawless finish if you paint the kitchen walls before the units are fitted. Plus, you'll reduce the risk of getting emulsion on your brand new kitchen cabinets! Any scuffs can be touched up after installation.

In any kitchen renovation project, there will be painting involved. It all comes down to great planning to make your kitchen renovation as easy and stress-free as possible.
Finding the right time to paint your kitchen is key. Timing will help to avoid damage, paint spillages on new worktops and cupboards, damaging your new paint work, or getting in the way of trades and delaying your project.
It’s much easier to get a flawless finish if you paint the kitchen walls before the units are fitted. Plus, you'll reduce the risk of getting emulsion on your brand new kitchen cabinets! Any scuffs can be touched up after installation.
Here are the steps to painting your new kitchen
Lay down some dust sheets, cover any furniture or fixtures in the room, and you’re ready to get started.
How to paint onto new plaster
If you've had your walls replastered, or a new wall built as part of a kitchen extension, you'll need to apply a mist coat before you can apply your chosen paint colour. Failing to do this will result in an uneven finish, as plaster is extremely porous, so it'll absorb moisture quickly.
Once your plaster is completely dry (which can take up to four weeks in some cases), prepare a mist coat by mixing three parts white emulsion paint with one part water. The mist coat will be runny, so make sure you roll over any drips before they dry.
Allow your mist coat to dry completely. You can then sand or fill any flaws you spot before applying your chosen paint colour.
How to paint kitchen walls
If you're painting over an existing paint colour, you won't need to apply a mist coat. You will, however, need to fill any cracks or holes and clean the kitchen walls before you get started to help achieve a good finish.
Fill any cracks or holes in the walls using flexible filler and a filling knife. Once dry, smooth it over with a fine sandpaper
To create a texture that'll help bind the paint to the walls, lightly sand all the walls with a fine sandpaper
Wearing gloves, apply a sugar soap solution to the walls using a sponge. This will remove any grease or dirt, allowing the paint to adhere properly. Rinse the walls with a clean sponge and warm water to remove any residue and leave them to dry
If you have any tiles, trim, or worktops in place, cover the edges with masking tape to get a crisp finish. Start at the top and work your way down the room, i.e. ceiling first. Choose a paint that’s moisture resistant, to withstand the steam from cooking
Next, paint the kitchen walls. Use a specific kitchen paint as these are formulated to be tough and wipeable without affecting the paint finish. Use a roller for the walls, and a brush for smaller areas or edges
Finally, paint the woodwork. Do the windows first, as these will need to be left open to dry (start early in the day if possible). Then the door, door frame, and architrave. Lastly, paint the skirting boards
Find checked tradespeople working in your area
Painting a kitchen cabinet
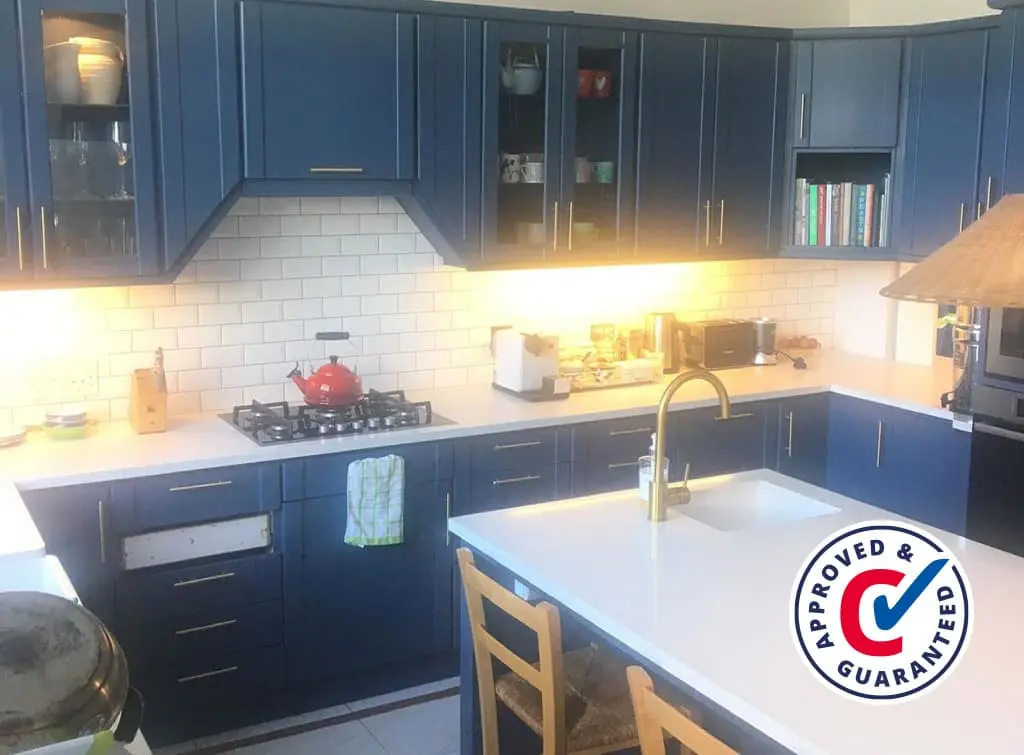
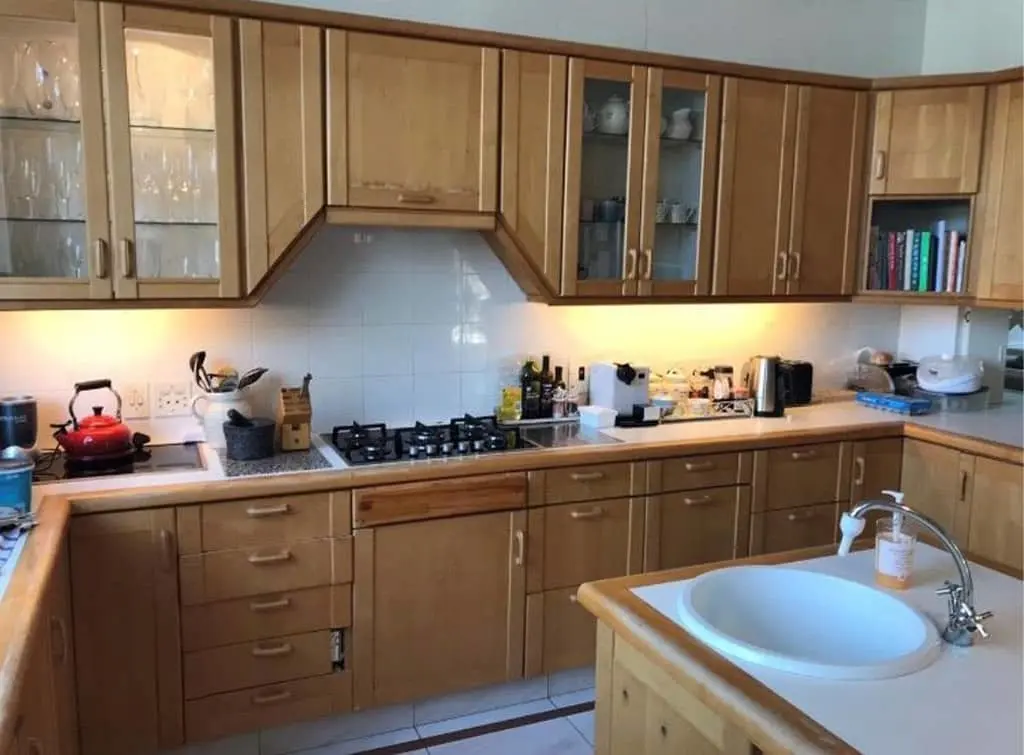
One of the most cost-effective ways to transform your kitchen is by painting the kitchen cabinets.
You'll need to take your time to get a professional and long-lasting finish. For best results, though, we recommend hiring a professional.
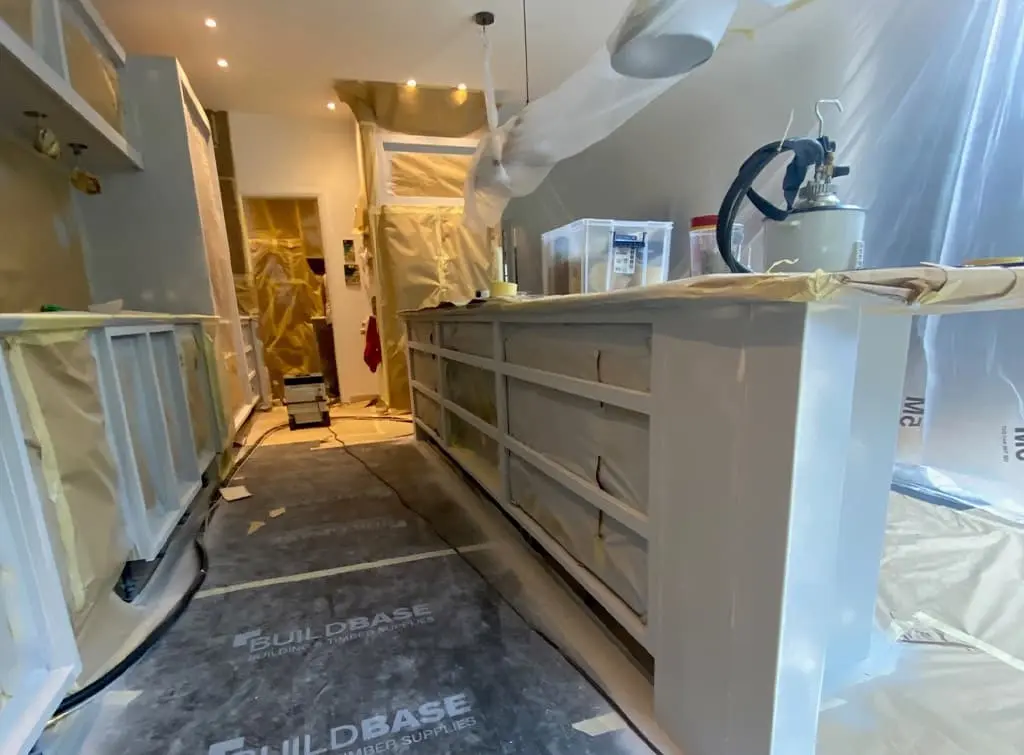
First, lay dust sheets to protect the area in which you’re painting
Cabinet doors are easier to paint (and it’ll help to avoid drips) if they’re horizontal. Therefore, take the cabinet doors off the unit, remove the hardware (hinges and door knobs/handles), and lay flat
Clean the doors with sugar soap and a sponge to remove grease or dirt. Wipe off any residue with a cloth and warm water and allow to dry
Fill any cracks or dents with a multi-purpose filler and sand lightly once dry
To help the paint ‘grip’ the surface, lightly sand the door all over with fine sandpaper, wipe away the dust with a damp cloth and allow to dry
Before painting the carcass of the unit, run masking tape along the wall at the edge of the cabinet to avoid getting paint on the wall and to help get a crisp finish
Depending on the surface type and colour you’re painting on top of, you may need to apply a primer to your cabinet doors first. Allow to dry
Now you’re ready to apply the first coat of paint. Using a natural brush, take your time cutting in to all the nooks
Use a small roller to apply an even coverage of paint over the rest of the door. A roller will help to achieve a smooth finish and will avoid visible brush strokes
Once dry, use a fine sandpaper to smooth over any bobbles or drips, gently wipe clean, allow to dry, and apply a second coat of paint
Reattach your door knobs or handles and reattach the doors to the units
Another way to update your kitchen cabinets is to spray paint them. And it is possible to do this as a DIY task (although we would recommend hiring a professional for the best results).
Hire a professional for the best results
Painting is a highly skilled job. For the best result you should always hire a professional painter and decorator for any part of your kitchen.
Find checked tradespeople working in your area
See the tradespeople we've checked for your job