Blog>How-To Guides>How to seal a shower screen
Last updated: 5 January 2022

How to seal a shower screen
Discover how to fit a shower screen seal, including how to fit a curved shower screen seal, in our step-by-step guide to sealing your shower.

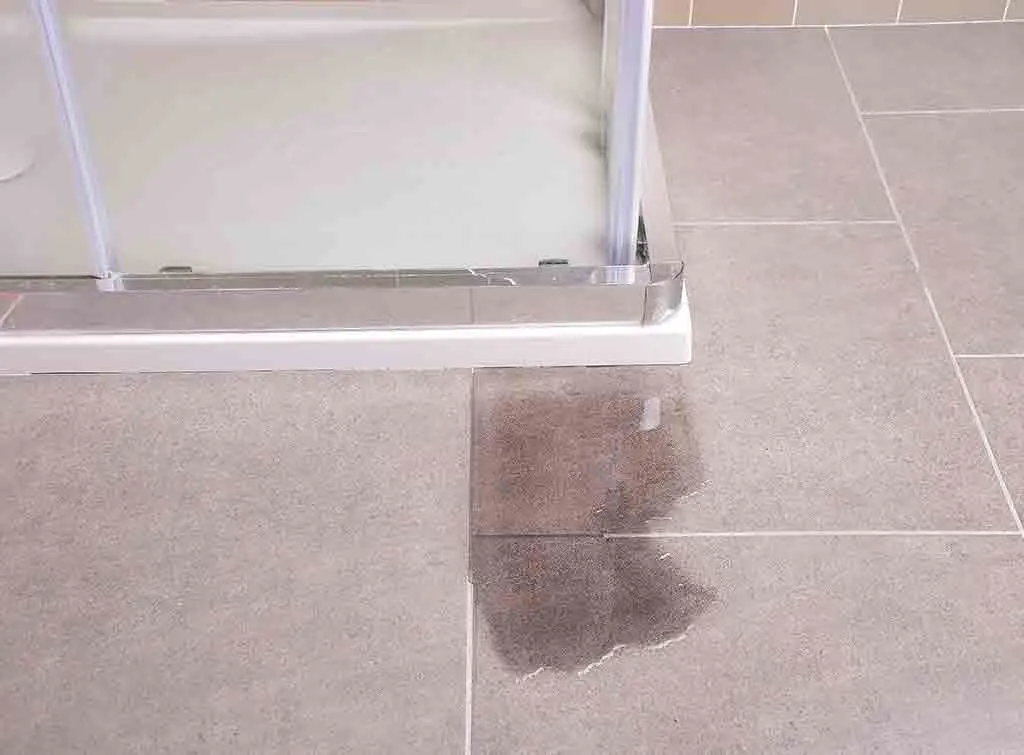
Whether you’re fitting a brand new shower unit or replacing sealant, knowing how to seal a shower screen the right way is important to prevent potentially damaging and expensive water leaks.
In this guide, we’ll explain how to fit a shower screen seal yourself, including on a curved shower screen and an 'L' shaped screen, and reveal how to stop your new shower screen seal from going mouldy.
Tools needed to fit a shower seal
Fitting a shower screen seal effectively that will stand the test of time (and regular torrents of water!) starts with preparing the tools for the job, as once you get started you'll want them all close at hand.
The tools you'll need to fit a shower screen yourself are:
A sealant gun
Anti-fungal sealant
Masking tape
A Stanley knife
Silicone smoothing tool (or your finger)
Damp cloth
Anti-bac wipes (optional)
Thick gloves (for when using Stanley knife)
How to fit a shower screen seal
Step 1: Remove old sealant
Using your Stanley knife, cut away any old sealant with care, ensuring you don't damage any surfaces.
If it proves too difficult to remove any small pieces of silicone, a top tip is to use an old plastic card to scrape it away, and if that doesn't work, then silicone remover is an option.
Step 2: Prep the area
This is essential for an effective and water-tight seal between the shower screen and adjoining surfaces. Use a vacuum cleaner to suck up any dust and deposits, then wipe down the surfaces with a damp cloth and mild detergent.
Step 3: Leave to dry
This is very important as you'll want to apply the sealant to a dry surface for a strong bond.
Step 4: Protect surfaces
Stick a length of masking tape above and below the join to be sealed, leaving a 5mm gap between. This will protect your tiles, shower screen or shower tray from misplaced sealant and give you a focused working area.
Step 5: Prep the gun
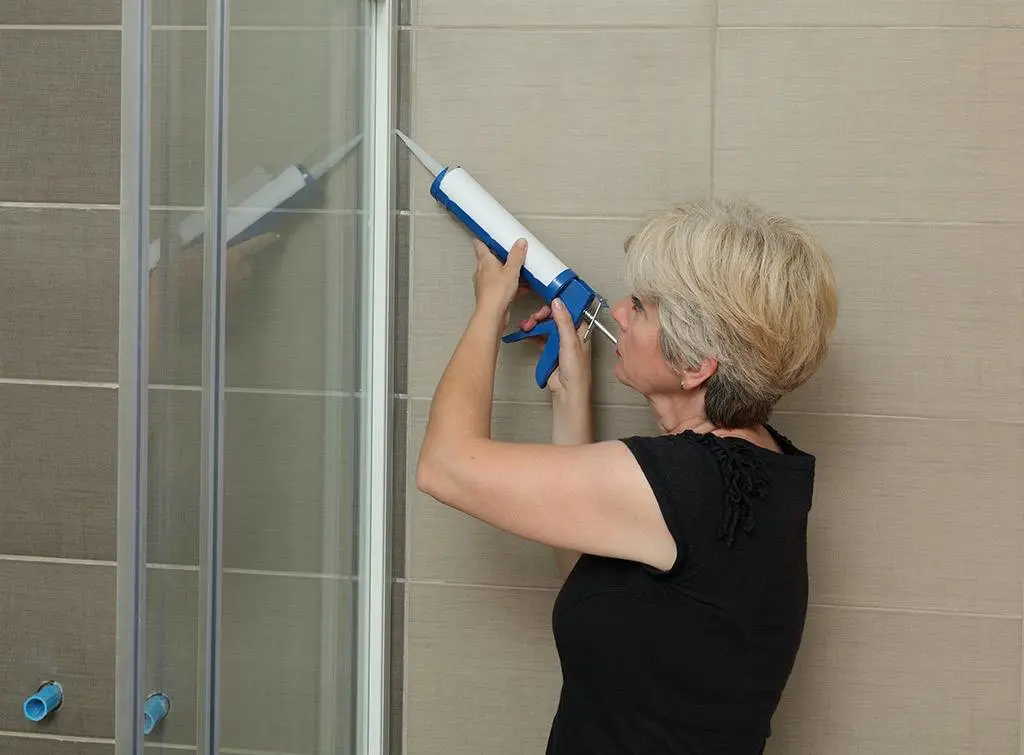
Screw your nozzle onto the end of your sealant tube and cut a 45 degree angle off the top, creating a 5-6mm hole. Insert into your gun and squeeze the trigger to tighten up to the tube base.
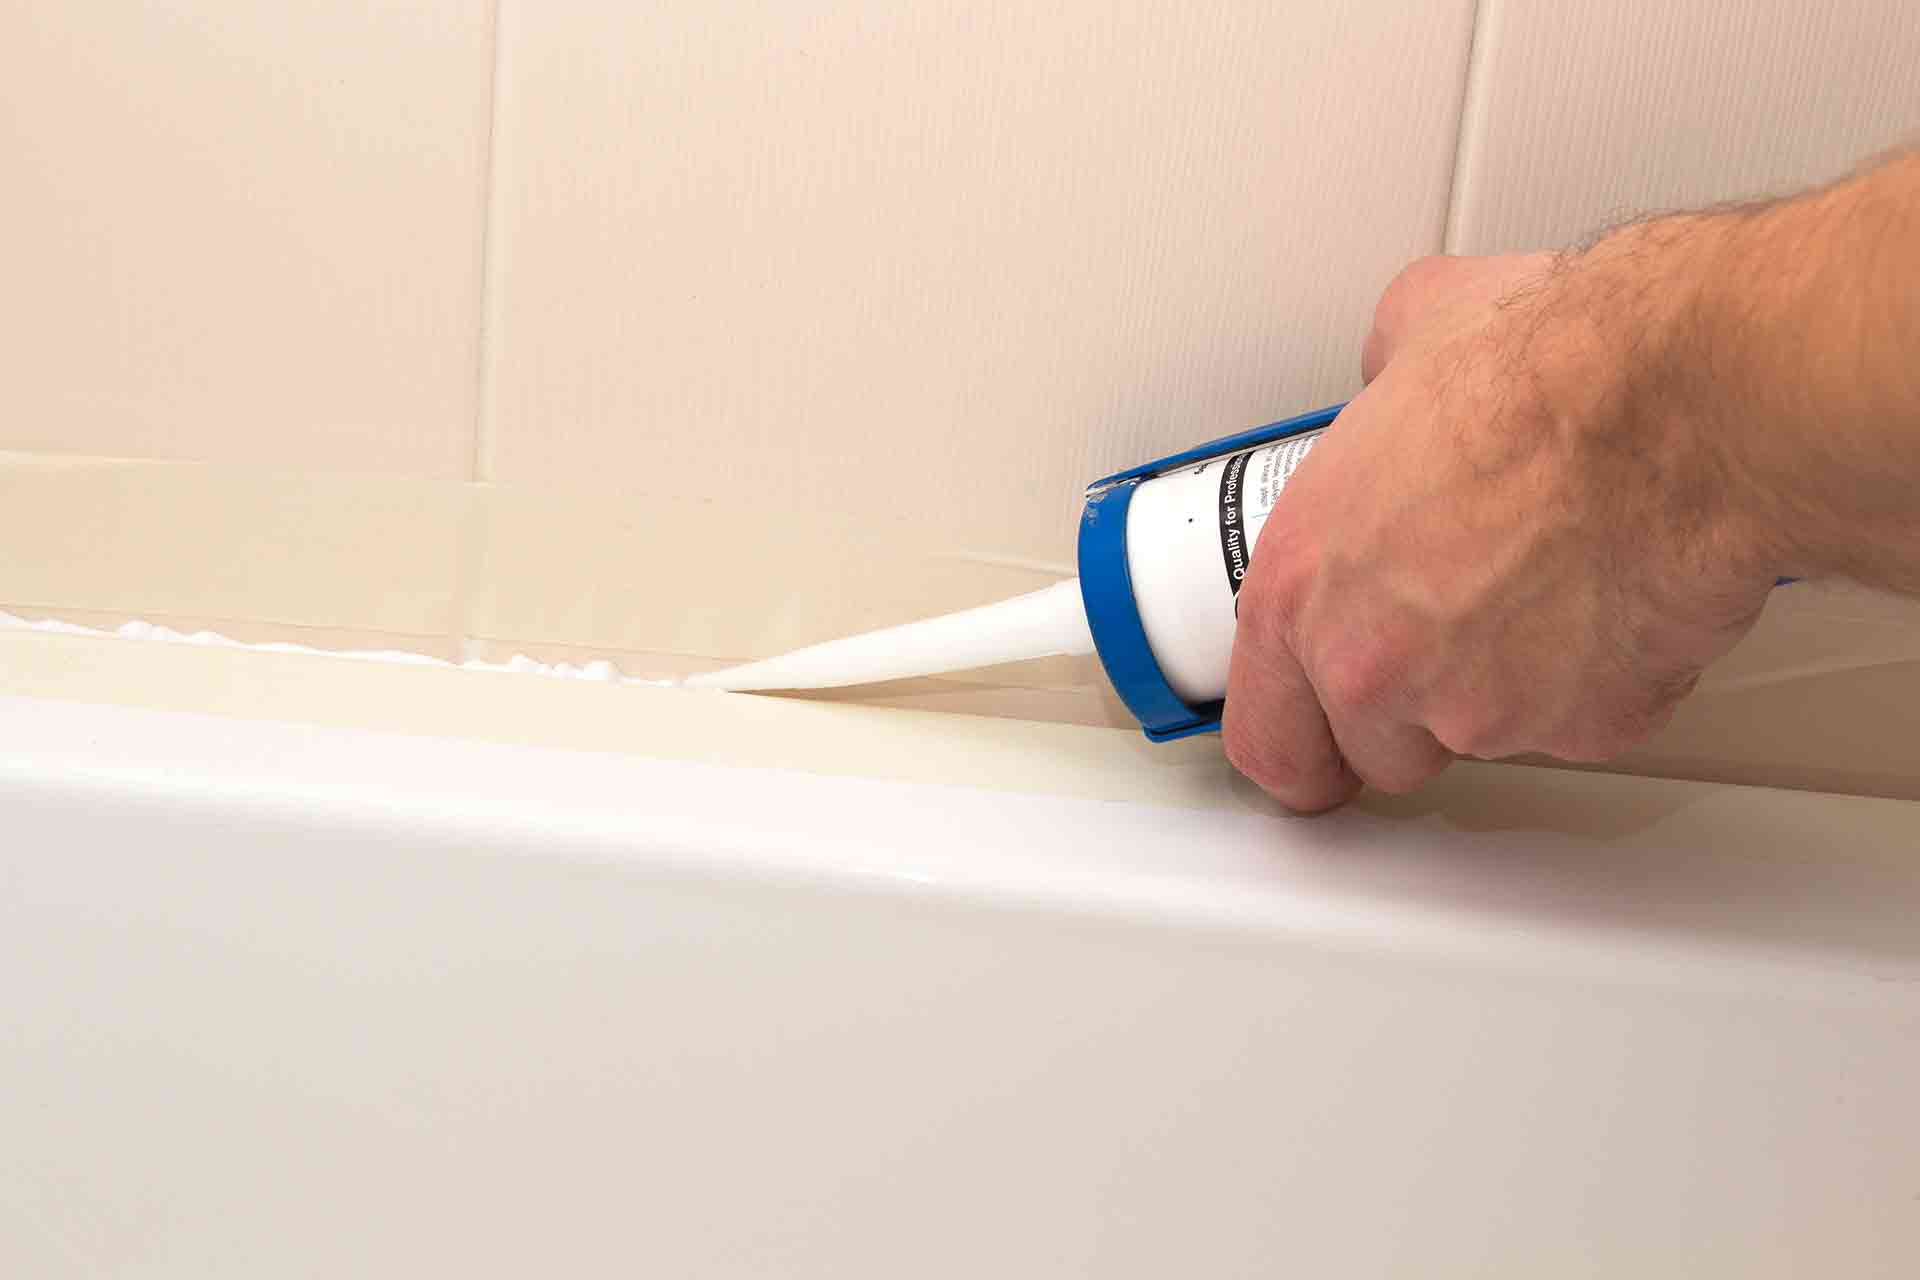
Step 6: Apply sealant
With gentle pressure on the trigger, start in a corner and apply a bead of sealant evenly around the shower tray in one constant run. You're looking to build it up gradually, so if more is needed you can come back and layer it up around until all gaps are sealed.
Step 7: Smooth the sealant
Smoothing your sealant ensures an even and water-tight finish, as well as being essential for the aesthetics of your shower screen. Run your smoothing tool or wet finger along the sealant. Ensure you get this right, as once the silicone has dried it will be too late to create a finish you'll be happy to look at every time you use the shower.
You'll want to achieve a professional finish with your shower sealant, for both the look and to ensure it's completely water-tight. Use the free search tool below to get quotes from locally recommended tradespeople.
See the tradespeople we've checked for your job
How to replace a shower screen seal
If your shower screen seal on your hinged, glazed unit needs replacing due to it failing or being mouldy, then you'll need to buy, cut and fit a new one to prevent potential water damage to your bathroom. Here's how to fit a removable seal:
Step 1: Remove old seal
Remove the old seal by sliding it off the bottom of the screen.
Step 2: Cut replacement seal
Using it as a template, cut your replacement seal to the same length.
Step 3: Add new seal to screen
Slide it onto the bottom of the screen and close to check it shuts and is water-tight.
Step 4: Test the seal
Next time you use the shower, check water is not passing under the seal.
FAQs about fitting a shower seal
How do you fit an L shaped shower screen seal?
Fitting an L shaped shower screen seal requires a little more concentration and attention to detail. You'll need to ensure the corner area of the two panels is successfully sealed and watertight.
Simply follow the steps listed above, and as mentioned: be sure to start in the corner of the 'L'.
How do you fit a curved shower screen seal?
While the shape of a curved shower screen may seem to throw up more difficulties than a straight unit, there is in fact nothing that adds to the complexity of a curved shower screen installation. Using the steps listed above will help you fit one yourself.
How do you stop sealant from going mouldy?
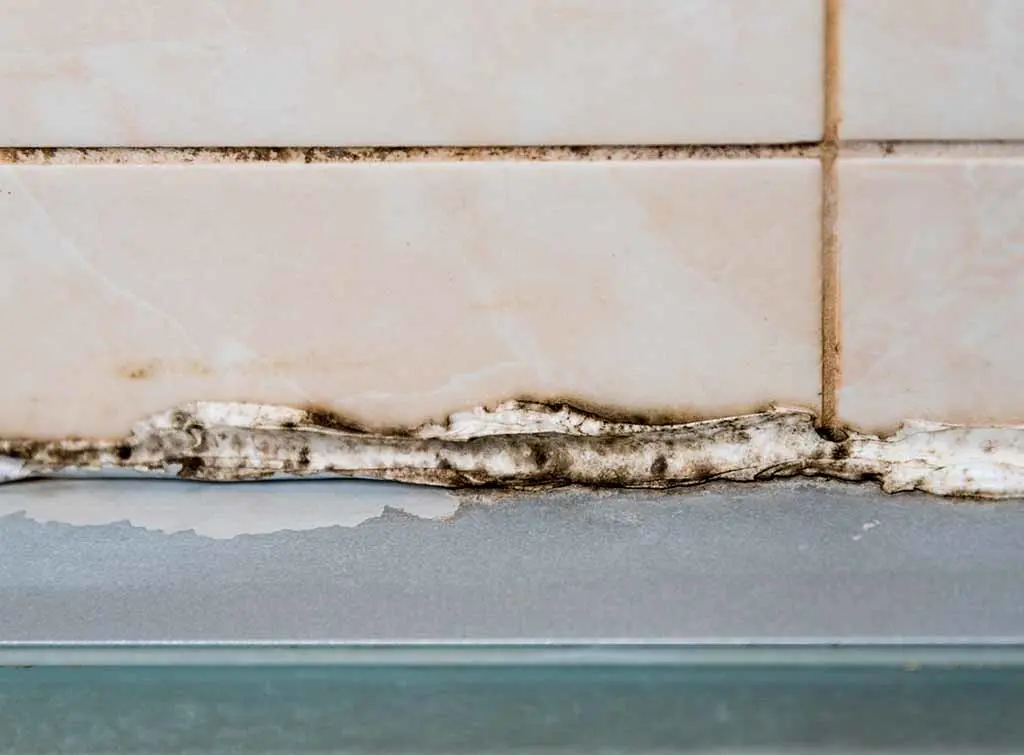
Mould is a form of life, and all life loves water. Your shower area offers a constant supply of water, humidity and warmth, which are the perfect conditions for mould to exist, so it's no wonder it occurs so prevalently. Here's how to clean a shower screen seal and how to prevent mould from growing:
Use an anti-fungal sealant when sealing your shower.
Dry your sealant area after each use.
Clean regularly with a citrus-based shower cleaner.
How do you measure a shower screen seal?
Top tip here, if you're replacing a removable sealing strip from the bottom of a hinged shower screen, then use the existing one as a template. If you're fitting a new one, then measure from one end of the bottom of the glass pane to the other. Add a little extra if you're not feeling confident, as you can always remove and trim it before fitting again.
If you want to ensure your shower seal is installed right the first time and to a professional standard, enter your postcode in the free search tool below to get quotes from local tradespeople that have been recommended by your neighbours.

See the tradespeople we've checked for your job