Blog>Expert Advice>How to vinyl wrap kitchen doors
Last updated: 27 May 2022

How to vinyl wrap kitchen doors
To give your kitchen doors the glow-up they deserve, read on for our expert advice.

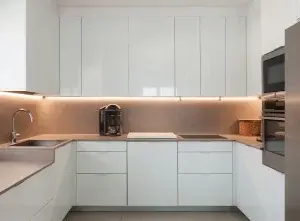
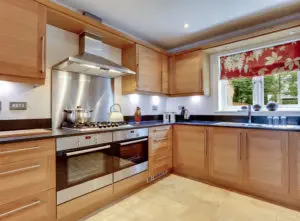
Kitchen cupboards probably get the most use out of all of your cupboards and therefore receive the most wear and tear. Instead of getting new cupboards, you should consider vinyl wrapping them.
Vinyl wrap is essentially used to cover up old and worn kitchen doors looking for a new lease of life. To give your kitchen doors the glow-up they deserve, read on for our expert advice and find out how to vinyl wrap kitchen doors.
Pros of vinyl wrapping kitchen cupboards
There are several benefits of vinyl wrapping kitchen doors. These include:
A wide range of vinyl wrapping colours, finishes, and designs to choose from.
Highly durable and resistant to chipping or scuffing.
Easy to clean and low maintenance (just avoid harsh chemicals).
Cost-effective with low prices to suit any budget.
Cons of vinyl wrapping kitchen cupboards
If your cupboards have suffered from extreme damage, vinyl wrapping them won't cover the chips or wear and tear - they'll simply mask them.
If you don't install vinyl wrapping properly or look after it, then it has a tendency to peel. That's why it's always best to hire a professional to install your vinyl wrap. Then, it's just a matter of maintaining them as per the manufacturers' instructions.
How to vinyl wrap kitchen doors
If you want to try it yourself or get an understanding of how to vinyl wrap kitchen doors before hiring a professional, we've given an overview.
For best results, we always recommend hiring a professional.
Tools you'll need for the job
Cleaning squeegee
Sharp scalpel
A cleaning spray with a degreasing element
Screwdriver
Soft cleaning cloth/microfibre
Your chosen quality vinyl wraps
Top tips on how to wrap kitchen cupboards
One: Unscrew the hinges and handles
Use your screwdriver to carefully unscrew the hinges and handles that hold your cupboards together. Be sure to ask someone to help steady the door so you don't split or drop it on the floor. Alternatively, if you're flying solo, cover it in bubble wrap before getting started.
Top tip: Organise your hinges and screws in boxes or bags so you don't lose them.
Two: Clean the doors with a degreaser
Your doors need to be spotless and degreased to ensure the best adhesion of your DIY vinyl wrapping. So, make sure you've thoroughly cleaned them with a degreasing spray and cleaning cloth, then dry them with a microfibre cloth.
Three: Trim your vinyl
To cut the amount of vinyl required to wrap your kitchen door, place it on the top of the vinyl sheet and either score with a scalpel or trace the outline with white chalk, leaving at least 2-inches of extra space on either side of your cupboards and double that (4-inches) from the top and bottom.
Make sure you protect your floor or table with cardboard or wood before scoring the vinyl sheet.
Four: Stick your vinyl to the doors
Once you've trimmed your vinyl, put the film facing down on your smooth surface and peel it at least a tenth of the way down. Next, take your door and line it up centrally on the vinyl before flipping it upside down to reveal the front surface. Take your squeegee and smooth out the vinyl, bursting any bubbles and making sure it's adhered properly.
Peel off another tenth of vinyl and repeat this step until the entire front of your kitchen door is wrapped and smoothed.
Five: Smooth your corners
Now the main front side has adhered, snip a 45-degree (diagonal) line into the vinyl at each corner of your cupboard, then fold down the edges and smooth them out with your squeegee, making sure there are no bubbles.
Six: Re-attach your hinges and handles
Now you've learned how to wrap kitchen cupboards, all you need to do is screw the handles and hinges back onto each of your doors and reattach them to your cupboards.
Congratulations! You now know how to vinyl wrap cabinets.
See the tradespeople we've checked for your job
How to wrap kitchen cupboards with grooves
The best way to wrap kitchen cupboards with grooves or dents is to use a hairdryer to slightly melt the material over the bumps as you smooth it on. This helps the vinyl manoeuvre these cosmetic irregularities a little easier.
For a professional finish that will last, hire an expert who knows the tricks of the trade and can make sure you're left with a perfect finish, regardless of the condition of your cupboard.
Cost to vinyl wrap kitchen doors
Hiring a professional to wrap your doors will cost you an average of £50 - £250 per door (not including labour). However, this depends on the material and level of cover you require. Read our kitchen door wrapping cost guide for more information.
Did you find this 'how to vinyl wrap kitchen doors' guide helpful? Let us know in the comments. And if you're looking for more expert advice like this, don't hesitate to browse our blog for more how-tos and helpful advice.
More Kitchen Doors - Repair Articles


See the tradespeople we've checked for your job