Blog>How-To Guides>How to build a guinea pig run in 6 easy steps
Last updated: 22 October 2021

How to build a guinea pig run in 6 easy steps
Expand your beloved pet's horizons by learning how to build a guinea pig run. Let them explore the great outdoors and fall in love with playing outside using our following tips.
Expand your beloved pet's horizons by learning how to build a guinea pig run. Let them explore the great outdoors and fall in love with playing outside using our tips.
Our guide is going to take you through the easiest method for a homemade indoor guinea pig run that you can put outside too. So, read on for our expert guidance.
If you're looking for a bespoke design, consider hiring a local carpenter. Use our free search and see who your neighbours recommend for the job.
What you'll need to build a guinea pig run
Before you get started on your DIY guinea pig run, you'll need to gather your supplies.
Tools you’ll need for the job
Materials:

10x furring strips (2 x 2 x 8 inches)
Chicken wire
4x hinges
2x hook and eye locks
24x 3-inch screws
Tools:
Circular or table power saw
Drill and drill bits
Staple gun
Measuring tape
Wire cutters
Safety equipment
Pencil and ruler
How do you make a homemade guinea pig run?
Step 1: Cut your furring strips to size
To make a rectangle guinea pig run, you need to measure the following:
8x 48-inch long furring strips
12x 24-inch long furring strips
Use your pencil and ruler to mark out the measurements. Then, take your chosen power saw and make the cut as cleanly as possible.
Note: handling a power tool is dangerous. If you're unsure of yourself in any way, please hire a professional. Alternatively, buy the furring strips pre-cut at the right measurements.
Step 2: Make four rectangles out of the furring strips
Connect 2x 48-inch furring strips to 2x 24inch furring strips to make 4-rectangles. Screw them together at each join with a clamp to keep them steady.
Step 3: Add another furring strip for extra support
Once you've made your rectangles, add another 24-inch furring strip horizontally down their centres. Use your measuring tape to make sure you find the centre so they're all even when lined up.
Step 4: Secure the chicken wire
Once you're left with your 4-rectangles, it's time to add your chicken wire. To do this, stretch your chicken wire roll over each rectangle frame lengthwise and pull it taut. Then, cut the chicken wire with your cutters and repeat the process for the other frames. To secure, line up the cut chicken wire to the edge of your frame and staple the top with your staple gun. This lets you pull the rest taut and secure with more staples.
Top tip: Space the staples about 5 inches apart to ensure a secure attachment.
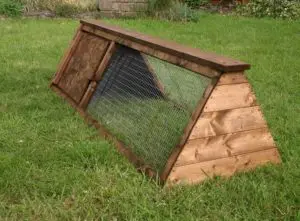
(How to make a folding guinea pig run)
Step 5: Attach hinges to connect two frames
Once you have your four completed rectangles, choose two and place them next to each other at a right angle so it creates a corner. Then, add two hinges to the shortest side of both frames, about 2 inches away from the top and bottom of the frame edges. Screw-in using a drill so one side of the hinge is attached to the first frame and the other side of the hinge is attached to the other frame, securing them together.
Repeat Step 5 on the other two hinges so you have two pairs of hinged frames. This lets you open and close your run on two sides.
Step 6: Add hook and eye locks to connect the frames
So you're able to open and close your run with ease, attach a hook and eye lock to the opposite side of the hinged pairs – a hook on one side and an eye on the other about an inch from the top. Repeat this on the other hinged pair but swap the sides you place the hook and eye so you can secure both frames together.
Now, put the frames together to make a rectangle and, voila! You've just made your simple guinea pig run. Now all that's left to do is test it out on a juicy patch of grass.
Top tip: So your guinea pig feels safe and gets the most out of its run, add lots of enrichment and hiding places so it can easily hide from the elements.
Find carpenters in your area
FAQs
How do I fox-proof my run?
If you want a fox-proof guinea pig run, the best way to do this is to create one that doesn't move. Foxes are cunning and will find ways into your run if it's not secured properly. Chicken wire and a roof help. However, you'll also need to make sure they can't dig under the run, which is why burying it or plumbing it with concrete first is recommended.
How long should guinea pigs be in a run?
To give your guinea pig the maximum outdoor benefit, let them play for no more than 4 hours. Just remember to add a water bottle to the cage and a bowl of food so they don't go without sustenance while they're running around.
Can a guinea pig run around in a ball?
Balls aren't recommended for guinea pigs as they often die of heat exhaustion. Therefore, we recommend building them a run to get their quota of exercise instead.
What should I put on the floor of my guinea pig run?
If you don't have a nice patch of grass for them to graze on, we recommend adding recycled paper bedding, fleece bedding or hay. This gives them a respite from the hard floor as they run around.
Do guinea pigs need a run?
Whether you attach one to their hutch or build them a DIY option, giving your guinea pigs the option to run around is kind and responsible pet ownership.
Should I hire a professional?
If you’re thinking of attempting any DIY work, we ask you to think about the risks associated with bad workmanship – not to mention the extra costs involved when it comes to correcting any mistakes. If you’re in any doubt about taking on a task, we highly recommend hiring a local expert your neighbours know and trust.
When you hire one of our trusted professionals, you’re able to see their profile and view their customer reviews. Even better, those reviews are from your neighbours and checked by us to make sure they’re legitimate. Not only that, but if you book one of our members for the job, we guarantee their work, which gives you the extra peace of mind and security that you and your project is in safe hands.


See the tradespeople we've checked for your job