HOW-TO GUIDES
How to fix squeaky floorboards
Updated 06/26

By: Olivia Scammell
Reviewed: Laura Macdonald

There's a particular type of household noise that's impossible to ignore once you notice it.
One floorboard squeaks every time you walk across the landing. The bedroom floor creaks in exactly the same spot each morning. Or perhaps the entire floor seems to groan whenever someone walks through the room.
The good news is that squeaky floorboards are often fixable. However, the right solution depends entirely on what's causing the noise in the first place.
Here, you’ll discover how to fix squeaky floorboards, how to identify the cause of the squeak, and when it's worth calling in a professional.
Why floorboards squeak
How to identify the cause of the noise
How to fix squeaky floorboards from above and below
How to fix squeaky floorboards under carpet
Which DIY fixes work best
When squeaks could indicate a bigger issue
How much it costs to fix squeaky floorboards
Quick answer: How do you fix squeaky floorboards?
Most squeaky floorboards happen because the timber moves slightly against another surface.
To fix squeaky floorboards:
First, identify where the squeak is coming from
Determine whether the movement is between the boards, joists or the subfloor
Tighten any loose fixings where appropriate
Use shims, screws or specialist repair kits to stop movement
Lubricate rubbing boards if the squeak is minor
Call a professional if the floor feels loose, uneven or structurally unsound
The key is finding the source of the movement before attempting a repair.
Don't worry if you're not yet sure what's causing the noise. Most squeaky floorboards are caused by a handful of common issues, and we'll walk you through how to identify the problem and choose the right fix step by step.
Alternatively, it'll probably work out quicker and more cost-effective in the long run to have a tradesperson do the job for you.
Find flooring repair specialists near you

Why do floorboards squeak?
Squeaky floors are usually caused by movement. As people walk across the floor, the timber components rub together, creating that familiar creaking or squeaking sound.
Older homes in particular often develop squeaky floorboards simply because decades of natural movement gradually loosen fixings and create small gaps between timber components.
Board-to-board movement
This is one of the most common causes.
Floorboards expand and contract naturally over time. And as they move, the edges of adjacent boards can rub together and create a squeak.
You may notice:
A squeak in a very specific spot
Slight movement underfoot
No obvious signs of damage
Floorboard movement against joists
Sometimes the floorboard itself moves slightly against the joist beneath.
This often happens when:
The fixings have loosened over time
Timber has shrunk slightly
The floor wasn't originally fixed securely
Subfloor movement
If a larger section of floor moves when you stand on it, the issue may be deeper.
Possible causes include:
Joist movement
Weak subfloors
Incorrect spacing between joists
Previous poor-quality repairs
Seasonal expansion and contraction
Timber naturally reacts to changes in temperature and humidity.
Many people notice squeaks becoming worse during:
Winter — when the heating comes on
Hot, dry weather
Seasonal changes in humidity — aim to keep the humidity levels in your home between 35% and 55%.
If your squeaky floorboards only appear during certain times of year, timber movement caused by changing humidity may be the culprit rather than a structural problem.
Are squeaky floorboards a sign of a bigger problem?
The good news? Usually not.
Most squeaks are simply caused by movement between the timber components and aren't dangerous.
However, it's definitely worth investigating further if you notice:
Sagging floors
Bouncy floors
Cracks appearing in walls nearby
Signs of damp or water damage
Significant movement when walking
These can sometimes indicate issues with joists, subfloors or structural timber.

Find experts in wooden flooring repairs near me
Are you looking for an expert in wooden flooring repairs to help fix your broken floorboards, rotten support beams, or cracked timber? Search for experienced professionals near you with Checkatrade. How to find experts in wooden flooring repairs near you Finding a local specialist to repair damaged
What type of squeak are you dealing with?
Before reaching for the drill, it helps to narrow down what's causing the noise.
If the squeak...
Happens in one small spot — it's likely to be board-to-board movement
Covers a larger area — it could be subfloor or joist movement
Gets worse in winter — it may just be seasonal timber movement
Happens beneath carpet — hidden floorboard movement could be the culprit
Feels bouncy underfoot — it could point to a joist or subfloor issue
Once you know what's causing the squeak, choosing the right repair becomes much easier.
Tools and materials you may need
Depending on the repair method, you may need:
A drill
Screws
Stud finder
Hammer
Carpenter's glue
Timber shims
Tape measure
Torch
Talcum powder
Dry silicone lubricant
Squeak No More repair kit
You probably won't need all of these items. The right tools will depend on what's causing the squeak.

How to fix squeaky floorboards when you can access underneath
If you have access beneath the floor from a cellar, basement or crawl space, repairs are often much easier.
Step 1: Locate the squeak
Walk across the floor and mark the noisy area.
Having someone walk above while you inspect from below can help pinpoint the exact location.
Step 2: Identify any gaps
Use a torch to inspect the area where the floorboard meets the joist.
Even small gaps can allow movement and create squeaks.
Step 3: Insert timber shims
For isolated gaps, apply carpenter's glue to a timber shim and gently push it into place.
Avoid hammering it aggressively. The aim is to remove movement, not force the floor upwards.
A timber shim is simply a thin wedge-shaped piece of wood. It's designed to slide into small gaps and stop movement between two surfaces. You can buy packs of timber shims from most DIY stores, or make your own from a thin offcut of timber if you're confident using basic woodworking tools.
Step 4: Add adhesive where needed
Longer gaps may respond better to construction adhesive.
Apply carefully along the gap between the floorboard and joist.
Step 5: Reinforce weak joists
Where joists have bowed or degraded slightly, fixing additional timber alongside them can help strengthen the area and reduce movement.
Step 6: Secure loose floorboards
Short screws can sometimes be driven from underneath into the floorboard above.
Be extremely careful with screw length. The last thing you want is a screw appearing through your flooring.
How to fix squeaky floorboards from above
If you can't access the underside of the floor, repairs become a little more limited.
Method 1: Tighten loose boards
Where the squeak is caused by movement around existing fixings, additional screws can often help secure the floorboard more firmly.
Before drilling, it's important to:
Check for pipes and cables
Locate the joists accurately
Use appropriate screw lengths
Method 2: Use talcum powder
This is one of the oldest squeaky floorboard fixes around.
Sprinkle talcum powder into the gaps between boards and walk across the area to work it in.
It won't solve structural movement, but it can be surprisingly effective at reducing friction between rubbing boards.
Method 3: Try a dry silicone lubricant
Some homeowners have success with specialist dry silicone sprays.
These work similarly to talcum powder but can be less visible.
WD-40 is often mentioned as a quick fix for squeaky floorboards, but it's usually only a temporary solution. It can also leave oily residue behind, which isn't ideal on finished flooring.
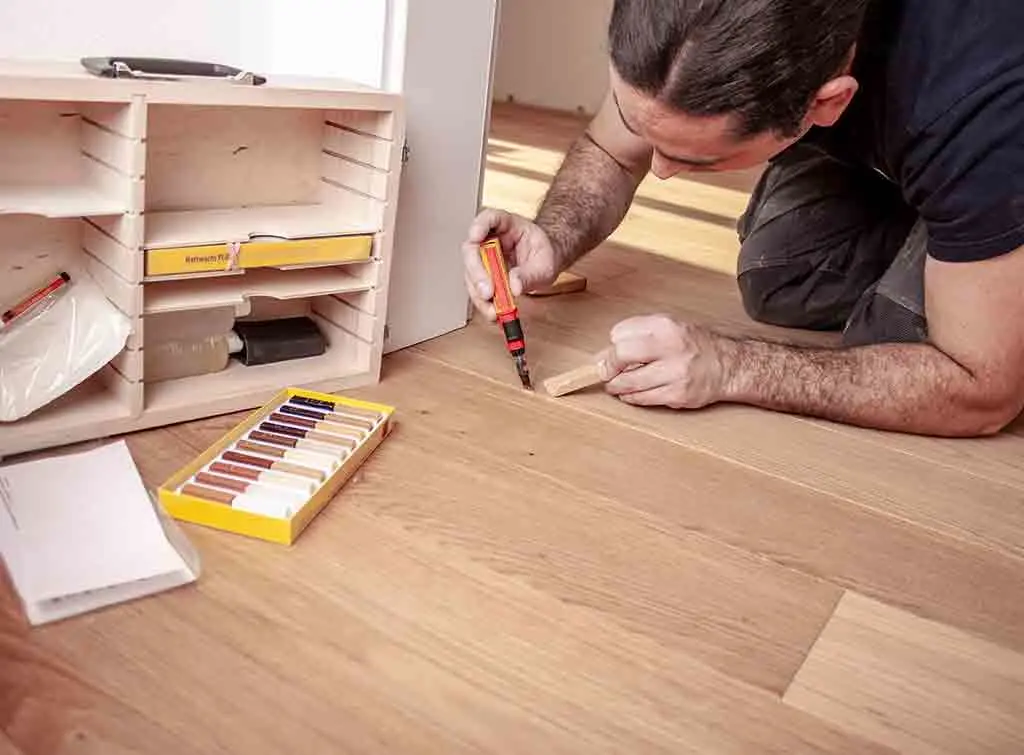
How to fix squeaky floorboards under carpet
This is one of the most common situations homeowners face.
Carpet adds another layer of complication because you can't easily see what's happening beneath it.
Fortunately, there are still a few options.
Option 1: Use a Squeak No More kit
These specialist kits are designed specifically for carpeted floors.
The process typically involves:
Finding the joist beneath the carpet
Using the supplied guide tool
Driving a specially designed screw into the joist
Snapping off the screw head below the carpet surface
The result is a more secure floorboard without lifting the carpet.
If the thought of drilling through your carpet fills you with fear, you're probably not alone. There’s very little room for error if you misjudge the joist position or accidentally hit hidden pipework or cables beneath the floor. A checked handyperson or carpenter can usually track down the cause of the squeak and sort it quickly, saving you the stress of wondering whether you've made the problem better or worse.
Option 2: Secure loose boards (only if you're confident)
If you've accurately located the joist beneath the squeaky area, it's sometimes possible to secure the floorboard using additional fixings.
However, this isn't usually a beginner DIY job. Pipes, cables and carpet grippers can all be hidden beneath the surface, and a misplaced screw can create a much bigger problem than a squeak.
That's why many homeowners either use a specialist floor repair kit designed for carpeted floors or call a professional to carry out the repair safely.
Option 3: Seek professional help
If the squeak is widespread, involves structural movement, or you aren't sure what's underneath, professional investigation is often the safest route.
Many squeaks beneath carpet are actually caused by movement deeper within the floor structure. If a repair kit doesn't solve the problem, the issue may lie with the joists or subfloor.
Find flooring repair specialists near you
How much does it cost to fix squeaky floorboards?
The cost of fixing squeaky floorboards depends on what's causing the noise and how easy the affected area is to access. Simple DIY fixes can be relatively inexpensive if the problem is minor. However, costs can rise if the squeak is caused by loose floorboards, damaged joists, subfloor movement, or flooring that needs to be lifted and refitted. If several areas are affected, or the squeak is linked to damaged joists or wider flooring issues, costs are likely to be higher. As a guide, the average cost of fixing a squeaky floorboard under carpet is around £200. If the squeak turns out to be linked to damaged joists or wider flooring issues, repair costs can increase significantly. You can learn more in our guide to the cost of replacing joists and floorboards.

Can you fix squeaky floorboards yourself — and should you?
In many cases, it is possible to put an end to those squeaky floorboards yourself.
DIY repairs are often suitable if:
The squeak is localised
The floor otherwise feels solid
The issue is caused by minor movement
You have access to the area
It may be worth calling a professional if:
Multiple rooms are affected
The floor feels bouncy
There are signs of damp
You suspect joist damage
Previous DIY repairs haven't worked
Sometimes what sounds like a simple squeak is actually a symptom of a larger flooring problem.

Thinking about hiring a professional?
Squeaky floorboards can be frustrating because the noise isn't always where the problem is.
An experienced carpenter or flooring repair specialist can often identify the cause much more quickly than someone working through trial and error.
They can also spot issues such as:
Damaged joists
Subfloor problems
Poor previous repairs
Damp-related movement
Just as importantly, you'll have the reassurance that the underlying problem has been properly diagnosed and repaired, rather than temporarily masked.
Many homeowners spend hours trying different fixes, only to hear the same squeak return a few weeks later. A professional can usually identify the root cause and provide a more permanent solution.
In many cases, the problem can be resolved in a single visit.
Here’s what recent Checkatrade customers said about hiring a tradesperson for flooring work in their home:
“Adam was friendly and professional throughout the process, always happy to answer any questions and made everything clear from start to finish. The quality of his work is extremely high, would definitely recommend.”
Verified reviewer, Exquisite Flooring, (Location BN43)
“I would highly recommend Harry. Having used Harry a few times now he always does a great job. Good communication, always shows up on time and does a clean and tidy job.”
Verified reviewer, HH Floor Coverings, (Location SO30)
Find flooring repair specialists near you
If you'd rather avoid lifting carpets, tracking down hidden joists and experimenting with repair methods, a flooring repair specialist can help identify the cause and carry out a lasting repair.
With Checkatrade, tradespeople are:
Checked - Every Checkatrade member must pass up to 12 checks and commit to upholding the Checkatrade Standard
Reviewed - Over 6.2 million reviews have been published on Checkatrade about real jobs, on everything from communication, tidiness, timekeeping, and quality of work
Guaranteed - Jobs booked through Checkatrade are covered up to £1,000 (T&Cs apply)
For a job done right, enter your postcode to find checked and reviewed floor repair specialists and carpenters working in your area.
Find flooring repair services
Enter your postcode to find a top tradesperson near you
LPH Flooring Limited
10.00
(46 reviews)Services & skills
Carpets / FlooringWood Flooring InstallersPly BoardingCarpet SupplierWooden floor specialistFm Flooring & Developments Ltd
10.00
(25 reviews)Services & skills
Carpets / FlooringWood Flooring InstallersParquet FlooringLaminate FlooringCarpet TilesNW3 Parquet
10.00
(31 reviews)Services & skills
Carpets / FlooringFloor SandingFlooring SpecialistWood Flooring InstallersParquet FlooringCRH Flooring Ltd
10.00
(68 reviews)Services & skills
Carpets / FlooringCarpet FittingFlooring SpecialistVinyl Floor TilesCarpet TilesIvory Interiors
10.00
(3 reviews)Services & skills
Carpets / FlooringCarpet FittingHardwood Flooring SpecialistEmergency Carpets / Flooring ServiceCarpet Supplier


FAQs
Can you fix squeaky floorboards without removing carpet?
Yes. Specialist repair kits such as Squeak No More are designed specifically to secure squeaky floorboards through carpet without needing to lift it.
Will WD-40 stop squeaky floorboards?
Sometimes WD-40 will help temporarily, but it's generally not considered a permanent fix. Dry silicone lubricants or addressing the underlying movement usually produces better results.
How much does it cost to fix squeaky floorboards in the UK?
DIY repairs to squeaky floorboards can cost very little, depending on the method used. Professional repairs might cost in the region of £200, depending on the cause and accessibility.
Who can fix squeaky floorboards?
A carpenter, flooring specialist or general builder will usually be able to diagnose and repair squeaky floorboards.
Are squeaky floorboards a structural problem?
Squeaky floorboards aren't always a sign of a structural issue. Most squeaks are caused by minor movement between the boards, joists or fixings. However, significant movement, sagging or damp may indicate a more serious issue that should be investigated by a professional.
What is the best lubricant for squeaky floorboards?
Talcum powder and dry silicone lubricants are among the most commonly used products for reducing friction between rubbing floorboards.


See the tradespeople we've checked for your job