Blog>How-To Guides>How to install brick slips
Last updated: 13 September 2022

How to install brick slips
If you’re looking to introduce an exposed brick effect to your home and want a cost-effective solution that’s easy to install, brick slips could be the answer. In this guide, we look at how to install brick slips in the best way, what they are, and tips for achieving the best brick look for your wall.
If you’re looking to introduce an exposed brick effect to your home and want a cost-effective solution that’s easy to install, brick slips could be the answer. In this guide, we look at how to install brick slips in the best way, what they are, and tips for achieving the best brick look for your wall.
What are brick slips?
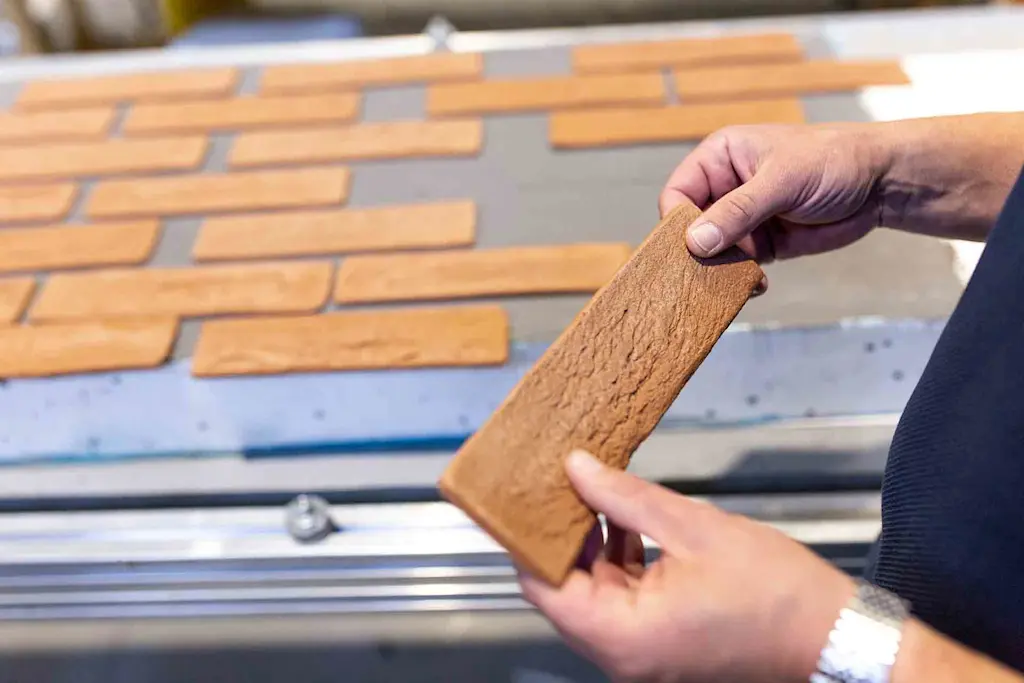
In case you’re wondering what on earth brick slips are, let’s start with a quick introduction. Brick slips, also known as brick tiles, are thin slices of standard clay brick that are made from the same material as traditional bricks.
With the same look and feel as regular bricks, the main difference is the thickness of a brick slip. These brick tiles are designed to create the brickwork effect and are fixed either directly to the wall or using plasterboard panels that you then attach to the wall.
If you're looking for inspiration take a look at our interior design ideas.
How to install internal brick slips - tools you'll need
Here is a list of the most common tools and products you’re going to need to install your brick slips in your home:
Bonding primer
Adhesive
Adhesive spreader
Spacers
Brick slips pointing mortar
Protective floor covering or dust sheet
Face mask and/or protective eyewear
Spirit level
Bucket (for mixing)
Hammer
Chisel
Brick jointer
Pointing trowel
Wire brush
See the tradespeople we've checked for your job
How to fit brick slips in 6 steps

If you’re up for the DIY challenge of fitting brick slips yourself, here are the main steps to follow:
1. Prepare the wall
As with all home improvement projects, preparation is key. You want to make sure the wall you’re going to fit the brick slips to is clean or any dirt or grease and completely dry before you start any work. If needed, use a scouring pad to remove any excess dirt.
2. Add the primer
Apply your brick slips bonding primer to either the wall itself (if you want to fit the brick slips directly onto the wall) or, alternatively, to a plasterboard panel that you’re going to fix to the wall. The primer is typically a PVA-based product that creates a sealed surface on the wall or panel – it’s not the adhesive.
3. Prepare the brick slip adhesive
You’ll need a special brick slip adhesive that has a high bond strength to ensure the brick slips fix in place securely. Always follow the manufacturer’s instructions when preparing the adhesive, as each product will have its own method of preparation and application.
4. Position your first brick slips
Accuracy is the name of the game when it comes to positioning your brick slips, so you’ll want to have a spirit level to hand. It’s always a good idea to start at the bottom and work in horizontal strips, applying the adhesive with a spreader and following the manufacturer’s instructions for guidance.
Top tip: Use brick slip spacers to help you fit each brick slip into place and create a uniform pattern on the wall (or panel). Brick slip spacers work in the same way as spacers for traditional tiling. And the bonus is, if you want flush mortar joints you can just leave the spacers in place and apply mortar over the top.
5. Apply brick slip mortar
Adding the mortar to your brick slips is the finishing touch as far as completing the brickwork look is concerned. The adhesive is holding the brick slips in place, so the mortar is purely there for decoration.
As with the adhesive, follow the manufacturer’s instructions to prepare and apply the brick slip mortar. It’s particularly important that you get the ratios right to achieve the desired mortar effect. And always make sure you push it right into the gaps between each brick slip using a pointing trowel.
6. Fix the panel to the wall (If you’re using panels)
If you’ve opted to fix brick slips to a panel instead of directly to the wall, you’ll need to fit the panel to the wall. First, make sure that the adhesive and mortar are completely dry before trying to attach the panel to the wall.
Then, depending on the type of brick slip panel you’ve used and the wall surface you’re fitting it to, follow the manufacturer’s instructions to ensure you safely and securely install the brick slip panel(s) into place.
See the tradespeople we've checked for your job
Benefits of fixing brick slips to plasterboard panels
If you’re still undecided as to whether to fix your brick slips directly onto the wall or onto plasterboard panels, here are a few reasons why plasterboard might be a better choice:
Plasterboard provides a ready-made flat surface to fit brick slips to
You’ll use less adhesive with plasterboard
Plasterboard panels don’t need to be skimmed
You can apply adhesive directly on to dry plasterboard (though it’s recommended to apply a few coats of a PVA first)
It's a quick and hassle free way to install brick slips
How much does brick slips installation cost?
If you don’t fancy taking on the brick slips installation job yourself, you can always hire a local tradesperson to do the work for you – saving you time, effort and stress.
The average cost of brick slips installation is around £150 per m2, depending on the complexity of the installation, the individual tradesperson you hire, and where you live.
To find out more, check out our guide to brick slips installation costs.
Brick slips chimney breast installation
One of the most common places that we see brick slips being used is on chimney breasts. It’s the ideal place for an exposed brickwork effect, without the hassle of building a full brick fireplace.
Here’s a quick guide to installing brick slips to a chimney breast:
Check that the chimney breast is structurally sound before starting any work
Remove any furniture or mantelpieces from the wall and clean any dirt and debris
Apply adhesive to the chimney breast in small areas at a time
Fix brick slips, using spacers to ensure they’re correctly aligned
Work from the bottom up in horizontal lines
Once all brick slips are in place, leave to dry
Once dry, apply brick slip mortar between each tile and point
Top tip: Use fire cement for your brick slip pointing for the best and most effective results that will withstand the heat of the fireplace.
FAQs
What do you use to stick brick slips?
You’ll need to use a brick slip adhesive to stick brick slips to the wall or plasterboard panel. A brick slip adhesive will generally be either a cement-based adhesive or an epoxy-based adhesive.
The adhesive you need will depend on the wall material or substrate you’ll be fixing the brick slips to. If you’re fixing your brick slips to a surface that won’t absorb water then you’ll want to go for an epoxy-based adhesive. Otherwise, you can use either a cement-based or epoxy-based adhesive.
More Brick Tiling Articles


See the tradespeople we've checked for your job