Blog>How-To Guides>How to reseal a bath in 3 easy steps
Last updated: 8 October 2021

How to reseal a bath in 3 easy steps
You might think learning how to reseal a bath is pretty straightforward. However, we've heard horror stories that made us run to our blog so we can help you avoid the same fate. From mould to leaks, to ceilings falling through, we've seen and dealt with it all. And as a result, it's only right that offer our top tips for a safe and waterproof finish.

You might think learning how to reseal a bath is pretty straightforward, but we've heard some horror stories that made writing this how-to guide a priority.
From hazardous mould to leaks that caused ceilings to fall through, we want to help you avoid the same fate. We've seen and dealt with it all. And as a result, it's only right that we offer our top tips for a safe and waterproof finish.
Alternatively, hire the local tradesperson your neighbours recommend. You can read our cost to reseal a bath UK guide to find out how much a project like will cost
How to reseal a bath
If you're reading this, it's because you've decided to tackle the challenge yourself, which is admirable. Resealing your bath is a great way to give your bathroom a little refresh, and when done right, also protects it from mould, leaks and other potential issues.
So, without further ado, let's get started.
What do I need to reseal a bath?
Tools you’ll need for the job include:
Silicone sealant
Applicator
Gloves
Glasses
Masking tape
Caulking gun
Safety knife
See the tradespeople we've checked for your job
Best way to reseal a bath
Once you've lined up your equipment and donned your safety equipment, it's time to get started. Note that this method works for straight, curved or corner baths.
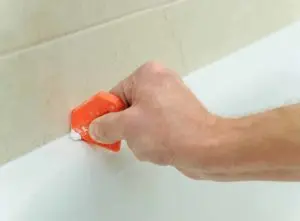
Step 1: Protect your edges with masking tape
Protect the bath enamel by using masking tape along the edges. This also lets you mark when you're going to squeeze the silicone, giving it a clean line and smooth finish.
Top tip: Work backwards from the farthest corner and leave at least 3mm from the wall.
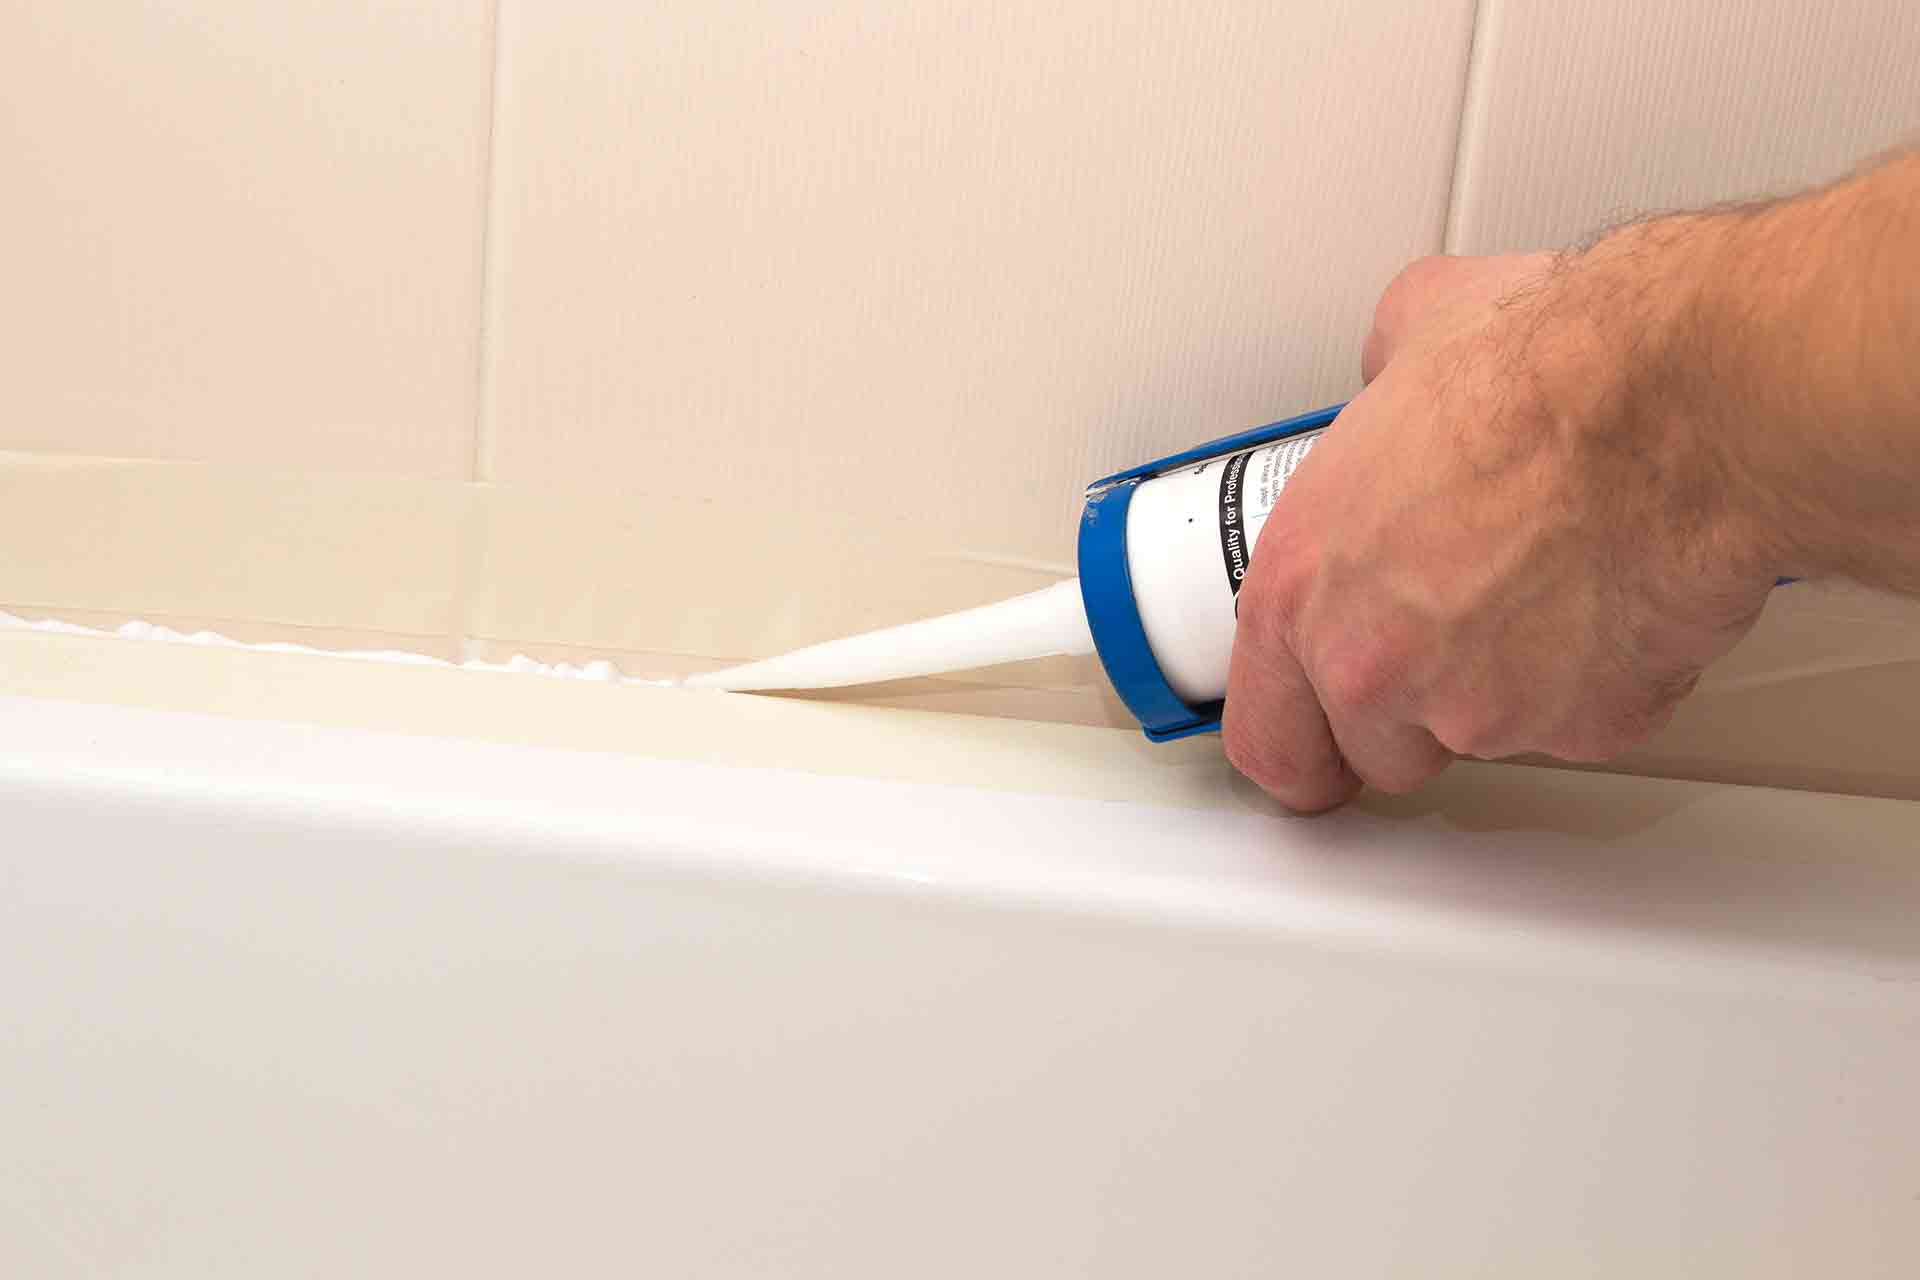
Step 2: Prepare and apply the sealant
Use your safety knife to cut the silicone top at a 45-degree angle. This allows you to have better control of the application. Next, attach the head/nozzle of the silicone before placing it in the caulking gun.
Now all you need to do is press down on the gun trigger to coax the silicone out. Get as close to the bath as possible and start from the farthest corner, working your way along the edge in a slow and steady way.
Top tip: Always start applying the sealant from the point farthest away from you to avoid disturbing any freshly laid sealant.
Step 3: Smooth and shape the sealant
Once you've applied the sealant, you'll see you're left with some ripples and bumps. So, now's the time to dampen your sealant applicator and use it to smooth and shape the applied sealant. Try to do this at a 45-degree angle so the sealant dries in a way that allows maximum water runoff.
Now all that's left to do is leave it for 24-hours before testing your handiwork!
See the tradespeople we've checked for your job
How to reseal a mouldy bath
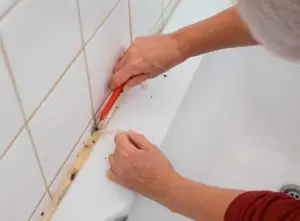
The same steps apply when it comes to resealing a mouldy bath. However, before you dive right in, we recommend removing the mouldy sealant first.
To do this, follow these simple steps:
Use a safety knife to carefully cut away the mouldy sealant
Use a flat head screwdriver to scrape off as much of the old sealant as possible
Remove the remaining strands with white spirit using an old cloth and some elbow grease
Reseal your bath using the above simple steps
Easy way to reseal a bath
If the above method isn't for you, then an alternative to using a caulking gin and silicone sealant is to use a flexible caulking strip instead. Essentially, it's a self-adhesive that you can cut to size and fit in the gap between your tub and wall.
See the tradespeople we've checked for your job
FAQs
How often should you reseal a bath?
If you're resealing your bath more than once every two years, there might be an issue with your sealant, application or bath itself. If that's the case, it's worth hiring a professional to check that everything is as it should be.
How much to reseal a bath (UK)?
Our reseal bath cost guide has everything you need to know about the costs and timeframes involved in resealing your bath. However, on average, it's going to cost you around £85 to get someone in to do this job for you.
How long does it take to reseal a bath?
A job like this can be completed in an afternoon, depending on your DIY skills or whether you've hired a professional.
Should I hire a professional?
Due to the risks associated with badly installed sealant, unless you're confident in your DIY skills, we highly recommend hiring a local expert your neighbours know and trust. When using one of our professionals, you're able to see their profile and view their vetted reviews, which give you extra peace of mind.
Any tips to reseal a bath?
Make sure you thoroughly clean your bath before applying any sealant. Then, follow our steps above for a strong, smooth and professional finish.
Can I reseal part of a bath?
Absolutely. The trick is to cleanly cut away the sealant you don't want and smooth down the new application with a damp sealant applicator to ensure a seamless fit.
More Bathroom Mastic Sealant Articles
See the tradespeople we've checked for your job