Blog>How-To Guides>How to take a radiator off in 6 steps
Last updated: 16 January 2023

How to take a radiator off in 6 steps
If you're staring at your radiator right now and you really want to take it off but have no idea where to begin, you may be wise to call in a professional. However, if you're confident in your DIY skills, take a look at this how to guide and see if you have what it takes to do the job safely and correctly.

Whether you're renovating your room, replacing/upgrading your radiator, or decorating, you'll need to remove your radiator.
The thought of removing a radiator yourself may make you nervous, and that's completely normal. You may be wary of:
The risk of injury. Radiators are heavy
Damaging the radiator, the wall, the pipes, or something else in the room while removing the radiator
How hard the task will be. Depending on the age and type of radiator, removing it might be a tough task
The cost of repairing your mistake. You might be hesitant to tackle the job yourself for fear of making a mistake that could be expensive to fix
These are all normal concerns, and the best way to avoid them is to hire a professional to do the job for you. You can easily find a plumber we've checked and recommend near you by searching your postcode below.
Find checked tradespeople working in your area
If you're still confident about learning how to remove your radiator, read the steps to do the job below.
Your step-by-step guide to removing your radiator in 6 steps
To remove a radiator, you will need to follow these steps:
Shut off the power supply to the heating system, and let the radiator and the pipes leading to and from it cool down.
Drain the radiator by attaching a hose to the drain valve at the bottom of the radiator and directing the water into a bucket or drain. If the radiator does not have a drain valve, you will need to drain the system by shutting off the main water supply to the house and opening all of the taps in the house to release the water pressure.
Once the radiator is drained, you can remove the bolts or clips that hold the radiator to the wall or floor. These are usually located at the top and bottom of the radiator.
Carefully lift the radiator off of the wall or floor and set it aside. Be careful not to bend or damage the pipes leading to and from the radiator.
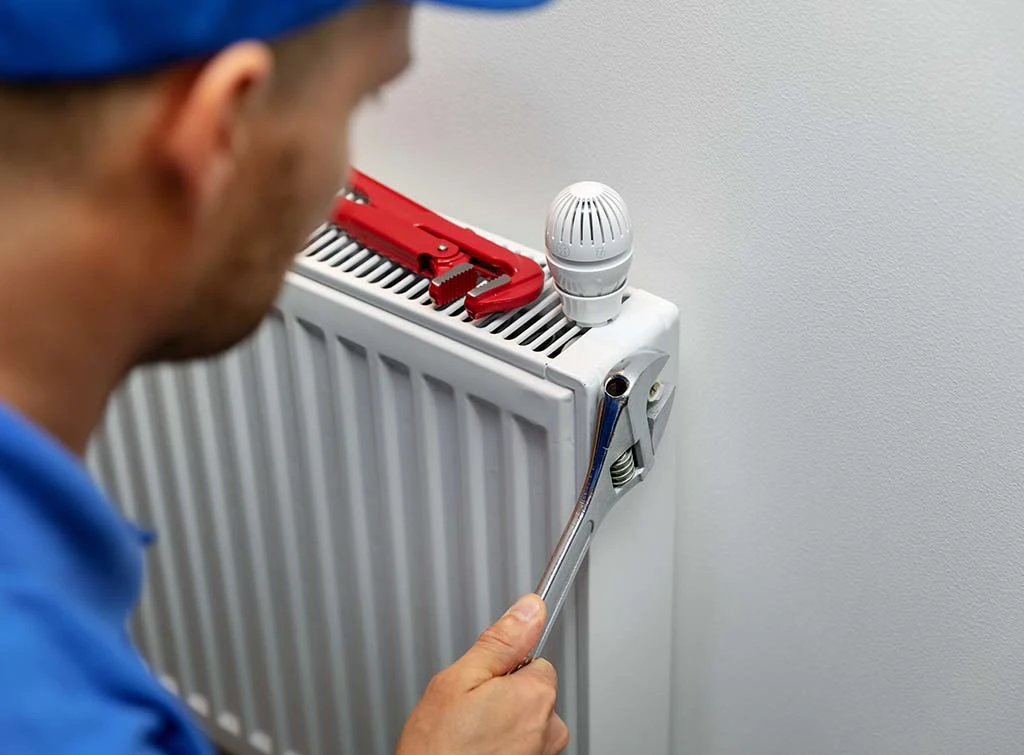
Disconnect the pipes from the radiator by loosening the fittings with a pipe wrench or adjustable spanner.
Once the pipes are disconnected, the radiator should be free to be removed from the room.
It is important to note that removing a radiator can be a complex and potentially hazardous task, especially if you are not familiar with plumbing and heating systems.
Note: If you're not confident in your ability to remove the radiator safely after reading our steps, it's recommended that you get help from a qualified professional.
Find checked tradespeople working in your area
Steps to removing your radiator from a wall
Removing a radiator from a wall is the same process as removing a radiator in the section above.
To remove a radiator from a wall, you will need to follow these steps:
Turn off the heat and the power to the radiator. You should also shut off the water supply to the radiator.
Drain the radiator by attaching a hose to the drain valve at the bottom of the radiator. Open the valve to allow the water to flow out.
Once the radiator is drained, you can remove the mounting brackets that hold the radiator to the wall. These brackets are typically located at the top and bottom of the radiator. You may need a screwdriver to loosen the mounting screws.
With the mounting brackets removed, you should be able to lift the radiator off the wall. Be careful, as the radiator may still be heavy even after it has been drained of water.
If you need to remove the radiator from the room completely, you may need to disconnect the pipes that supply water to and from the radiator. You will need a pipe wrench to loosen the nuts on the pipes.
How to remove a radiator without draining it
It's not recommended to remove a radiator from the wall without draining the system first, as this can cause damage to the radiator and the heating system.
If you do need to remove the radiator without draining the system, you should follow these steps:
Turn off the radiator and the heating system. Make sure that the radiator and the system have cooled down completely before attempting to remove the radiator.
Locate the valves on either side of the radiator. These valves control the flow of hot water into and out of the radiator.
Using a radiator key, turn both valves to the closed position. This will stop the flow of hot water into and out of the radiator.
Locate the mounting brackets that hold the radiator to the wall. These brackets may be located at the top and bottom of the radiator, or they may be located on the sides.
Using a wrench or pliers, loosen and remove the bolts that hold the brackets in place. Be careful not to drop the bolts or lose them, as you will need them to reattach the radiator later.
Once all of the bolts are removed, carefully lift the radiator off of the wall. If the radiator is heavy or large, you may need a helper to hold it steady while you remove it.
Once the radiator is off of the wall, you can proceed to do any necessary repairs or maintenance. To put the radiator back on the wall, simply reverse these steps.
Again, it is generally not recommended to remove a radiator from the wall without draining the system first. If you're unsure of how to do this safely, it is recommended that you consult a professional or refer to the manufacturer's instructions.
How to take a towel radiator off the wall
If you're looking to take off a towel radiator to paint behind it, then follow the steps above to remove a normal radiator. The steps are the same.

How to take off a radiator valve in 5 steps
To remove a radiator valve, you will need to follow these steps:
Turn off the radiator and the heating system. Make sure that the radiator and the system have cooled down completely before attempting to remove the valve.
Locate the valve on the side of the radiator. The valve will have a knob or handle that can be turned to control the flow of hot water into and out of the radiator.
Using a wrench or pliers, loosen the nut that secures the valve to the radiator. This nut is usually located on the back side of the valve, and may be hidden by a decorative cover.
Once the nut is loosened, you should be able to remove the valve from the radiator carefully. If the valve is stuck or difficult to remove, you may need to apply gentle pressure or use a penetrating oil to loosen it.
Once the valve is removed, you can proceed to do any necessary repairs or maintenance. To replace the valve, simply reverse these steps.
How to take the thermostat off a radiator in 5 steps
Turn off the radiator and the heating system. Make sure that the radiator and the system have cooled down completely before attempting to remove the thermostat.
Locate the thermostat on the side of the radiator. The thermostat will have a knob or handle that can be turned to control the temperature of the radiator.
Using a wrench or pliers, loosen the nut that secures the thermostat to the radiator. This nut is usually located on the back side of the thermostat and may be hidden by a decorative cover.
Once the nut is loosened, you should be able to carefully remove the thermostat from the radiator. If the thermostat is stuck or difficult to remove, you may need to apply gentle pressure or use a penetrating oil to loosen it.
Once the thermostat is removed, you can proceed to do any necessary repairs or maintenance. To replace the thermostat, simply reverse these steps.
Common errors made by inexperienced DIYers
There are a few common mistakes that people make when removing their radiator:
Not shutting off the heat and water supply: Before you start any work on the radiator, it's important to shut off the heat and water supply to the radiator. Failing to do so can result in burns or flooding.
Not draining the radiator: If you don't drain the radiator before removing it, you could end up with a large amount of water spilling out when you lift it off the wall.
Not using the right tools: You'll need a few tools to remove a radiator, including a screwdriver, a hose, and a pipe wrench. Make sure you have these tools on hand before you start the job.
Not being careful: Radiators can be heavy, even when they are empty. Be sure to lift with your legs and get help if you need it to avoid injury.
Not shutting off the power: If you have an electric radiator, be sure to shut off the power before you start working on it.
To be on the safe side, always hire a professional to remove your radiator. The cost to remove a radiator may not be as much as you think, especially if you compare it to the repair costs if something goes wrong when you DIY.
Find a local professional that we've checked and approved in seconds below.
Find checked tradespeople working in your area
Frequently asked questions about removing a radiator
Can I remove a radiator myself?
In most cases, it is possible to remove a radiator yourself as long as you take the proper precautions and follow the manufacturer's instructions. However, it is important to note that removing a radiator can be a complex and potentially dangerous task, especially if you are not familiar with the heating system or do not have the necessary tools and equipment.
Before attempting to remove a radiator, it is important to turn off the radiator and the heating system and allow them to cool down completely. You should also make sure that you have the necessary tools, such as a wrench or pliers, and any other equipment needed for the job.
How easy is it to take off a radiator?
The ease of removing a radiator will depend on several factors, including the size and type of radiator, the age of the radiator, and the condition of the mounting brackets and valves. Some radiators may be relatively easy to remove, while others may be more difficult due to their size or the condition of the mounting hardware.
In general, removing a radiator will require some basic tools, such as a wrench or pliers, and may require some physical effort. You will need to locate the mounting brackets and loosen the bolts or screws that hold the radiator to the wall, and you may need to use a radiator key to turn the valves to the closed position.
Do you need a plumber to take a radiator off the wall?
It's highly recommended that you hire a plumber to take a radiator off the wall.
It is generally not necessary to hire a plumber to remove a radiator from the wall, as this is a task that can be performed by a homeowner with some basic knowledge and the right tools. However, it is important to note that removing a radiator can be a complex and potentially dangerous task, especially if you are not familiar with the heating system or do not have the necessary tools and equipment.
Before attempting to remove a radiator, it is important to turn off the radiator and the heating system and allow them to cool down completely. You should also make sure that you have the necessary tools, such as a wrench or pliers, and any other equipment needed for the job.
See the tradespeople we've checked for your job