Blog>Planning Guides>Planning your house painting and decoration project
Last updated: 19 March 2024

Planning your house painting and decoration project
Planning your house painting and decoration project is an exciting step towards creating your dream home. However, it also involves several key considerations you don't want to miss. So, to make sure you end up with your desired aesthetic, keep reading for our top tips.
How do you plan a painting and decorating project?
If you're looking at planning your next house painting and decoration project, you're ready for a new start.
A fresh coat of paint breathes new life into tired walls, while decor choices will transform your space from drab to fab.
However, before you break out the rollers and brushes, you need a solid plan in place. From choosing the perfect hues to finding the right professionals for the job, let's delve into the nitty-gritty of planning your next house painting project.
Of course, if you can't wait to get started, just pop your postcode into the search bar below, and we'll show you top painting and decorating professionals near you.
See the tradespeople we've checked and recommend for your job
Steps when planning your house painting project
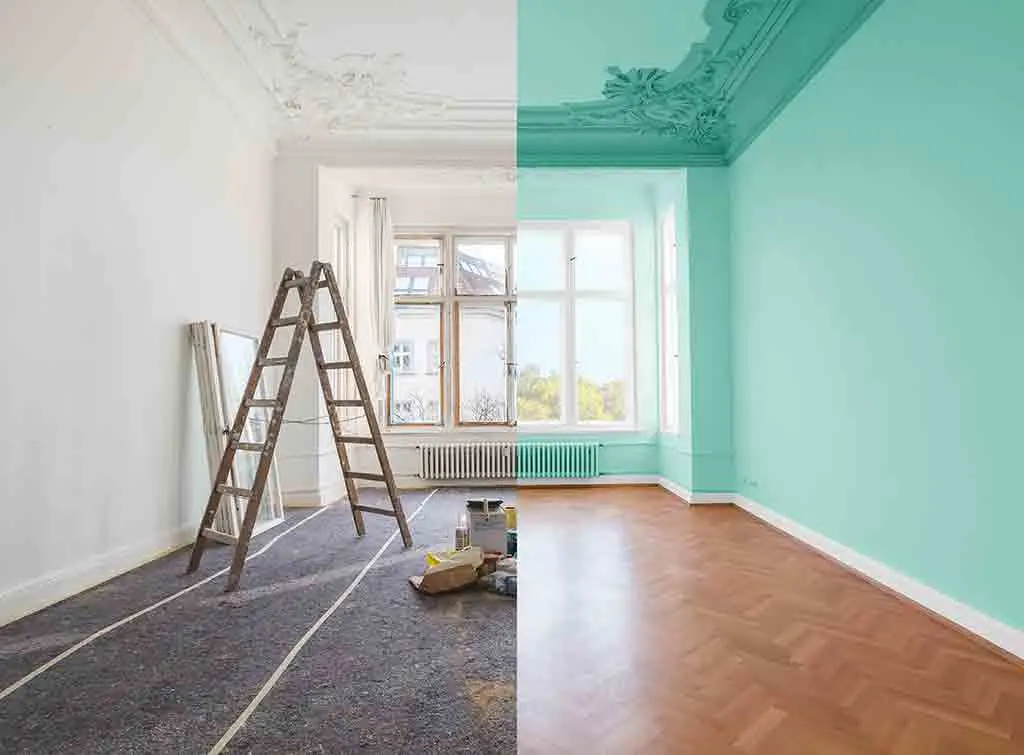
Every renovation starts with a fresh lick of paint. A newly painted room is the canvas on which you build the rest of your decor.
When it comes to your walls, there are lots of ways to make a design impact. For example:
Accent/feature walls
Wall panelling (e.g., wainscotting or acoustic panels)
Colour blocking
Eco-friendly paint alternatives
3D wallpaper
Whatever you choose, let's take a look at how to plan and prepare your walls for their transformation.
Step 1: Visualise your dream space
When you close your eyes, what does your ideal living space look like? Is there a particular vibe you're going for?
For example, are you aiming for a serene sanctuary with soft pastels, or perhaps a bold and vibrant atmosphere with striking accent walls? What aesthetics do you prefer – industrial, coastal, mid-century modern, or rustic? Visualise yourself in each to work out what feels right.
Once you've settled on a design trend, consider how to get that look in each room of your home. Do you want the same theme throughout your house for cohesion, or do you want every space to have its own signature style?
Step 2: Take stock of your current situation
Before you start stripping out your rooms and slapping on paint without care or consideration, take a minute to assess your home's current condition.
For example, are there any imperfections such as cracks, dents, or peeling paint that need addressing before you can start decorating? Have you checked for mould or structural irregularities?
Trust us – a little preparation now will save you a world of hassle in the long run.
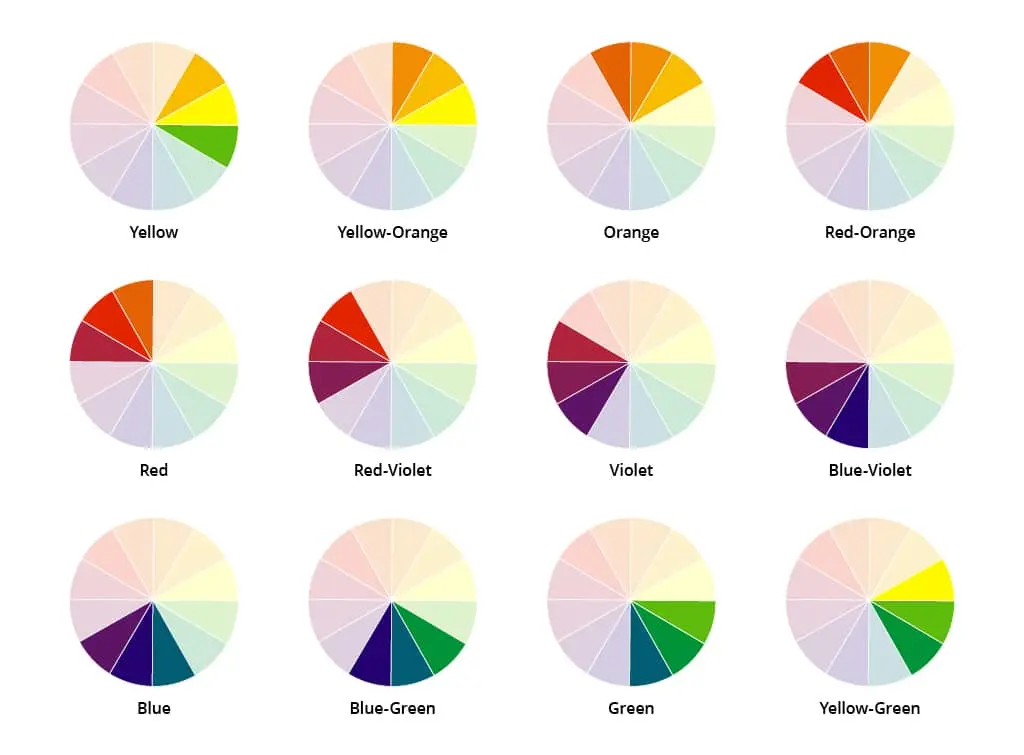
Step 3: Choose your colour palette
Choosing your colours is the most exciting (and sometimes daunting) part of the process.
Take into account where your natural sources of light are coming from, your overall room size, and what existing furniture you own (unless you're buying new items!)
These aspects will determine how bright or rich your colours should be. For example, rooms with limited light benefit from lighter hues and paint finishes with light-refracting qualities.
One of our best pieces of advice is to dive into your creative side. Too often, people second-guess themselves and end up disappointed with the results. So, don't hesitate to play around with various shades and contrasts until you discover a combination that truly reflects your style.
Current trends span from monochrome elegance to dynamic two-toned palettes and bold colour contrasts.
Top tip: Feeling overwhelmed? Seek the guidance of a colour consultant or interior designer. They can offer valuable insights and validation for your choices, steering you towards a design that resonates with you.
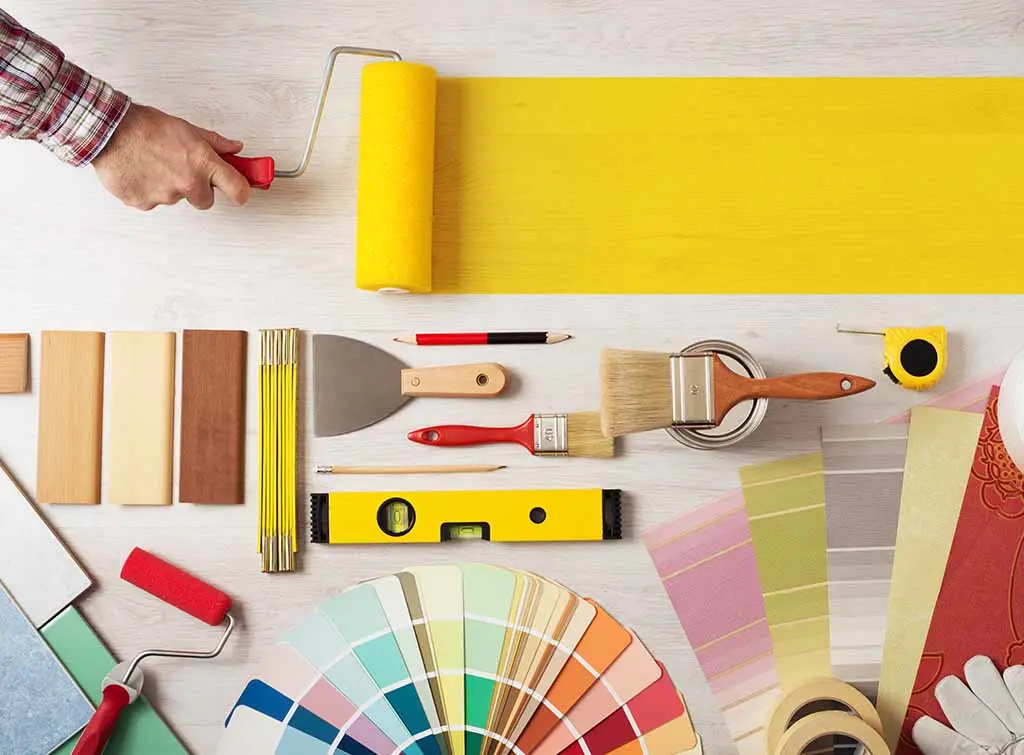
Step 4: Gather your essential supplies
For best results, we recommend hiring a professional from here on.
If you're going to try and do it yourself, follow the steps.
Once you've decided on your colour scheme, it's time to gather your tools and materials. However, before you head out shopping, make a comprehensive list of everything you'll need. Essentials include paint, primer, brushes, rollers, masking tape, and paint cleaner.
When it comes to professional results, investing in high-quality tools and materials is the difference between brush hairs in your emulsion and a professional finish.
Top tip: If you're environmentally conscious and prefer eco-friendly paint options, consider non-toxic alternatives. Look for brands that are free from volatile organic compounds (VOCs). The most eco-friendly options feature ingredients like balsam, citrus, clay, and milk proteins, offering both sustainability and minimal odours.
Related content: Eco-friendly home improvements
Step 5: Prep like a pro
If you're going to achieve a flawless finish, prepping your walls is essential. This might include replastering them, fixing any irregularities with filler, sanding them, removing old wallpaper, or all four.
When you've made the necessary steps to prepare your walls, you'll need to clean them to remove any dirt, grease, or grime. Leave to dry overnight to avoid trapping any mould-forming moisture.
Top tip: Remember to protect your floors and furniture with protected sheets or drop cloths. (Paint has a funny way of ending up where you least expect it!)
Step 6: Start to paint your walls
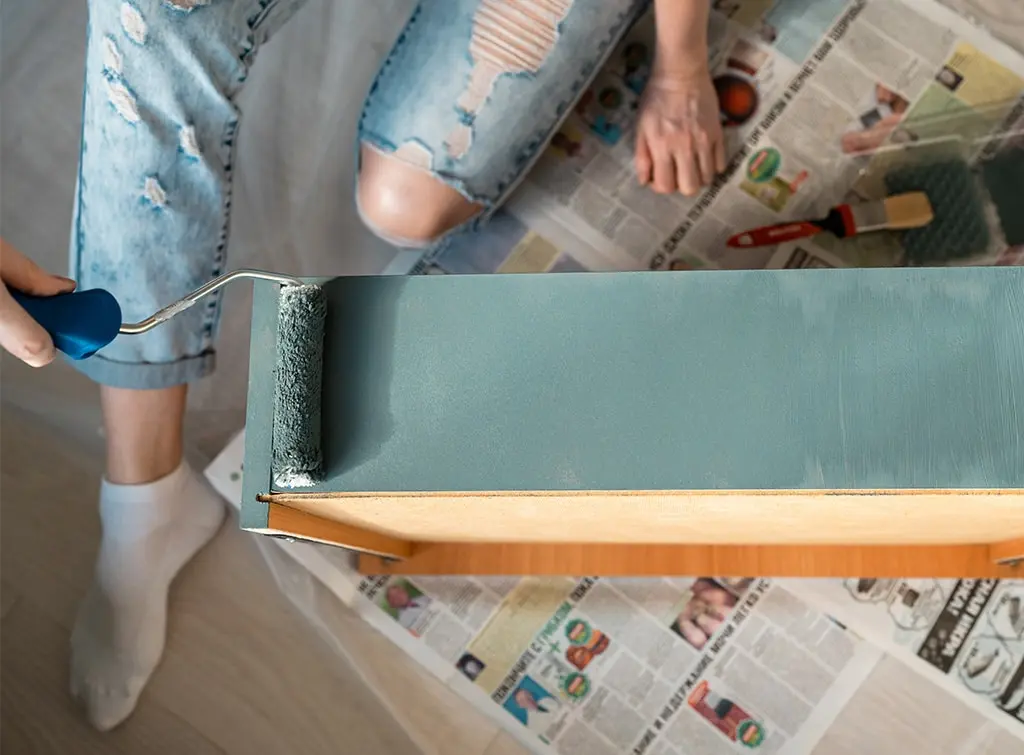
Once your walls are prepped and primed, you can start painting them (if you're doing this yourself and not hiring a professional!) The best way to do this is to 'cut in' along the edges and corners with a brush before tackling the larger areas with a roller.
Although it's easy to get carried away, mistakes mean more work, so practice patience to avoid having to start over. For a professional-looking finish, take your time by applying thin and even coats. Use masking tape to avoid going over the lines if that helps.
Top tip: If you're painting over a dark or bold colour, consider using a tinted primer first to help your new paint colour pop.
Step 7: Add the finishing touches
Once your paint has dried, it's time to add a few final flourishes. This might include hanging artwork, arranging furniture, and adding soft furnishings to tie the room together. Also, don't forget to step back and admire your handiwork!
Related content: Mural painting cost guide.
See the tradespeople we've checked and recommend for your job
Summary: Step-by-step order for painting a room
Work out the number of rooms, type of paints and the themes you're going for
Determine the scope and areas you want to paint, such as walls, ceilings, trim, and any other surfaces/furniture
Consider whether you need to do any repairs or preparation work, e.g., filling cracks, sanding surfaces, or removing old paint
Choose your colour scheme for each room to suit your desired aesthetic and ambience
Take into account factors such as what you use the room for, any natural light, and the existing decor
Gather paint swatches and samples to help visualise how different colours will look in your home
Calculate how much paint you'll need by measuring the square footage of each room you want to paint
Don't forget to account for primer, brushes, rollers, painter's tape, drop cloths, and any other supplies
Set a budget for your painting project, including labour expenses if you plan on hiring professionals
Determine a realistic timeline for completing the painting project
Prep the space for painting by clearing furniture, covering floors and immovable objects, and removing any obstacles that might cause problems
Clean walls and surfaces thoroughly and fix imperfections before you start painting
Choose the right paint and tools for specific finishes (e.g., matte, satin, or gloss) and ease of application
Make sure there's good ventilation in the painting area by opening windows and using fans to increase air circulation
Take precautions to protect yourself and others from paint fumes and hazards by wearing appropriate safety gear, e.g., goggles, gloves, and respirator masks
Start painting! Be sure to apply paint evenly and let each coat dry before applying the next one. Don't rush the process!
Don't fancy the hassle? Hire a professional for best results.

On Checkatrade, you'll only find trades who meet our high standards and pass up to 12 checks.
How do you start a decorating project?
After the paint has thoroughly dried and each room is ready for dressing, it's time to reintroduce the furniture and provide the finishing touches.
However, knowing where to begin when decorating a room can feel daunting, regardless of whether you're using current furniture and accessories, upcycled alternatives, or starting from scratch.
Thankfully, we've put together everything you need to consider when planning the final stage of your house painting and decor project.
How to start decorating your home: Step-by-step order for decorating a room
Step 1: Clarify the desired finish
To make sure your desired aesthetic is on track, check in with your original plans. Is everything looking how you intended? Ask yourself whether there are any other specific design preferences or themes you want to incorporate. It's never too late to change your mind.
Step 2: Reassess the space
Undertake a thorough inventory of each room's layout, size, and architectural features. Identify any existing design elements, such as flooring, wall finishes, and built-in fixtures, as these might influence your decorating choices.
Work out where the natural light is coming from, how you want the traffic to flow through each room, and any focal points that might inform your design decisions.
What do you need in each room for it to meet your needs? Is anything blocking the windows? Can you walk around without stubbing your toe? These elements relate to functionality and form and should be considered before you start filling each room.
Step 3: Set a budget
Establish a realistic budget for your decorating project, based on your goals, priorities, and financial constraints. Then, determine how much you're willing to spend on furniture, decor, accessories, and any professional services you might want to employ.
Allocate funds accordingly to make sure your project stays on budget. Money is a huge stressor when renovating your home, so don't avoid this step because you'd rather not think about it.
Step 4: Create a mood board for inspiration
Whether you use Pinterest, a scrapbook, or download images on your phone, gather everything that inspires you and showcases the results you want to achieve.
Creating a digital mood board (or even a physical collage!) makes you less likely to go rogue or off-plan. It also helps you visualise your design concept and keep your project on track.
Step 5: Stick to your colour scheme, sort of
Although it's good to have a plan, don't be afraid to break the rules too – especially if it introduces more character. Colour theory principles help create harmony and balance within your home and are good to understand. However, injecting your personality with a few key flourishes doesn't hurt either.
You don't have to go too far. Personal artefacts, accessories, pictures, artwork, and sentimental items are all individualised and unique to you. After all, it's your home!
Step 6: Plan the layout of your furniture
Work out the best way to arrange your furniture by working out each room's dimensions, features, functional needs, and traffic load. This exercise helps you sketch different layout options to see what works. Alternatively, use an online room planning tool to experiment with where you can put what.
Top tip: When placing each item, consider seating arrangements, storage solutions, and focal points.
Step 7: Select key furniture items
Choose furniture that complements your design dreams and serves both aesthetic and practical purposes. For maximum longevity, try to invest in quality pieces that align with your taste and lifestyle.
Other factors, such as size, scale, materials, and comfort, should also be considered when choosing furniture for each room. Statement pieces work well as accents, while traffic-heavy items require robust and durable designs.
Step 8: Accessorise and decorate
Inject your personality into your decor by displaying decorative accessories, artwork, and textiles. Other visual interest items include rugs, throws, pillows, curtains, mirrors, and pouffes. However, anything that adds dimension and visual interest is worth considering.
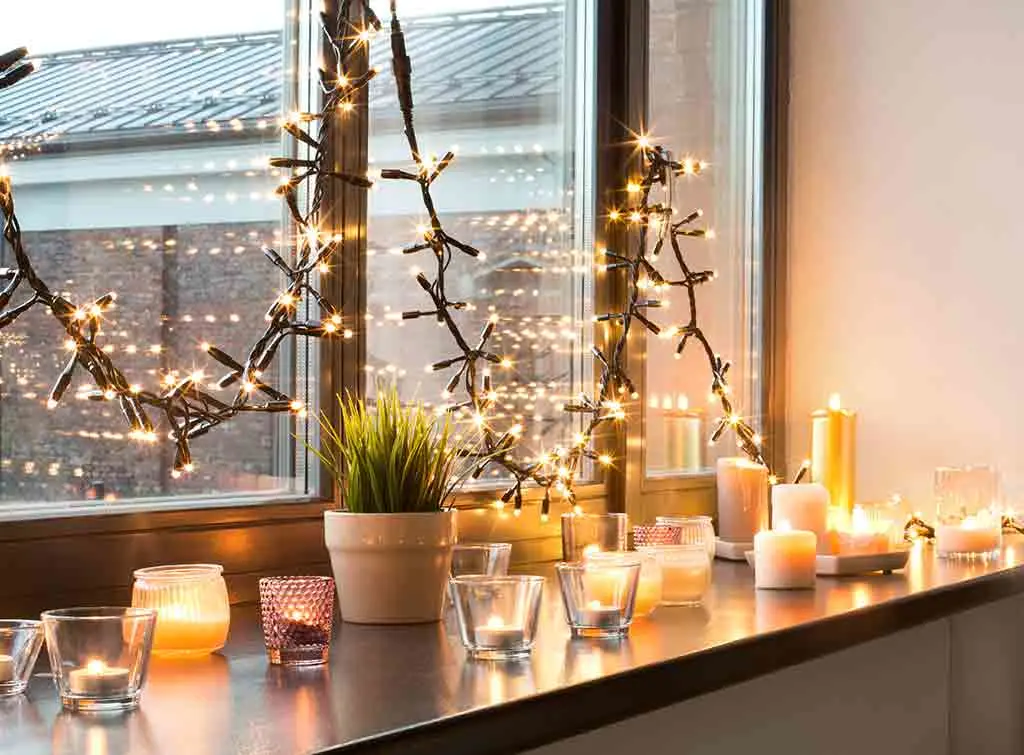
Step 9: Choose the right lighting
Illuminate your home with a combination of ambient, task, and accent lighting sources. Choose light fixtures that complement each room's style, such as sconces or pendants, and enhance their functionality with LEDs or dimmer switches.
Of course, natural light is always better where possible, but adding a layer of artificial lighting will create further depth and atmosphere. For example, strip lights offer gentle illumination, especially when placed under kitchen units, stair treads, and shelving units.

Kitchen lighting ideas for low ceilings: 16 brilliant solutions
If you’re on the hunt for kitchen lighting ideas for low ceilings, we’ve got some brilliant suggestions. Perhaps you live in a cottage or farmhouse with low beamed ceilings. Maybe your new build home or modern kitchen extension isn’t blessed with a lofty height. Every successful
Step 10: Add your final touches
Put the finishing touches on your decorating project by styling and arranging each room's items. In other words, edit and curate accessories to create visual balance and focal points within the space.
For example, details such as colour-coordinated bookshelves, tabletop vignettes, feature walls, and plants all offer stylish touches.
Step 11: Evaluate and adjust
Once you're happy with your handiwork, take a step back and consider your completed room design. Does it meet your expectations and functional needs?
If not, make the necessary adjustments or refinements to the layout, furniture placement, or decor arrangements. Ask your family and friends for their opinion too, and then fine-tune the design to create a space that feels comfortable and inviting.
See the tradespeople we've checked and recommend for your job
Who to hire for your house painting project
While some DIY enthusiasts might love taking on the challenge of painting and decorating themselves, others might prefer to leave it to the professionals. If you fall into the latter camp, consider hiring experienced painters, decorators, or interior designers who can bring your vision to life.
Related content: How to hire a trustworthy local painter and decorator.
Cost considerations for your house painting project
The million-dollar question – how much will it all cost? Well, the answer depends on various factors, including the size of your space, the quality of materials used, and whether you go down the DIY route or hire a professional.

Painting and decorating: Cost Breakdown [year]
There's nothing quite like a freshly decorated room - especially when you haven't had to spend days doing it yourself! Read on to discover the average painter and decorator prices in the UK.
Did you find this house painting project guide helpful? If so, there's more where this came from. Check out our blog for more planning tips, cost guides, and decor inspiration.
More Planning Guides


See the tradespeople we've checked and recommend for your job