Blog>How-To Guides>How to build railway sleeper steps
Last updated: 2 December 2021

How to build railway sleeper steps
Railway sleepers are not only robust, durable, and long-lasting, they will bring instant character to your outdoor space. Here's how to create steps with this versatile material.
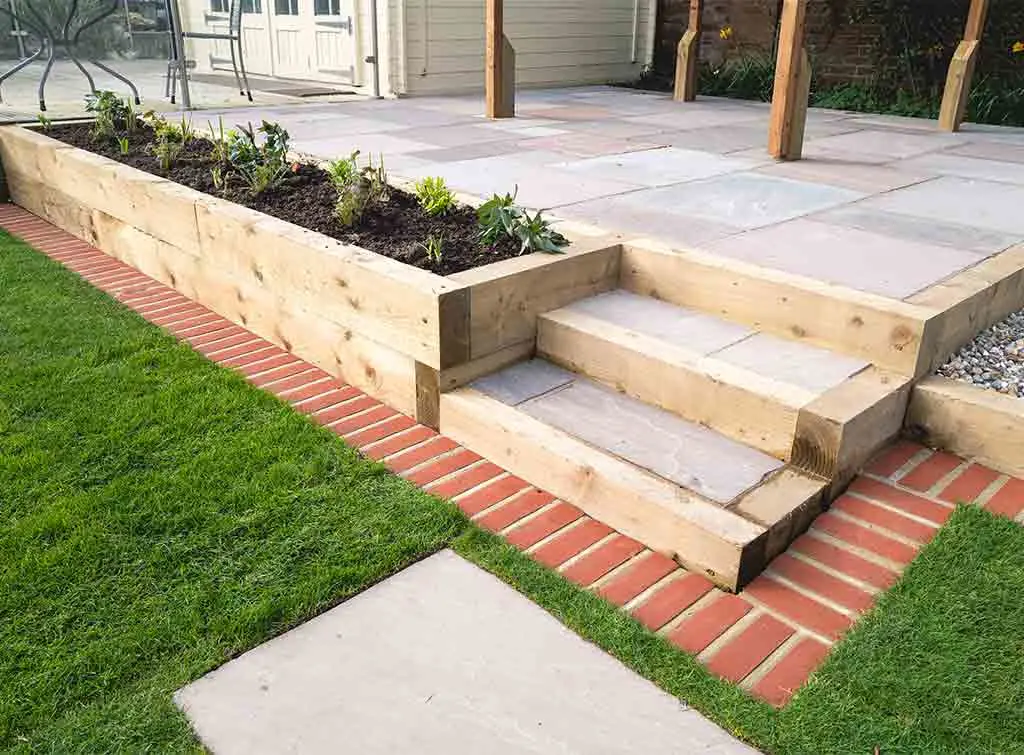
Railway sleepers are robust and built to last, and therefore make a brilliant building material for sturdy outdoor steps. They'll also add a quirky, rustic touch to your outdoor space and provide a wide, practical tread that all ages can use easily.
So, whether you’re thinking of replacing old steps, or adding new ones to create access to zoned areas like a separate patio or play zone, this handy guide on how to build railway sleeper steps will help you bespoke your outdoor space.
Want to continue the modern look? Find inspiration from our sleeper ideas that will transform your garden.
See the tradespeople we've checked for your job
Tips on how to make railway sleeper steps
Before starting, take time to work out the dimensions of your steps and plan how wide and high they will be, so you can order the correct amount of timber. To work out the number of steps you’ll need, divide the total height of your incline by the riser height of your sleeper.
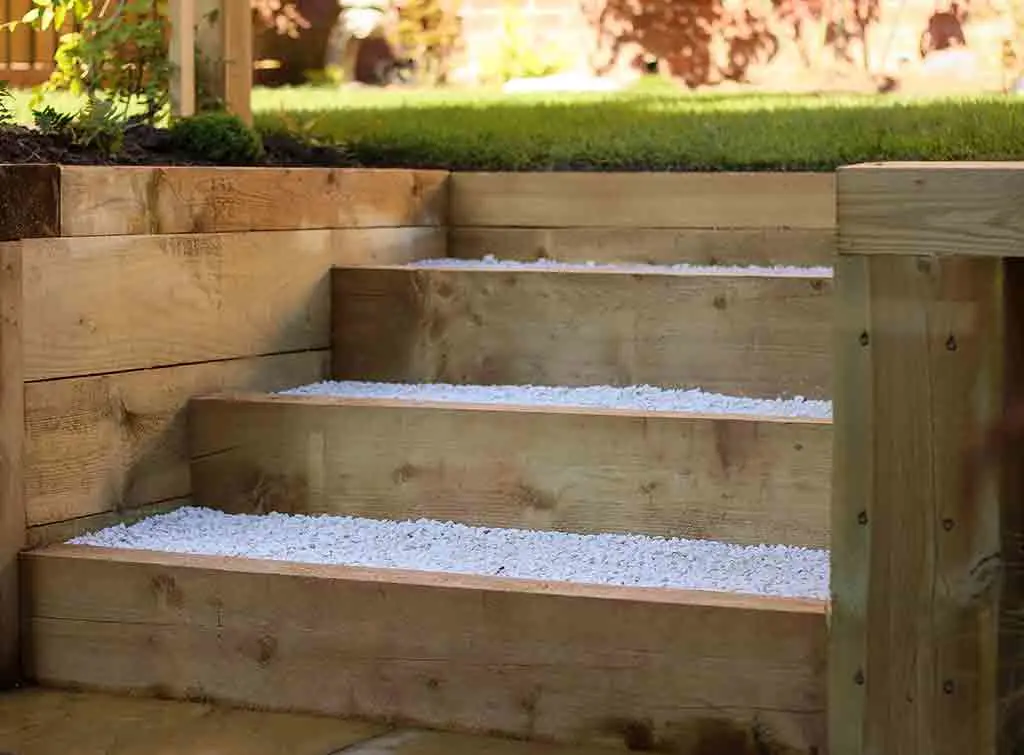
If building a small step of steps, your sleeper will form both the step and tread, meaning no other material is needed unless you are adding a layer of gravel to the tread for extra grip.
It's advisable to use hardwood sleepers for their durability against decay. If you opt for the more budget-friendly softwood sleepers or brand new untreated sleepers, it's wise to treat the timber with a wood preserve that will help prevent the wood from rotting.
How to build garden steps with sleepers
Tools:
Circular saw or hand saw
Wood preserve
Stakes (concrete or wood)
Wood screws or nails
Ready-mix cement (optional)
Spirit level
How to make steps out of sleepers:
Cut your sleepers to the size required for each step. Paint wood preserve onto the newly cut ends for protection.
Depending on which method you are using to fix your sleepers in place (see steps 3 and 4), mark out your steps and dig out your basic step shapes in preparation for fixing your sleepers.
The best method for fixing your sleepers in place will depend on the type of ground you are building on. If the ground is soft or rocky, concreting them into place is best. If the ground is relatively firm, a wooden stake driven in behind each sleeper, and then attached to the sleeper, should sufficiently hold them in place. When digging the shape of your steps, dig space for the sleeper, the stake, and enough space behind the stake to attach it to the sleeper.
Place your sleeper and then drive two wooden stakes into the ground directly behind the sleeper at either end. The top of the stake needs to be a few centimetres lower than the sleeper so that it can be covered by the lip of the next sleeper above, or a layer of gravel if you want deeper steps. Use a spirit level to ensure the sleeper is level before attaching, then screw through the stake into the sleeper.
If using concrete to fix the sleepers, lay a bed of concrete between 50mm - 100mm thick, with a little extra at the front and behind the sleeper. Position the sleeper on top of the concrete bed and add concrete in the space behind it. Then use a spirit level to make sure the sleeper is level.
Top tip: If you want extra wide steps, add a sleeper at the front and back of each step and then fill in with gravel or soil to grow grass. Line the steps with landscaping fabric to prevent weeds and make sure the ground on each step is well-compacted.
See the tradespeople we've checked for your job
How to build sleeper steps on a slope
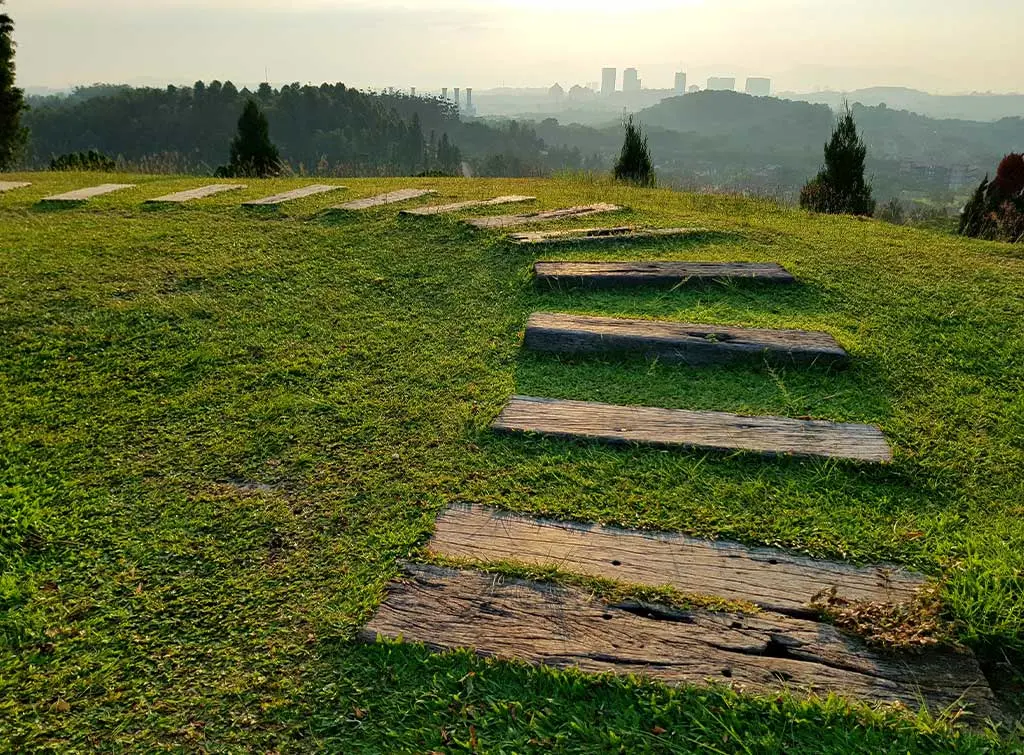
Want to create safer and easier access up a slope? Whether you're after a few gentle steps or s steep hillside stairway, sleepers are a simple option.
Here's what you'll need to do:
Follow the steps above, starting off by shaping the slope for the treads and risers by removing soil or adding more if the slope is irregular. Measure the height and length between the slope levels to calculate a suitable dimension for treads and risers.
Before fixing any sleepers in place, mark where the front edge of each step will go to ensure they are evenly spaced. Once you're satisfied that your steps will create a safe flight on your slope, start fixing your sleepers in place using the methods above.
FAQs
How much do sleepers cost?
If opting for softwood sleepers, expect to pay between £18 - £23 each, but then you'll have to buy wood preserve if they are not treated. Hardwood sleepers will offer a more robust and durable solution and will set you back between £30 - £40. Or why not try salvaged railway sleepers for a quirky, rustic feel? They are mid-range, between £20 - £25 each, however, they are supremely hard-wearing and already treated. Take a look at our garden landscaping cost guide for more information.
How easy is it to make steps from sleepers?
Unless you have solid DIY experience, we strongly recommend hiring a landscaper to take on your project. Not only will they be able to source you the best materials, but they'll be able to ensure that your steps are safe, solid and will stand the test of time.


See the tradespeople we've checked for your job