Blog>How-To Guides>How to build a raised deck
Last updated: 31 March 2021

How to build a raised deck
Improve your DIY skills and safely learn how to build a raised deck with our easy to follow guide. Packed with step by step instructions, guidance and tips.

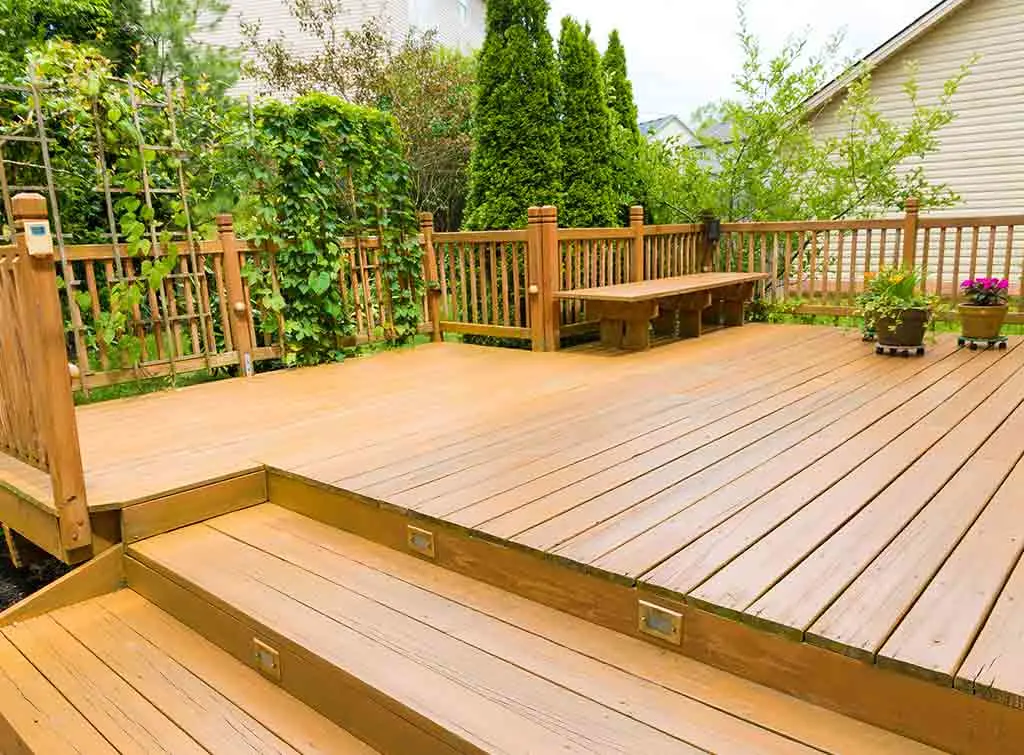
If you’ve always wanted decking but have uneven ground or bumpy terrain in your garden, building a raised deck can be the perfect solution. They’re a fantastic way to enhance a garden and create a space to entertain, socialise or relax. In this article we look at how to build a raised deck, lay decking and building decking on a slope.
Tools and equipment needed
Tools:
String line
Tape measure
Wooden stakes
Club hammer - to hammer in the pins
Shovel/post hole digger (from hire shop)
Spirit level
Saw
Builder’s square
Pencil
Paintbrush
Equipment
For the base:
Drill and flat wood drill bit
Anchor bolts/expansion bolts and stainless-steel washers
Timber lengths for profiles
22 x 50 x 1,800mm (approx.) length of timber - to make the builder’s square
100 x 100mm joist support posts
Weed control membrane
Gravel
Wood preservative
Aggregate
Cement or postcrete
For the deck:
Decking boards
Decking screws
Drill bits
Planer if required
See the tradespeople we've checked for your job

Staying safe
Always take the proper precautions before commencing the work:
With any manual handling, care should be taken. Get assistance wherever possible.
Don’t forget to wear protective clothing. This includes eye protection, steel toe-capped footwear, gloves and a face mask when cutting wood.
When digging into the ground it is always advisable to check for underground services. If there’s a manhole cover or water meter cover in your lawn, then that is a good indicator of services, but to be sure you can hire a cable avoidance tool. If there are any signs of pipes or cables, it may be worth considering a different area to build your new deck.
Finally, if you have a real fire in your home, do not be tempted to burn the timber off-cuts. Pre-treated timber is toxic when burnt.
How to build raised decking
Top tip: This is quite a long, complex process so it is worth reading ahead to ensure you understand all the steps before continuing. If you are confused or unsure how to proceed, using our free search feature to find a local tradesperson to assist with your project may be a good idea.
Start by properly measuring the location. You can then draw up a to-scale plan for your decking space so you can work out the amount of materials and equipment you will need.
Using your plan, use string/builder’s line to mark the shape and size of your decking frame. Then secure this in place using pegs.
Next, measure the distance between your marked corners (in a criss-cross pattern). As long as both measurements are equal, your marked space is square.
Then, clear the site by removing any rocks, grass, plants and other debris. Excavate the space to at least 5cm depth.
You can then lay a weed-proof membrane covering your decking area to stop weeds and other plants from breaking through from under your new deck. Cover this with gravel to ensure it stays in place.
Adding the footings
Top tip: Always treat any wood cuts with wood preservative.
Start by digging four holes for the joist support posts. These will need to be deep enough to ensure that 25% of the post is buried, and the holes should be approximately three times the width of the posts. You should only leave a maximum of 1.8m from the centre of one post to the centre of the next in any direction.
Use your shovel to dig the post holes. It helps to use your joint support post as a gauge as you dig, placing it in the hole regularly to check that you are digging down to the correct depth. Top tip: If you have several holes to dig, you can hire a ‘post hole digger’ from your nearest provider.
Next, fill the holes to a depth of 10cm with aggregate. This will improve drainage under the concrete, to prevent your posts from rotting.
You can then place the posts into the holes. You should use battens to stabilise and hold the posts in the correct position.
Use pegs to secure your posts centrally within the holes, bedding them into the aggregate by about 2.5cm. Also, make sure you hammer a stake into the earth at each point where the batten touches the ground.
With a spirit level, check that each joist support post is level vertically. Once you have done this, screw the wooden stakes to the end of each batten to brace them when the aggregate is compacted.
Prepare your concrete by mixing. You could save time by hiring a cement mixer if you are using a large number of posts. The best ratio for your cement mix is to use one part cement with two parts sand and four parts aggregate. You could also consider using postcrete, following the manufacturer’s guidelines.
Next, fill the holes with cement, stopping about 10cm from the top, always ensuring that the cement has a gentle fall from the post outwards. This will help to prevent water from pooling around the post. Then you can backfill with turf or soil if necessary.
Keep using a spirit level to check that each post is vertically level whilst fixing them in place. Check again once all the holes have been filled to ensure the posts stay level while the concrete sets.
After the concrete has completely set, remove the post supports/braces. You can then tie a string line around the posts to act as a guide for positioning further joint support posts.
Next, measure where the central point is between the posts. Then, use a post marker to mark this out. Continue with this process until all five post markers/stakes have been placed.
Dig each of the five remaining holes, as you did previously, then repeat the process until all posts are cemented in place.
See the tradespeople we've checked for your job

How to build a decking base and frame
Now your posts have been set in place, it is time to construct your decking frame and base. Building a strong level base is essential if you want your new decking to be flat and long-lasting.
Top tip: Remember that the deck boards always run in the opposite direction to the joists!
Start by cutting your outer joists to the correct length. Temporarily fix one end of the joist in place using a decking screw. Use your spirit level and lift the loose joist end until it is level, then properly secure it in place. Top tip: To stop rainwater pooling on the decking, ensure it is laid at a slight angle facing away from your house. It is wise to allow a 2mm fall for every metre of decking.
Repeat step one, moving from corner to corner, until all four joists of your decking frame are secured. Once again, use your spirit level to make sure your frame is flat.
Mark the post at the halfway point above the decking frame. Use a set square and draw a line down the joist marking 4cm from the top and the bottom along the line.
Next, secure the joists to the joist posts, using coach bolts, making sure to countersink each one. Do this for each corner and repeat the process for the midsections until all of the outer joists are securely bolted to the joist support posts.
Measure, cut and attach two centre support joists in the same way as you did for the outer decking frame. Make sure the centre support joist is sandwiched between the two joists. These joists will need to run in the same direction as your decking boards.
Trim each of the posts and use a wood preserver on all the cuts you made.
Internal joists and decking boards
Now your decking frame is in place, you will need to install your internal joists.
Firstly, measure 40cm out from the centre of your frame and draw a line with the assistance of your set square, continuing this line down the side of the joist.
Repeat step one every 40cm covering the entire length of your frame. You should also add an additional mark if the final space measures over 40cm. Then drill pilot holes at a distance of 4cm from the top and bottom.
Attach joist hangers to both ends of your joist with 3cm exterior screws.
Next, position your joists so that the centre lines up with one of the marks you made previously on the decking frame. Lining up with your pilot holes, attach using 10cm exterior screws. Top tip: Ensure that the internal joists all sit flush with the external frame.
Measure and mark for noggins, ensuring they are no further apart than 120cm.
To finish, lay the decking boards, checking that there is enough overhang so that the facia boards will sit flush. Remember to lay these in the opposite direction of your frame joists.
Secure the boards into place by drilling 7cm holes, countersinking the decking screws to prevent the boards from splitting. For more information about laying decking boards, please see our how to lay decking guide.
See the tradespeople we've checked for your job
How to lay decking on uneven ground or a slope
If the ground where you are planning to build is uneven or rough, it may be worth levelling the earth before laying your decking. This may add extra time to the project but will ensure your new decking is flat and level and that the posts are in secure ground.
If you are unsure how to lay decking on uneven ground and to see a guide on building a level base, why not check out our how to lay decking guide.
Alternatively, you can start by measuring from where the deck's highest corner is located and then marking the post at the point where the uppermost point of the frame will be. You can then use the instructions in our ‘how to build raised decking’ section above.
Planning permission
While building a deck can be an exciting project with fantastic results, you need to ensure you have the correct legal permissions before beginning.
Often, you will not need planning permission when building a raised deck but there are some exceptions to this. As such, it is always worth checking before continuing to prevent future issues. Please click Planning Portal and the Government guidance for more information.
Help, I’m confused!
It is important if you feel unsure or confused at any point during your raised deck project that you seek professional assistance. The last thing you need is a shoddy deck that collapses and injures yourself and your family. Try not to feel disheartened if you do need help, this is a complex and arduous job, even DIY experts may struggle.
You also should be aware that without the proper angle to your decking, rainwater won’t drain properly, causing your deck to rot and be very slippery. In addition, if you do not correctly finish your deck footings, your new decking could warp, sink or subside over time. Finally, not properly using pilot holes may even cause your timber to split.
If you are ready to speak to a professional or need more advice, our free search feature will instantly connect you with a number of vetted tradespeople in your area. Or, why not check out our garden decking cost guide for further information about prices.


See the tradespeople we've checked for your job