Blog>How-To Guides>How to fit a shower tray
Last updated: 9 December 2021

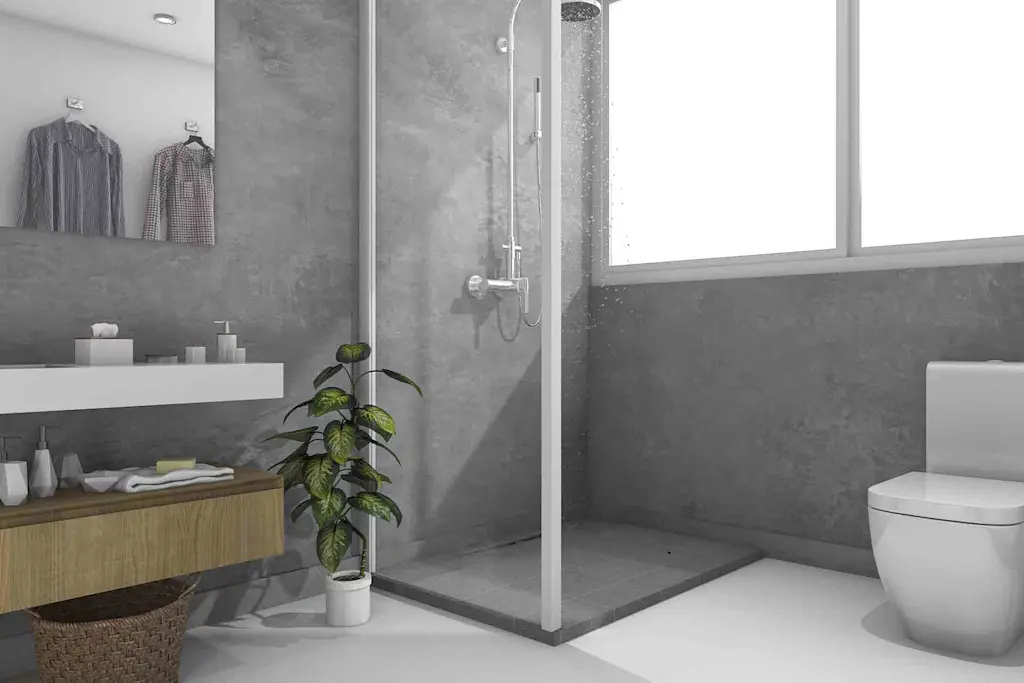
How to fit a shower tray
Explore our comprehensive guide to quickly learn how to fit a shower tray. With step-by-step guides on installing raised shower trays, shower wastes & more.

Shower trays are versatile and functional, but they can also change the look and feel of your shower. Whether you're looking for an aesthetic upgrade, a better-quality tray, or to replace a leaking tray, learning how to fit a shower tray correctly is important. A poorly fitted or low-quality shower tray will end up costing you more in terms of fixing leaks, repairs and eventually the tray will need to be replaced.
Good quality well-fitted trays can last for years so are well worth the time and financial investment. Read on to discover more including how to install a shower tray on a wooden floor, how to install a shower tray on legs and more.
Tools and materials needed
The best place to start is with planning and preparation. This is vital if you are looking for perfect, long-lasting results. Start by ensuring the area where you will be fitting your shower tray is clean and stable. This will prevent issues further down the line.
Also, check your new shower tray to make sure there are no cracks or holes which will lead to leaks over time. Then, take a little time to collect the tools and materials you will need to stop any interruptions during installation. You will need:
Tools
Pencil
Spirit level
Jigsaw
Drill
Sealant gun
Kettle/jug
Kitchen roll
Materials
Silicone sealant
Builders sand
Cement
Waste trap
Shower tray
18mm marine ply if replacing wooden flooring
See the tradespeople we've checked for your job

How to install a shower tray
This step-by-step guide will help to show you how to install a shower tray on a wooden floor using a low-profile tray. Please note, it is important that you read the manufacturers guidelines that came with your new tray.
Once you have gathered your materials and prepared the space, follow these steps:
When learning how to lay a shower tray on a wooden floor, you will need to mark the area where the tray will stand. Next, replace the floorboards within that area with a minimum of 18mm marine ply.
You will need to ensure there is access to the waste pipes in the floor beside the tray. Using a jigsaw for accuracy, cut an access hatch.
Cut a hole for the shower tray waste. Ensure your measurements are accurate and once completed, proceed with assembly.
Using five parts builder’s sand and one part cement, mix up some mortar and place a thin layer beneath the shower tray. Use a spirit level to ensure the tray is completely level and press it into place. Leave for 24 hours to set.
Through the access hatch you positioned next to the tray, connect the waste trap to the outlet pipe (it is a good idea to keep the access hatch for future maintenance if required).
Using silicone sealant, run a line along the edges of the tray, to ensure no water can get underneath, once the shower is in use.
How to fit a raised shower tray
Not all shower trays are low profile, in fact, raised shower trays are very popular. They are great at keeping water from leaking out of the shower zone in your bathroom. Learning how to fit a raised shower tray is easier than fitting low profile options and perfect for beginners.
Remember to properly prepare the space before beginning, then follow the below steps to achieve great results:
Start by placing the tray where you want it to be installed, to enable you to identify any potential clearance issues.
Next, screw the legs into place and adjust the height to the desired level.
Position the shower tray waste to ensure everything lines up correctly.
When you have seen that everything is in the correct position, attach the waste to the shower tray and then connect this to the trap.
Using a spirit level, ensure that the shower tray is completely level. Please note, this is essential to ensure no future issues so remember to check the tray is level in ALL directions.
Attach the underside of the waste outlet pipe as securely as you can to avoid leaks. A great way to check is using a cold kettle, pouring water down the waste/plug and placing kitchen paper around the join. You will then be able to identify any leaks.
You can now attach the shower tray side panel, following manufacturers guidelines.
Finally, use your silicone sealant to run a line along the edges of the tray. This will ensure water cannot get under the tray when the shower is being used.
See the tradespeople we've checked for your job
How to install a shower tray on legs
Shower trays can be installed using a riser kit to create easy access to the waste. This is particularly important if you plan to install your shower over a concrete floor.
If you suffer from mobility issues this may not be the best option for you as your shower tray will be higher than usual. Want to know how to install a shower tray on legs? Just use the following guide:
Once you have chosen a riser kit, read the manufacturers guidelines before continuing.
Prior to starting, check that your shower tray fits in the space.
Now you can screw the legs into place and set to your desired height.
Make sure your waste is properly lined up then fit it.
Using a spirit level, check the tray is sitting level and evenly.
You can then connect the waste to your waste pipe making sure the seal is tight to prevent leaks.
It is always worth pouring a little water down the drain to make sure none escapes.
Next, use a silicone sealant to seal the edges of the shower tray in place.

How to fit a shower tray on a concrete floor
Concrete floors are easy to maintain, affordable and long-lasting. This makes them the ideal choice for areas of your home that have high traffic. They also look incredible and are a great talking point with visitors.
Figuring out how to fit a shower tray on a concrete floor can be a little tricky so read ahead and if you are unsure of any steps please speak to a professional.
Again, check the tray is in good condition before starting and ensure that the concrete you are placing the tray on is clean and free from debris.
Make sure the concrete is also completely level, using a levelling compound if required.
Now, using the shower tray’s waste hole as a template, mark the concrete where the waste is to be positioned.
Ensure you cut away enough of the concrete to leave adequate space for the waste. Place the waste in the hole and check that it doesn’t affect the level of the tray. This will ensure proper drainage and avoid any damage.
Next, lay the shower tray in place, ensuring the hole lines up correctly with the waste below.
Fit the trap cover onto the top of the tray and then pour water around the waste area, and directly into the waste.
You can then remove the tray and should check the waste pipe join and surrounding areas for signs of water leakage.
As long as there are no leaks, you can fit the shower tray.
Create some mortar by combining five parts builder’s sand and one part cement. Then spread a thin layer under the shower tray.
Check that the tray is totally flat using a spirit level.
Now, press the tray into place and leave it for 24 hours to set.
To finish, reassemble the waste/trap.
See the tradespeople we've checked for your job
How to fit a shower tray waste
The waste is a crucial part of any shower tray, otherwise, the water will have nowhere to go and will flood your bathroom. This is why it is important to learn how to fit a shower tray waste correctly.
Please note, you should always follow manufacturers guidelines. Use the below step-by-step guide to fit your shower tray waste:
Firstly, you will need to disassemble the new waste.
There will be two rubber washers attached to the waste (one for above the shower tray, and one for below), remove both.
Next, place a thin bead of sealant on the underside of the trap (make sure it is on the part that will sit on the tray), and another thin bead of sealant around the shower tray waste hole.
Then, replace the rubber washers, hold the bottle trap under the shower tray waste hole and screw the upper piece into position.
For flawless results, wipe away any excess sealant and finish putting the trap together according to the manufacturer's guidelines.
Finally, beneath the tray, fit the fixing pipe to the waste outlet.
Check for leaks.
Professional help
It is important that you take the time to properly fit your shower tray as there are many potential issues if this is not done correctly. If the shower tray is not fitted correctly there is a risk of leaks, water damage, water stains, plaster damage, damp, wood rot to flooring and floor joists, water pooling, poor drainage and damage to the tray.
As such, if at any stage you become confused or are unsure how to proceed, please speak to a professional. Some people feel like this is admitting defeat, but it is a really wise decision to prevent future problems. Looking for a trusted tradesperson in your area? Please use our free search feature.
If you would like to learn more about professional shower fitting, check out our shower installation cost guide. Or, view our guide on walk in shower installation costs.
See the tradespeople we've checked for your job
FAQs
Is it possible to replace a shower tray without damaging tiles?
It can be difficult to prevent tile damage during this process as for correct shower installation, tiles are always fitted after the shower tray. This helps to prevent water leakage and weak spots. If the tiles have not been discontinued, you could consider carefully removing the lower levels, directly above the tray, then replacing the tiles after installation.
However, doing this also brings risks; in removing the old tiles, you must be careful not to damage any waterproof membranes over the boarding beneath the tile. Alternatively, if the tiles have been discontinued, then there is little choice but to replace the entire tile in the shower enclosure for effective protection from water damage.
How much would a tradesperson charge to install a shower tray?
A professional shower fitter will charge roughly £340 – £380 for installation. For more information on prices, explore out our helpful shower installation cost guide.


See the tradespeople we've checked for your job