Blog>How-To Guides>How to install cladding
Last updated: 2 November 2021

How to install cladding
Learn how to install cladding to upgrade your home today. With a step-by-step guide to installing external and internal cladding.

Timber cladding is a great option to decorate your home with, both internally and externally. Not only does it look good but it's also sustainable.
We've created this guide with step-by-step instructions to show you how to install cladding. We’ll also be covering finishing corners on timber cladding, adding details, and answering your FAQs.
Tools and materials
Before you start, you'll need to gather all the tools and materials that you will need, including:
Cladding
Battens
Cladding pins
Paint or stain for your cladding
Spirit level
Sandpaper
Saw
Hammer
Nails
Pencil for marking
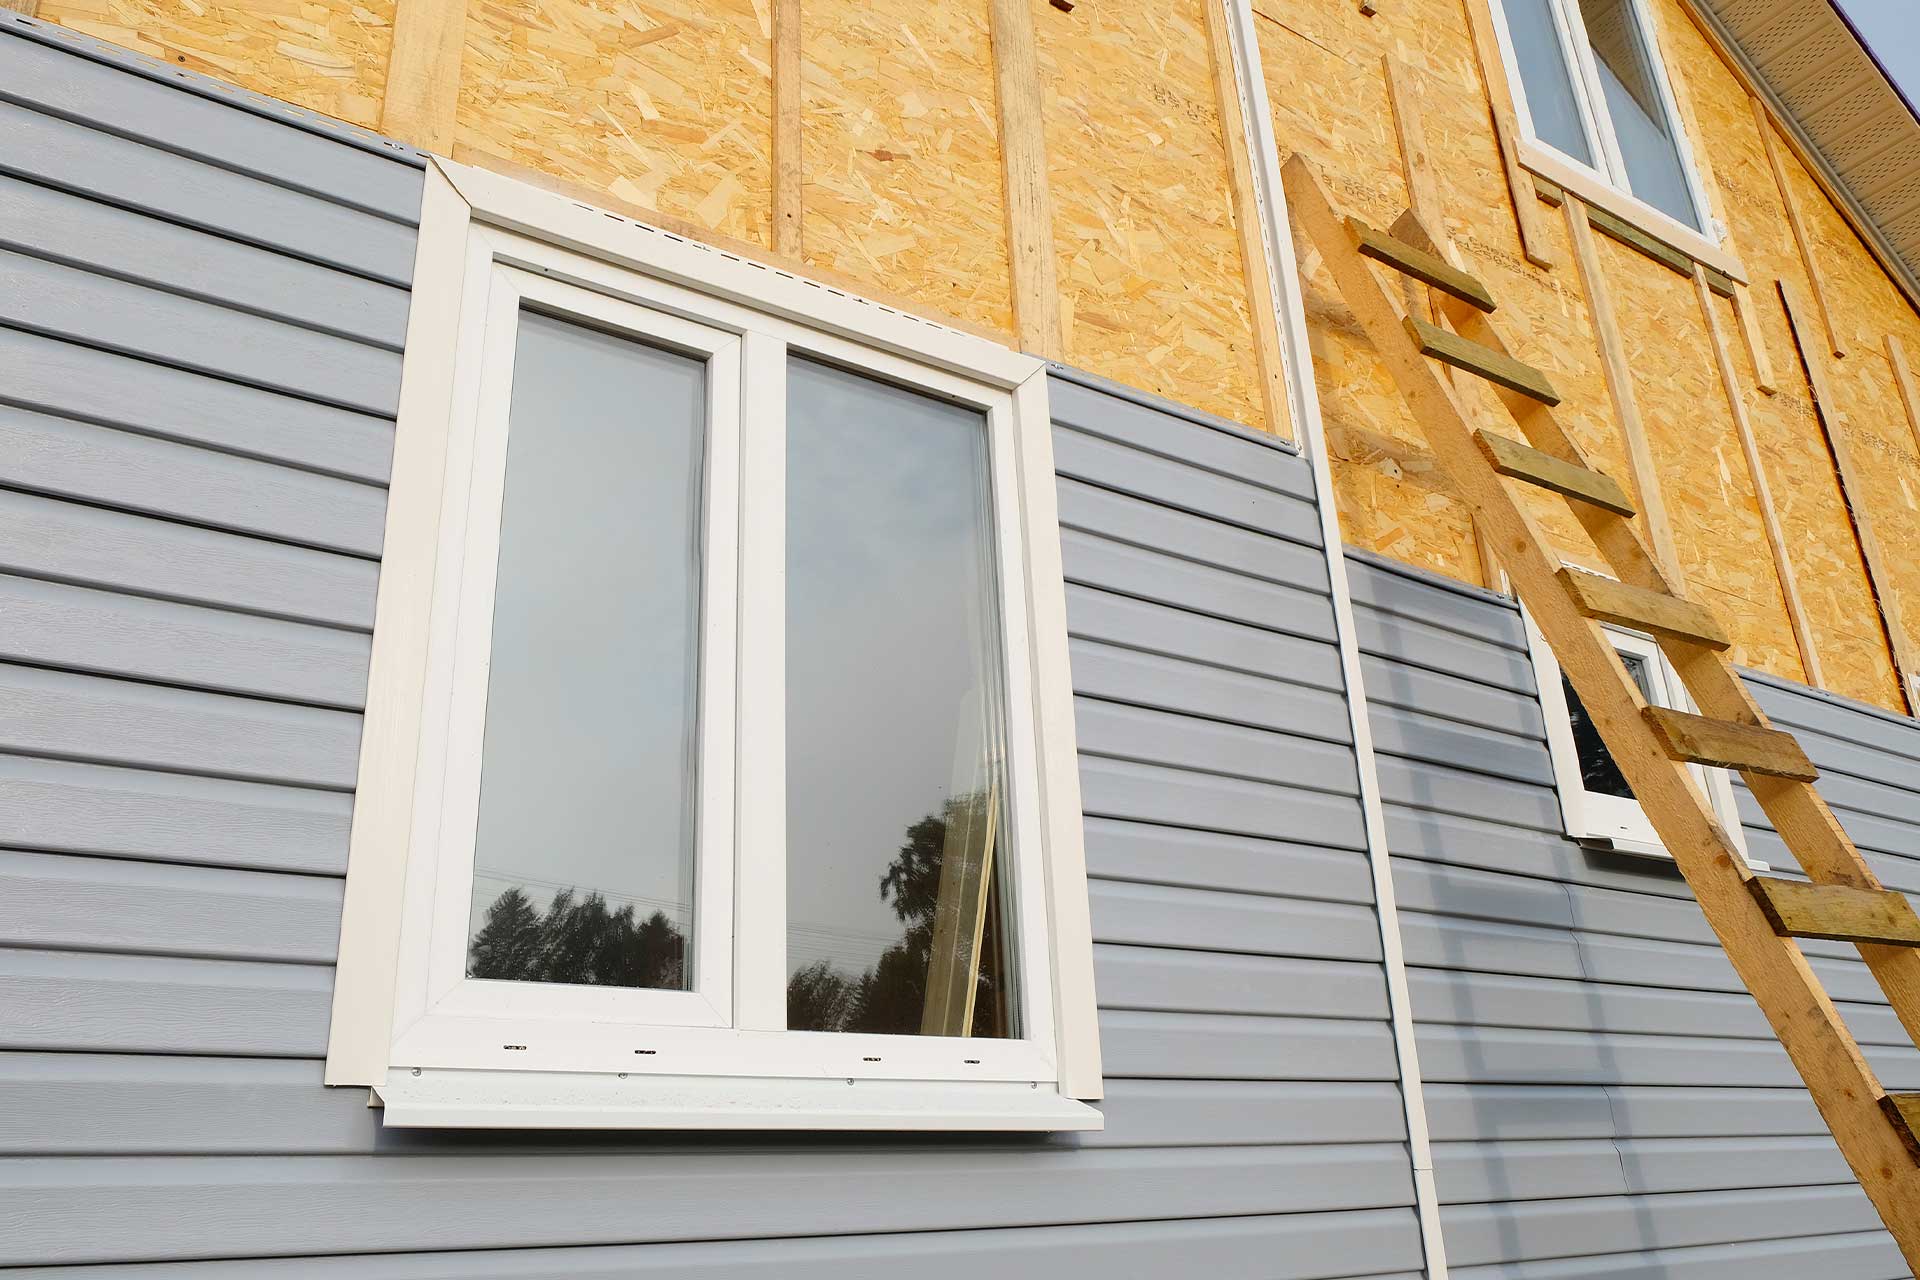
How to install external timber cladding

When you install cladding on the outside of your home, you need to also use a house wrap and foam insulation. This will help to keep your home warm and prevent energy loss.
Follow the below steps to install your external cladding.
Start by measuring your walls and ensuring you have enough cladding to cover your entire home
You can then cover your home in house wrap, fixing it in place with a staple gun. Then use nails to fix foam insulation in place
Attach battens to your walls using nails
Once your battens are installed, start attaching your first row of cladding boards, moving from the bottom of your wall to the top
Keep moving up your wall, attaching each cladding board before moving to the next
Finally, install any corner pieces and trims
Top tip: Ensure you use a spirit level to make sure your cladding is straight.
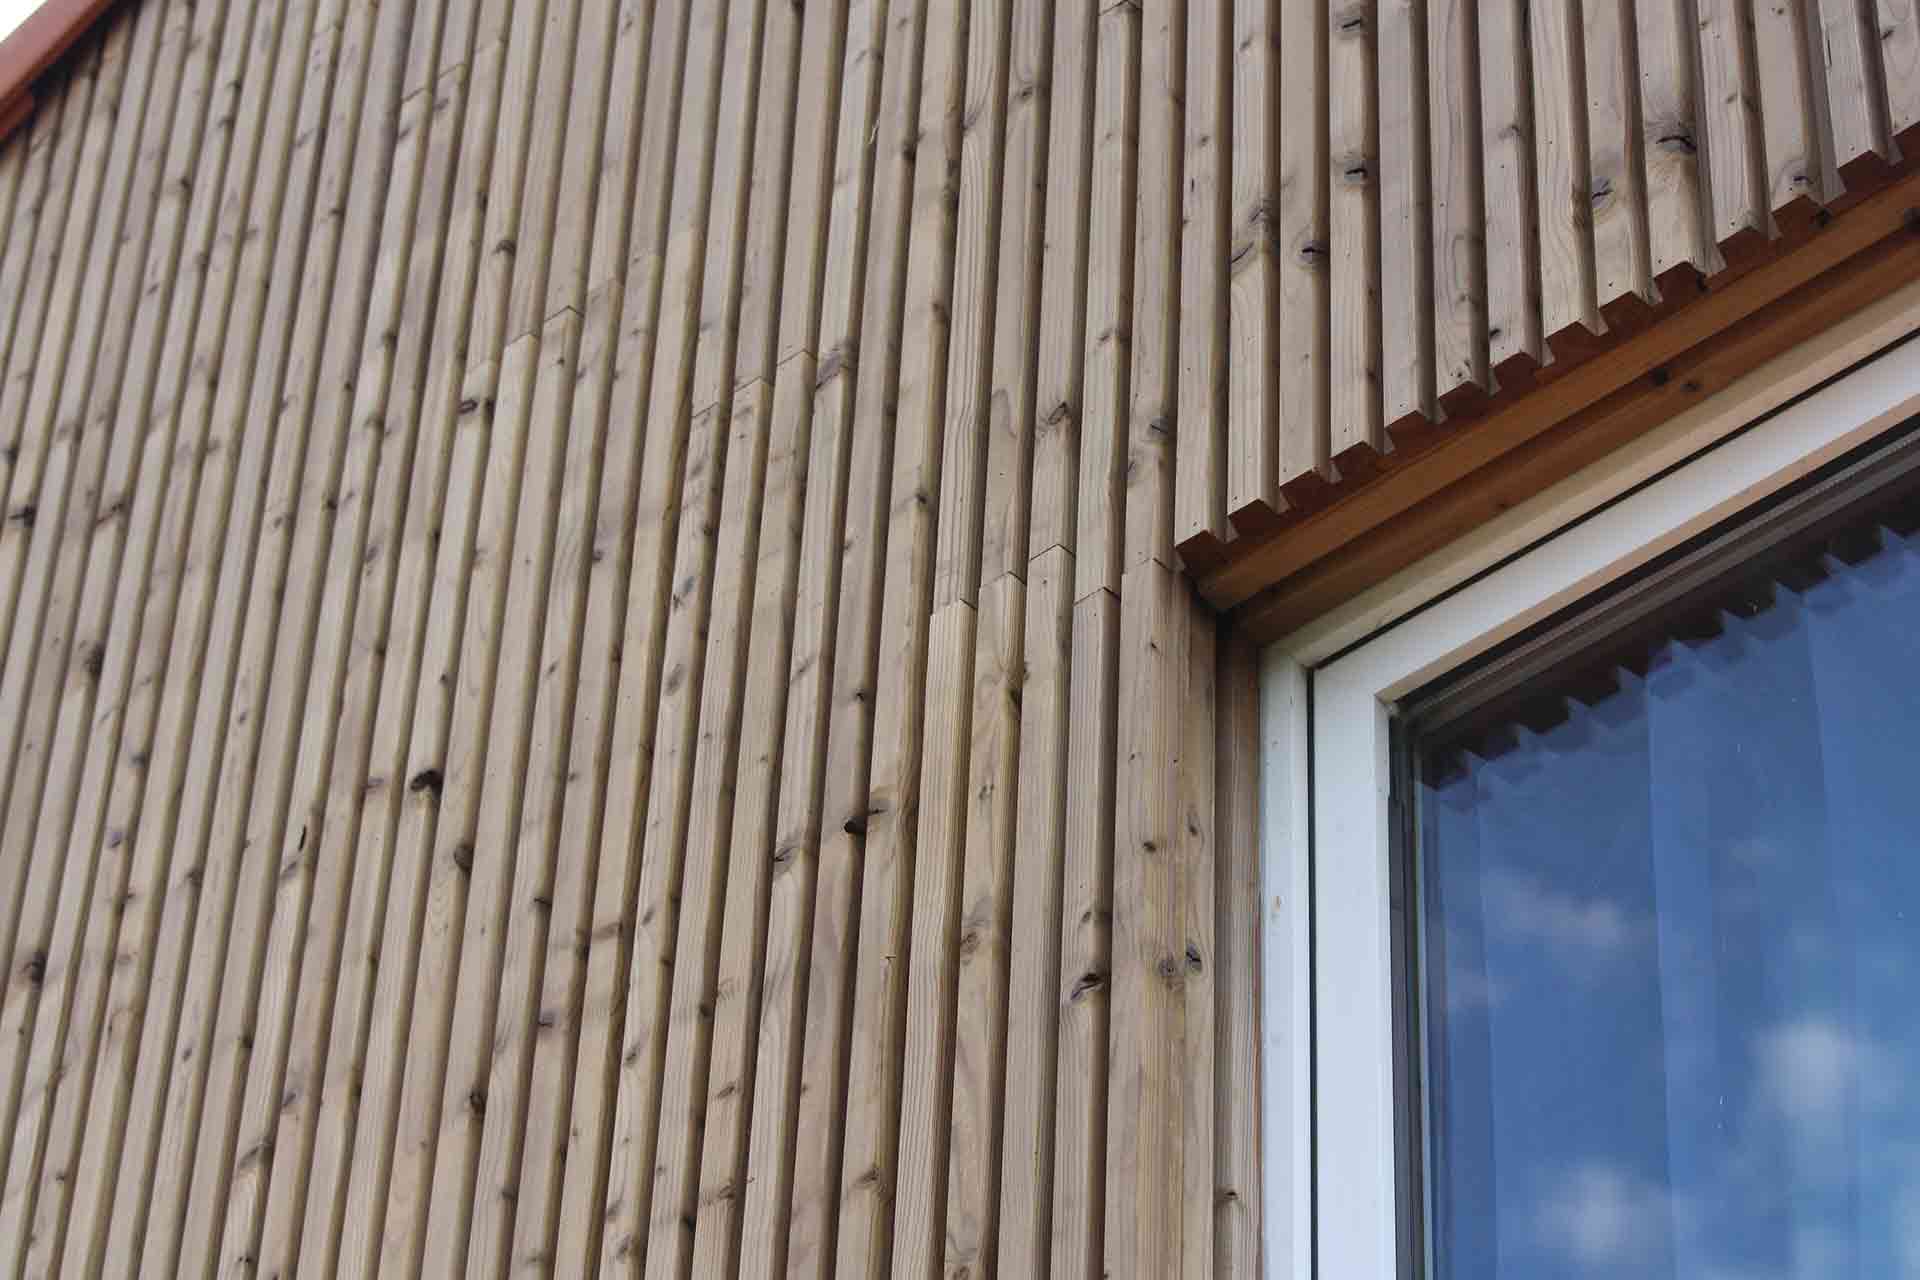
How to finish corners on timber cladding

To finish corners on timber cladding we’d recommend using a corner block of timber. When attaching your cladding be sure to leave a 90-degree angle at the end of each wall. You can then use nails to attach a block of timber that is the height of your wall to fill the gap.
Vertical timber cladding fixing details
The difference between using horizontal and vertical timber cladding fixing details is minor. All you need to know is that if you plan to install vertical cladding, you’ll need to first install horizontal battens.
Alternatively, if you plan to install horizontal cladding, you’ll need to first install vertical battens.
See the tradespeople we've checked for your job
How to install internal cladding
Once you have everything you need to hand, use the following steps to install your internal timber cladding:
Prepare your cladding by laying it out close to where it will be installed. Leave it for two weeks to allow it to acclimatise
Ensure your wall is clean and free from wallpaper. Also, remove any skirting boards or shelves. Then, check that the wall is stable enough to support the extra weight of the cladding (Please note: if your plaster is crumbling or damaged, this should be dealt with before you install your cladding)
Start by fitting the battens to your wall with the first batten positioned just over the skirting board. Use nails to fix these in place horizontally with gaps of 40cm between each batten
Check that your cladding is clean and dust-free, then decide whether to treat it before installing. It'll be easier to do this before installation as you’ll have better access to each board
Measure the height of your wall and then trim the cladding to size with a saw. Next, use sandpaper to remove any jagged edges
Start attaching your cladding to the wall using cladding pins and a hammer. Check each piece of cladding is flat using your spirit level before hammering nails through into the battens on your walls
Slot each piece of cladding into the previous piece, frequently checking its level, then nail in place
Finish by reinstalling your skirting board and any shelves or pictures
Top tip: Don't apply any paint to the indents where your cladding boards fit together or this will cause issues later.
How can I ensure my cladding looks flawless?
If you’re a beginner to DIY and have no experience installing cladding, it may be harder to get the results you're hoping for. The best way to combat any worries or mistakes is to contact a qualified tradesperson to take on your project. While you'll need to pay for installation, you can guarantee the job will be done to a high standard in a fraction of the time it would have taken you.
Looking for an expert you can trust? Try our free search feature. Simply enter your postcode to find a range of local, experienced tradespeople who are recommended by your neighbours. You can check out their previous work on their profile and have a look at reviews from other customers.
How much does professional cladding installation cost?
If you'd prefer to hire an expert to install your cladding, you may be curious as to how much this will cost. Our house cladding cost guide covers the different costs you can expect to pay. As a guide, it'll cost around £300 - £600 to install cladding on a single wall on an average gable roof house (not including the price of the cladding itself).
Thermowood cladding is another cladding option to consider. It is treated with pressure and heat to make it more weather resistant and costs on average £42.50 per m2 to install**.** Check out our thermowood cladding cost guide for the latest prices and advice.
See the tradespeople we've checked for your job
FAQs
How do you attach wooden cladding to a wall?
As we mentioned earlier in this article, using nails is the best and most secure way to attach cladding to a wall. However, you can also use wood adhesive, although this will not be as durable and shouldn’t be used externally.
How far apart should battens be for cladding?
For the best results, you should leave 40cm between battens.
Can you install cladding yourself?
Yes, you can install cladding yourself. Having said this, cladding installation may be too complex for DIY beginners, although we hope this guide will help to simplify the process. If you’re concerned about whether installing cladding yourself is a good idea, consider hiring a professional to alleviate your worries.
Which tradesperson should I use to install cladding?
It’s important to hire the right tradesperson for your project to ensure you get the best results possible. Depending on the type of cladding you choose, you'll need to hire either a carpenter or a general builder to install your cladding.

See the tradespeople we've checked for your job