Blog>How-To Guides>How to repair Victorian coving
Last updated: 6 August 2021

How to repair Victorian coving
If you’d like to revive the glorious coving in your home and return some period charm into your spaces, follow these easy steps to restoring your coving.

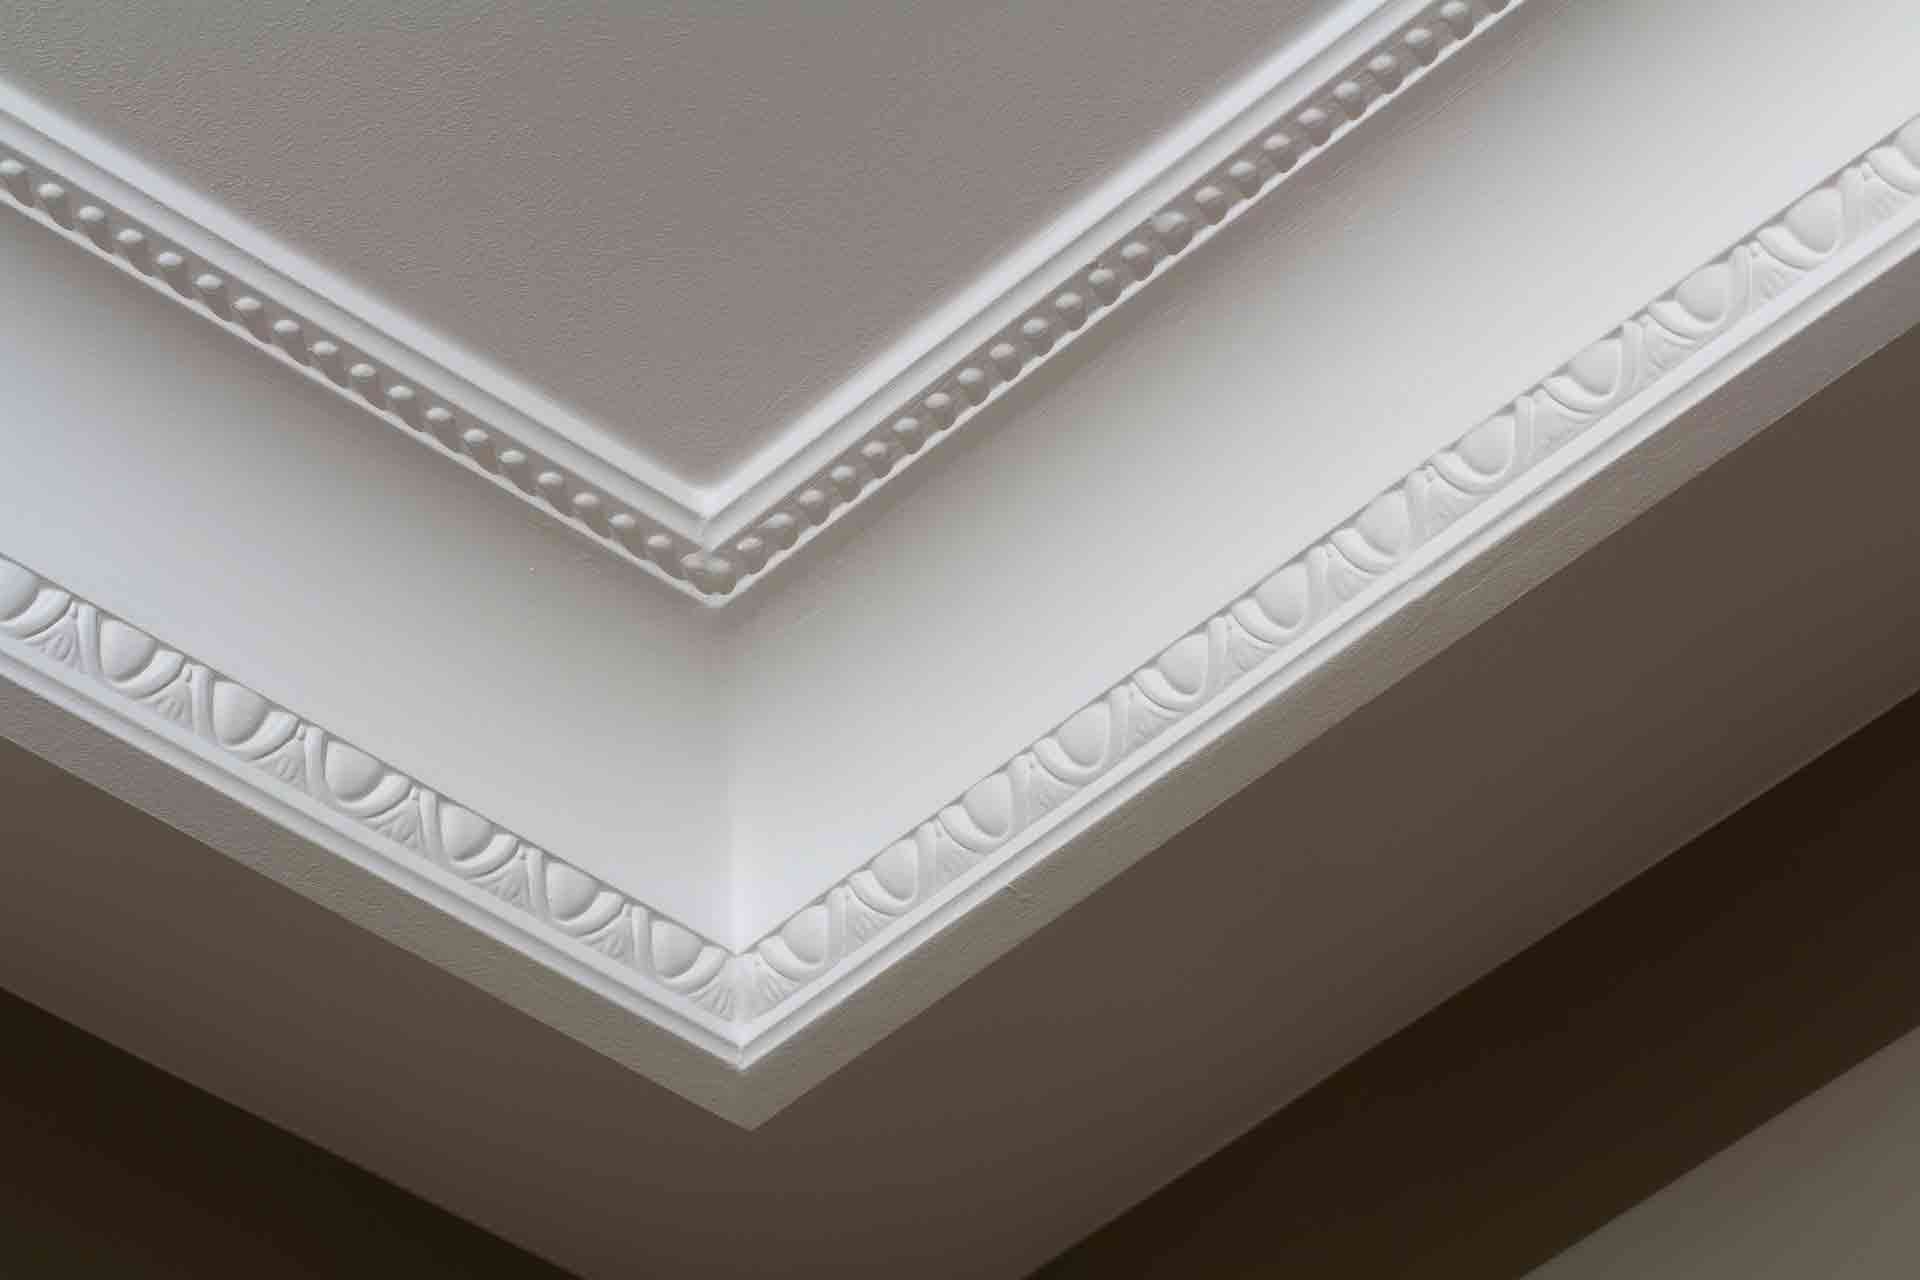
If you’re lucky enough to have a period home that features original Victorian coving, it’s likely the coving might need a little TLC to look its best. Over the years, cracks may appear, and the build-up of paint layers can diminish the look of the coving.
So, if you’d like to revive this glorious architectural feature and return some period charm into your home, follow these easy steps on how to restore Victorian coving.
If you’re also looking to add some character to spaces that lack any features, such as a new build, read our guide on how to fit coving.
How do you repair Victorian coving?

If you are planning to refresh the coving with paint, you'll have to fill any cracks first. However, repairing Victorian coving can be a challenging DIY job as you'll have to perform the restoration from a ladder or platform. If you're not confident about working from a height, we recommend using our search tool to find a professional who can help. If you're still keen to give it a go, here's what you'll need:
Ladder or platform to safely stand on
A paint stripping product if required
Light disinfectant
Cloths
Non-abrasive sponges
Chisel
Clean brush
Sandpaper
Step one
Start by ensuring you have a stable and safe ladder or platform to work from. If your coving is covered in layers of paint, then the first thing to do is remove the paint back to the plaster so you have a clean base from which to apply paint. If using a paint stripping product, follow the manufacturer's instructions, which will likely involve applying a paste to the coving and covering it with a poultice blanket.
Caution: Paint strippers can contain strong chemicals, so it's advisable to wear gloves and goggles. If unsure, call in an experienced decorator who can help.
Step two
Give the coving a good sanding down with light sandpaper, getting into the nooks and crannies to remove any loose debris. Then give it clean down with a wet cloth and mild detergent to get rid of dust.
Step three
This is the fun bit where you can become a bit of a restorer. To create crisp edges and re-establish the authentic look of your coving, take a small chisel or blade and carefully skim along the edge to highlight the corners and right angles. Chip away any excess paint to get a smooth finish. Do the same along the other lines of your coving, working down to the bottom, but being careful not to chop away too much and compromise the original shape.
Where people can slip up: Be careful not to slice away too much of your coving and compromise the original shape of the detailing. Also, when using a chisel or a blade, there's always a danger of slipping and cutting yourself. If in doubt, leave it to an experienced decorator or plasterer.
See the tradespeople we've checked for your job
How do you repair damaged coving?
How do you repair cracked coving?
If you've uncovered any cracks after stripping the paint, these need to be filled. Here's how:
You'll need:
Spatula or wide chisel
Ready-mixed filler
Light sandpaper
Using a spatula or wide chisel, apply a ready mixed soft filler to the crack. Smooth over and allow to dry. Once dry, lightly sand to create a seamless finish that is ideal for painting.
Top tip: Make sure to not overload the filler in the crack as it will look untidy. The key is to start with a little at a time and top up with more if required.
Tips on removing paint from Victorian coving
If using a paint scraper, apply pressure and work the tip of the scraper under the paint being careful not to break the plaster.
If using a paint stripper, wear gloves and goggles and give it a good stir before using. Be sure to choose a methylene chloride-based remover that will strip the paint without damaging the plaster.
It's important to test that the stripper won't damage the plaster, so find an inconspicuous portion of the coving and allow the chemical to penetrate the paint for 30 minutes. Scrape away the paint making sure the plaster isn't damaged.
Use various sizes of paint scrapers, particularly small scrapers for detailed scrolling, and larger scrapers for the flat portions of the coving.
How to repair loose coving
It is possible that you may knock small portions of the plaster off. These will need to be carefully restuck with adhesive or putty to ensure your coving looks its best. If you're worried that you might ruin your period coving, find an expert to help rather than tackling the job yourself.
See the tradespeople we've checked for your job
Tips for painting Victorian coving
Whether you are planning to paint your coving in white emulsion, or add statement colour to make it stand out even more, here are some tips for creating a good finish:
Once you've defined the edges, filled the cracks and lightly sanded down the filler, give the coving a good clean with a cloth and clean water to remove any dust.
To ensure a super clean and dust-free surface, spray the coving lightly with sugar soap and wipe away any residue before starting to paint.
If you've stripped the coving right back to the plaster, you'll need to apply a primer before applying the topcoat of paint. Chose a primer that is suitable for bare plaster.
Apply the first coat of your chosen paint colour - matt emulsion is best. Leave to dry, and then paint over with a second coat.
FAQs
How much does it cost to repair victorian coving?
The average coving cost in the UK is £25 - £30 per metre, for the supply and installation of the coving. Prices for a whole room will obviously depend on the size of the space, the complexity of the job and the design of the coving, amongst other things. However, for one room you’re looking at a coving cost of around £335 to supply and fit standard coving. If you’re looking for a more ornate plaster cornice, the cost for the room would be around £850.
Find out more information in our coving cost guide.
How do you repair damaged Victorian coving?
Depending on what type of damage there is (plaster damage, paint damage etc), follow the steps in the guide above. If you're still unsure, contact a professional.
How do you repair ceiling coving?
Follow the steps above. Regular coving may not be as intricate as Victorian period coving, so it may be slightly easier.
Like what you see? There’s more where this came from. Why not check out our blog for more tips, how-tos and household inspiration?

See the tradespeople we've checked for your job