HOW-TO GUIDES
How to screed a floor
Updated 06/26
By: Content Team
Reviewed: Laura Macdonald

If you've ever walked across a floor and noticed dips, bumps or uneven patches beneath your feet, chances are the screed underneath wasn't quite right.
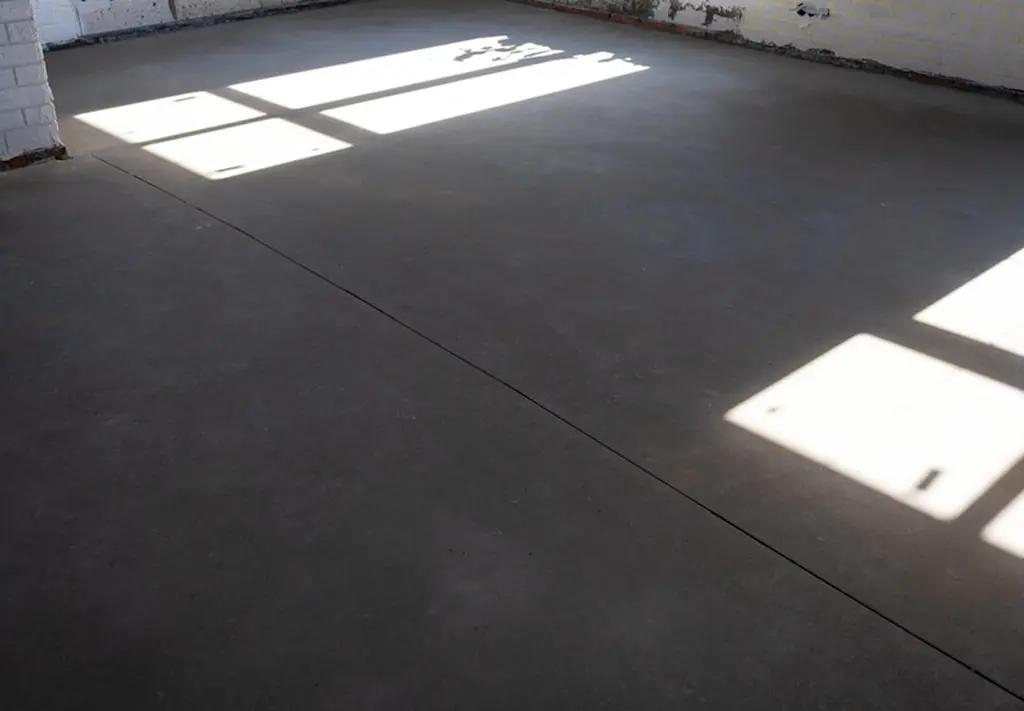
A properly screeded floor creates the smooth, level surface that your final flooring sits on.
Get it right and your tiles, laminate, vinyl or carpet will have a stable base. Get it wrong and you could end up with cracking, movement, uneven finishes and expensive remedial work.
What floor screeding involves
The different types of screed available
Bonded vs unbonded vs floating screed
How to screed a floor step-by-step
Floor screed thickness requirements
How long screed takes to dry
Common screeding mistakes
When it's worth hiring a professional
The good news is that screeding isn't impossible for experienced DIYers.
The catch is that it often looks easier than it is. Many DIYers only realise how demanding screeding can be once they're trying to keep a large area level before the mix starts setting.
This guide explains how to screed a floor, the different types of screed available, common mistakes to avoid, and when it's worth calling in a professional.
Quick answer: How do you screed a floor?
In simple terms, screeding involves:
Preparing and cleaning the subfloor
Installing any membranes or insulation required
Mixing the screed correctly
Pouring and levelling the screed
Compacting and smoothing the surface
Allowing sufficient drying and curing time
The exact process depends on whether you're laying bonded, unbonded, floating or self-levelling screed.
For larger areas, underfloor heating systems or projects where levels need to be absolutely precise, professional installation is usually recommended.
What is floor screed?
Floor screed is a layer of material applied over a structural floor (usually concrete).
Its job is to create a smooth, level surface ready for the final floor finish.
Screed is commonly used beneath:
Tiles
Laminate flooring
Vinyl flooring
Engineered wood flooring
Carpet
Think of screed as the layer that corrects imperfections before the visible flooring goes down.
What type of screed do you need?
Choosing the right screed is often the first challenge.
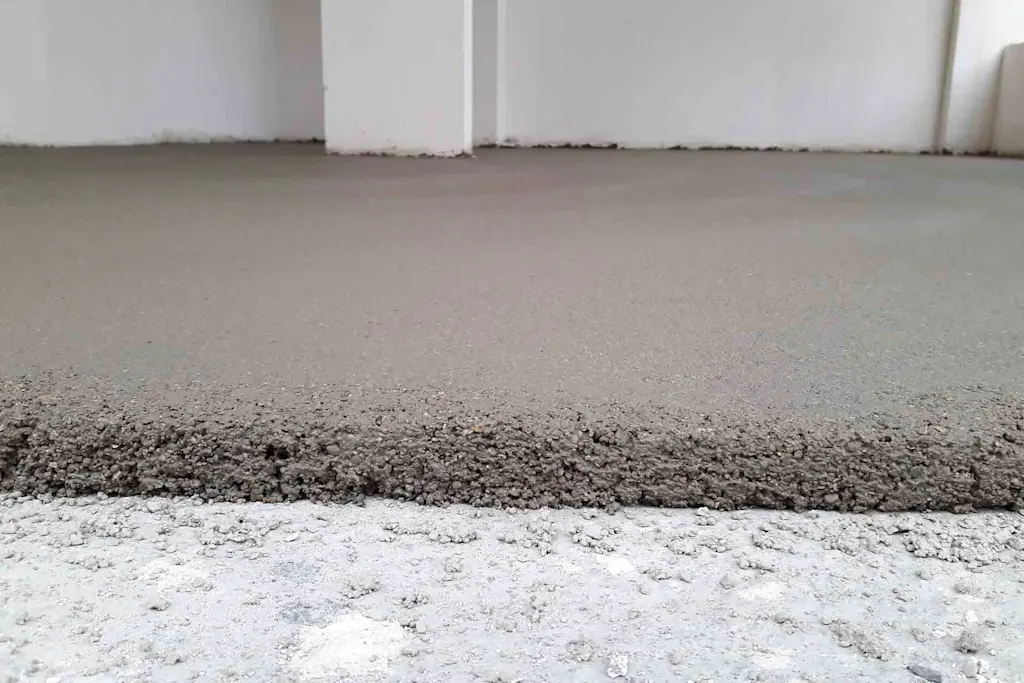
Traditional sand and cement screed
This is the most common option in UK homes.
It's made from cement, sharp sand and water and is suitable for most domestic projects.
Best for:
General floor levelling
New extensions
Renovations
Small-to-medium projects
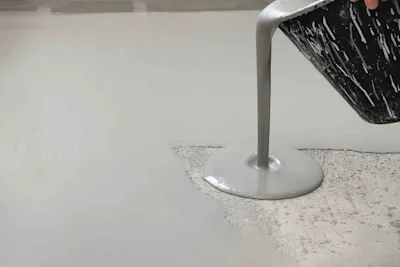
Self-levelling screed
Often called liquid screed or flowing screed.
It naturally finds its own level, making it quicker to install and particularly useful over large areas.
Best for:
Large open-plan spaces
Uneven floors
Projects requiring a very smooth finish
Fibre-reinforced screed
Contains polypropylene fibres to help reduce shrinkage and cracking.
Best for:
Larger floor areas
Areas prone to movement
Fast-drying screed
Designed to reduce waiting times before floor coverings are installed.
Best for:
Time-sensitive projects
Commercial environments
Renovations on tight schedules

Bonded vs unbonded vs floating screed
This is one of the most common points of confusion.
Bonded screed
Installed onto: Directly onto concrete substrate
Typical use: Thin applications and high-strength requirements
Unbonded screed
Installed onto: Damp-proof membrane
Typical use: Protection from moisture
Floating screed
Installed onto: Insulation layer
Typical use: Underfloor heating and insulated floors
Many homeowners assume all screed is the same. In reality, the type of screed and installation method can significantly affect thickness, drying times and long-term performance.
Floor screed thickness guide
The correct thickness will depend on the screed type being used.
As a guide, the minimum floor screed thickness is typically:
Bonded screed: 25mm–40mm
Unbonded screed: 50mm+
Floating screed: 65mm–75mm
Underfloor heating screed: usually 65mm–75mm
However, it's always best to check the manufacturer's guidance for your chosen product.
Tools and materials you'll need
For most screeding projects you'll need:
Floor screed
Screed board
Sugar soap
Duct tape
Straight edge
Spirit level
Float
Trowel
Hand tamper
Chipping hammer
Chisel
Shovel or mixing equipment
Edging foam
Wood battens
Polypropylene fibres (where required)
Damp-proof membrane (for unbonded screed)
Bonding agent (for bonded screed)
For larger projects, many professionals use forced-action mixers rather than standard free-fall mixers to achieve a more consistent mix.
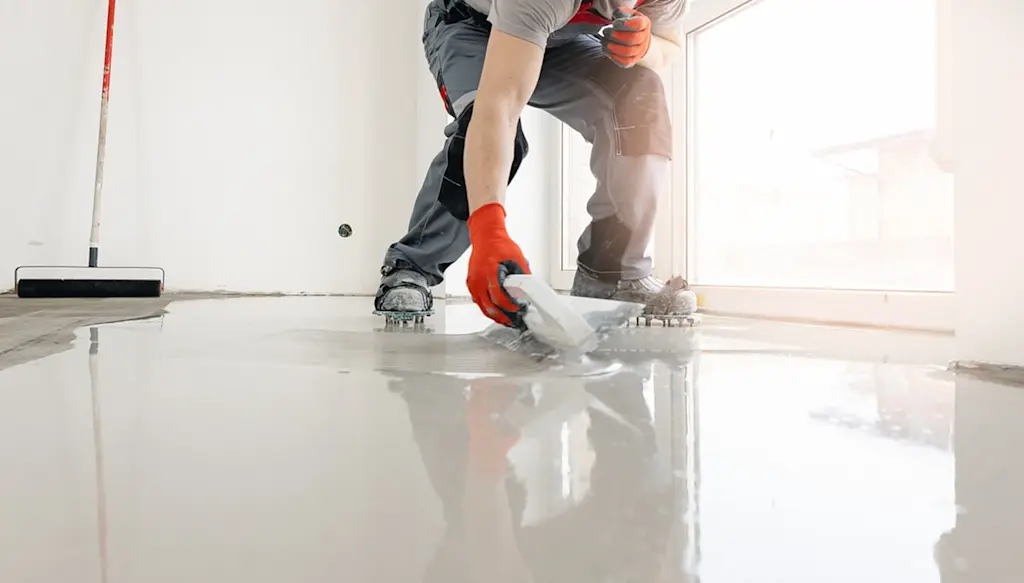
How to screed a floor
Screeding a floor isn't the most technically complicated job you'll ever tackle, but getting a smooth, level finish takes patience, accuracy and a bit of practice.
Most problems happen because the preparation wasn't quite right, the screed wasn't compacted properly, or the floor wasn't given enough time to cure. If you're planning to tackle the job yourself, here's the typical process.
Step 1: Prepare the subfloor
Before any screed goes down, the floor needs to be clean, stable and free from dust. This usually involves:
Removing existing floor coverings
Sweeping and vacuuming thoroughly
Repairing any major cracks or loose areas
Checking the floor is structurally sound
Fitting edging strip or foam around the perimeter of the room
If you're laying screed over underfloor heating, insulation boards or a damp-proof membrane, these should also be installed before screeding begins.
Most screed failures start with poor preparation rather than poor screeding. Spending extra time getting the subfloor ready is rarely wasted.
Step 2: Decide whether you're using bonded or unbonded screed
The preparation method depends on the type of screed you're installing. Bonded screed is applied directly onto the concrete subfloor. It's commonly used where floor build-up needs to be kept to a minimum.
To prepare for bonded screed:
Roughen the concrete surface to improve adhesion
Remove all dust and debris
Lightly dampen the substrate if recommended
Apply a bonding slurry or bonding agent according to the manufacturer's instructions
Unbonded screed sits on top of a damp-proof membrane rather than bonding directly to the concrete beneath.
To prepare for unbonded screed:
Lay a polythene damp-proof membrane across the floor
Overlap membrane joints by approximately 250mm and secure them with duct tape
Turn the membrane slightly up the walls
Install perimeter edging strip to allow for movement
Always follow the guidance for your chosen screed product. Different manufacturers may have slightly different requirements for preparation and installation.
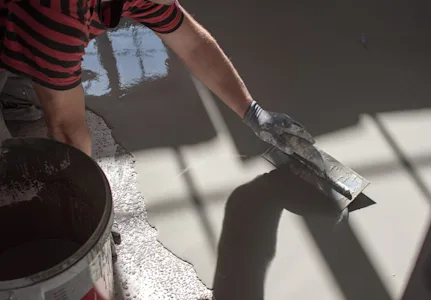
Step 3: Mix the screed correctly
Whether you're using traditional sand and cement screed or a proprietary screed mix, getting the consistency right is important. The screed should be:
Workable enough to spread and compact
But not so wet that it becomes difficult to level or prone to shrinkage
For larger projects, many professionals use forced-action mixers. Free-fall mixers can create inconsistent mixes and small clumps of material. A forced action mixer uses paddles to evenly mix the materials together.
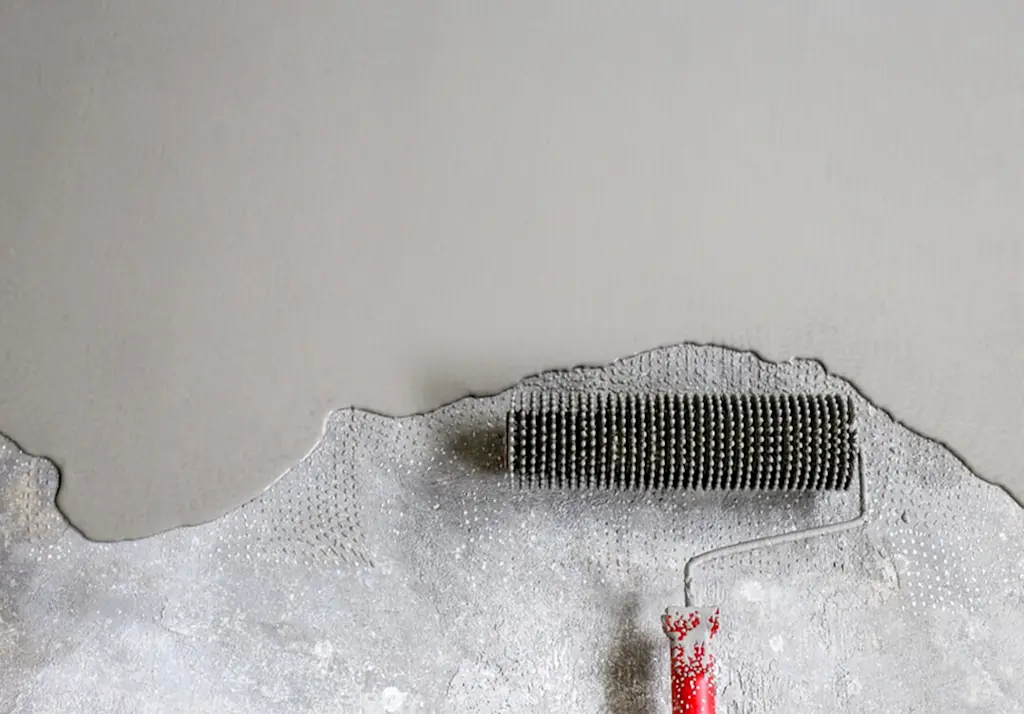
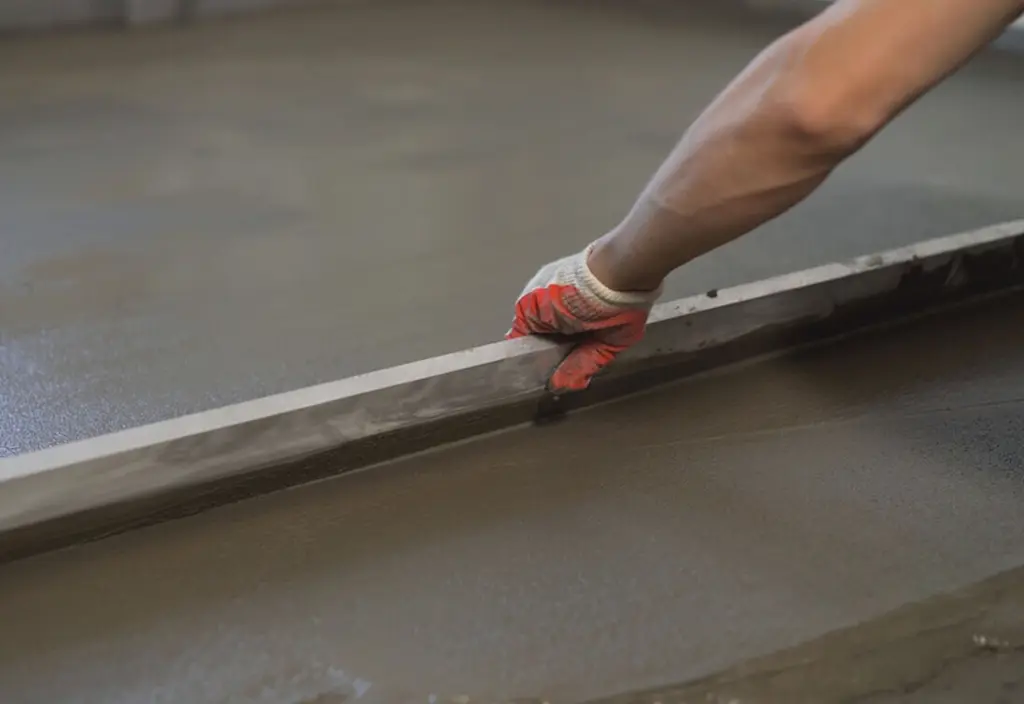
Step 4: Lay and level the screed
Once the screed is mixed, it's time to start laying it. Working in manageable sections:
Place screed between level guides or battens
Spread it evenly using a trowel
Compact it thoroughly to remove air pockets using a hand tamper
Use a straight edge or screed board to strike off excess material
Fill any low spots as you go
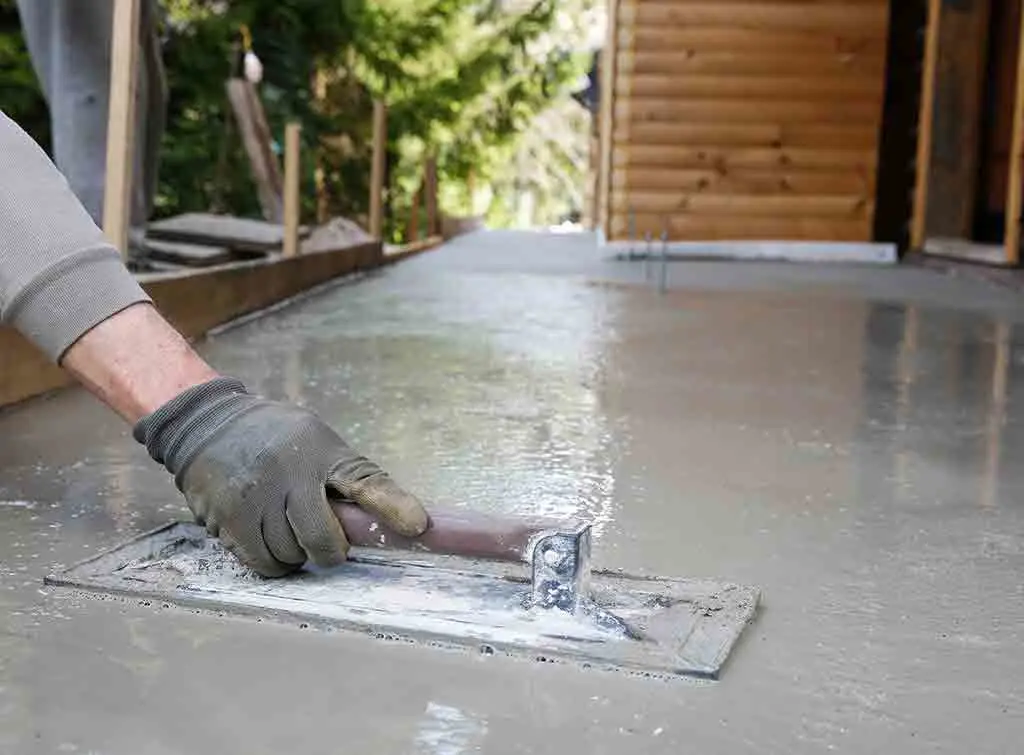
Smooth the surface with a float
Continue working methodically across the floor until the entire area is level. If you're using battens as guides, remove them once adjacent sections have been completed and fill the gaps with fresh screed.
Professional screeders constantly check levels as they work. It's much easier to correct small dips and high spots immediately than after the screed has started curing.
Step 5: Compact the screed properly
Compaction is one of the most important stages of the process and is often underestimated by DIYers. Without proper compaction:
The screed can weaken over time
Cracks may develop
Hollow spots can form beneath the surface
Flooring installed later may become uneven
Take your time during this stage. A floor that looks level but hasn't been compacted properly can still cause problems later.
Step 6: Allow the screed to cure
Once the screed has been laid and levelled, it needs time to gain strength. Depending on the product you're using, this may involve:
Covering the screed with polythene sheeting
Protecting it from draughts and direct sunlight
Avoiding foot traffic
Following the manufacturer's curing guidance
It's important to remember that drying and curing aren't the same thing. Even if the surface feels dry, the screed underneath may still be developing strength.
One of the most common causes of cracking is allowing screed to dry too quickly. Following the curing guidance carefully can make a big difference to the finished result.
How long does floor screed take to dry?
This is where expectations often differ from reality.
As a rough guide:
Traditional sand and cement screed
Walkable: Approximately 24-48 hours
Drying: Around 1 day per mm up to 40mm thickness
Liquid screed
Walkable: Typically 24-48 hours
Floor coverings: Often 3-6 weeks
Fast-drying screed
Can be ready for flooring in a matter of days, depending on the product
Just because screed feels dry on the surface doesn't mean it's ready for flooring. Moisture testing is often needed before installing floor coverings.
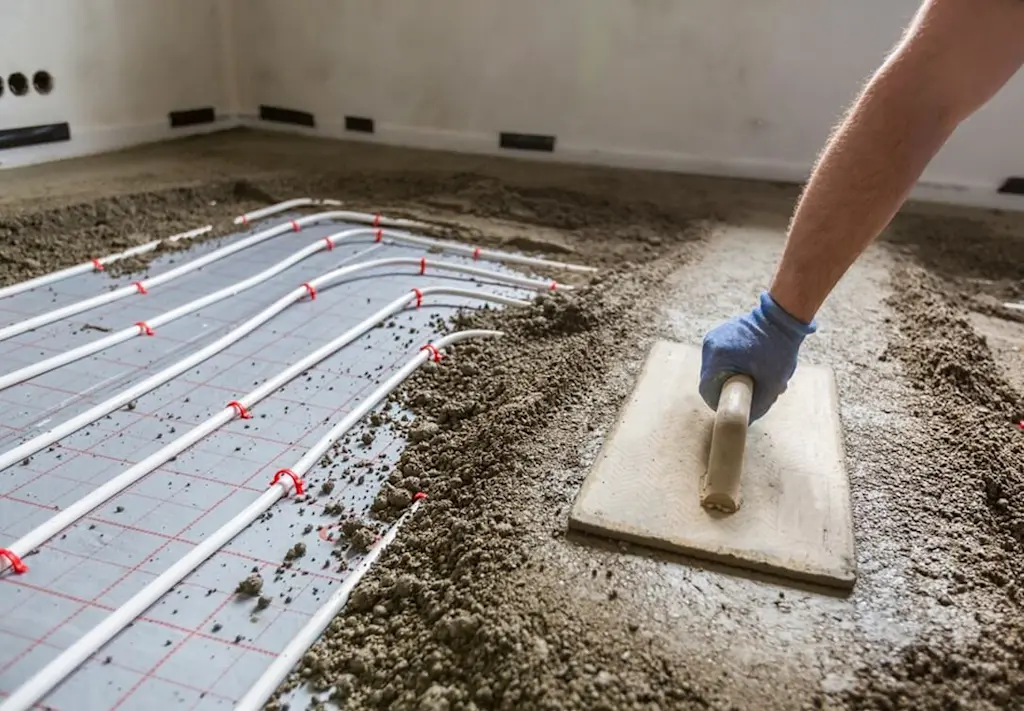
Best screed for underfloor heating
Underfloor heating places extra demands on a screed floor.
Fibre-reinforced screeds and liquid screeds are often preferred because they:
Reduce shrinkage
Minimise cracking
Flow around heating pipes more effectively
Distribute heat evenly
Poor screeding around underfloor heating is one of the most common causes of cracking later on.
Can you screed a garage floor?
Yes. In fact, garage floors are one of the most common places screed is used.
You might choose to screed a garage floor if:
The existing concrete is uneven
You're converting the garage into living space
You want to install tiles or another floor finish
The floor has minor surface damage, pitting or imperfections
Garage floors often need a slightly different approach because they may be exposed to:
Vehicle loads
Moisture
Temperature changes
If you're screeding a garage that will continue to be used for parking vehicles, it's worth speaking to a flooring specialist or screeding contractor about the most suitable screed type and thickness for the expected loads.
If you're planning a garage conversion, screeding is often completed before insulation, underfloor heating or final floor coverings are installed. Getting the floor levels right at this stage can make the rest of the project much easier.
Five screeding mistakes that cause cracked floors
Most screed failures come back to a handful of common issues, including:
Adding too much water: weakens the screed and increases shrinkage
Poor subfloor preparation: contamination can prevent proper bonding
Incorrect thickness: too thin and the screed may crack
Insufficient compaction: creates weak spots and voids
Drying too quickly: rapid drying often leads to shrinkage cracks
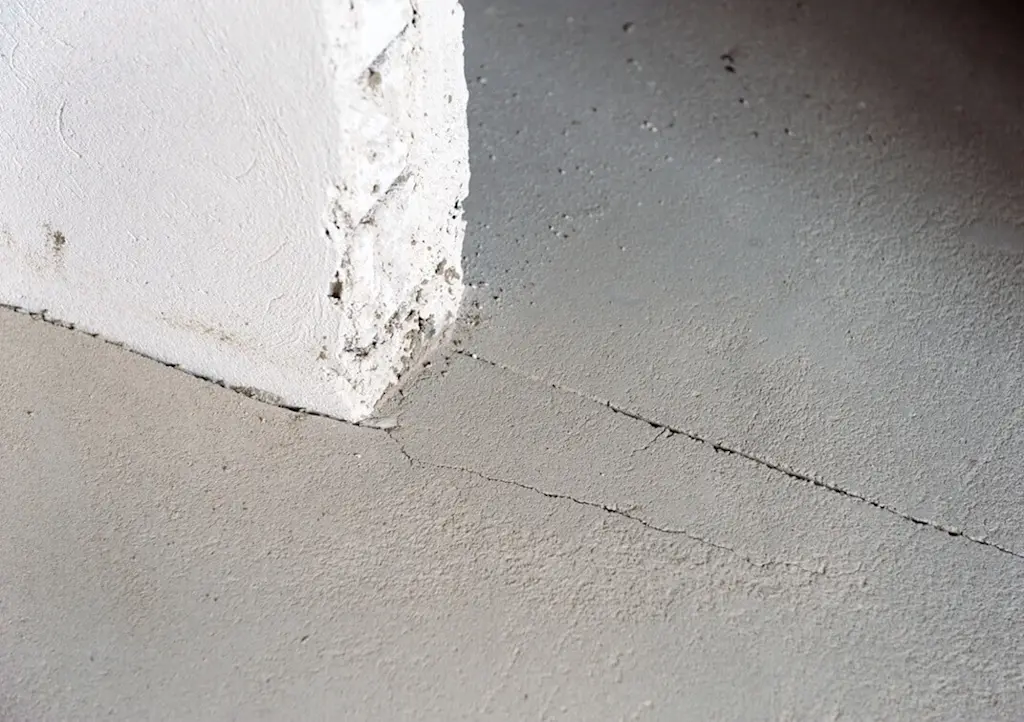
What happens if screed dries too quickly?
Many DIYers focus heavily on installation but overlook curing.
The trouble is, when screed dries too quickly:
Cracking becomes more likely
Surface strength can reduce
Uneven drying may occur
Final floor finishes can be affected
This is one reason professionals often cover screed during the curing period.
Can you screed a floor yourself — and should you?
Screeding isn't impossible as a DIY project. However, it requires accuracy, preparation and confidence.
DIY screeding is usually manageable if:
You're working in a small area
Levels aren't critical
You're experienced with DIY projects
You're using self-levelling compounds
It's usually worth hiring a professional if:
The area is large
Underfloor heating is involved
The floor finish needs to be perfect
You're working to tight deadlines
Multiple rooms are involved
The actual screeding often isn't the hardest part. Getting the levels perfect across an entire room is where experience really shows.

What do professional screeders do differently?
One reason professional screeding often produces better results is that experienced contractors approach the job differently.
Screeding contractors typically:
Use laser levels for accuracy
Calculate thickness requirements precisely
Use specialist mixing equipment
Monitor moisture levels properly
Understand drying and curing conditions
Spot potential problems before they occur
That's why professional screeding often pays for itself by avoiding the risk of costly flooring issues later.
How much does professional screeding cost?
As a rough guide, floor screeding costs average around £33 per m². This includes materials and labour.
Bear in mind, the price you're quoted for floor screeding will depend on the room size, screed type, thickness, ease of access and labour rates in your area. Our floor screeding cost guide has more detailed information.
Thinking about hiring a professional?
Here’s what recent Checkatrade customers said about hiring a screeding contractor:
“Wow these guys from start to finish were amazing, so easy to talk through my project, super responsive, always on hand when I needed something and the work was fantastic, I can’t recommend Daniel and he’s team enough 10/10.” Verified reviewer, DAC Home Solutions, (Location E2)
“The job was completed quickly and without any issues. Communication was straightforward and they were easy to deal with. The rates were very reasonable and everything was handled professionally. Appreciate the service – thank you.” Verified reviewer, AJ Flooring London Ltd, (Location SE25)
Find floor screeding specialists near you
If you'd rather leave the levelling, mixing and drying calculations to an expert, a professional screeder can help ensure your floor is level, stable and ready for your chosen floor finish.
With Checkatrade, tradespeople are:
Checked - Every Checkatrade member must pass up to 12 checks and commit to upholding the Checkatrade Standard
Reviewed - Over 6.2 million reviews have been published on Checkatrade about real jobs, on everything from communication, tidiness, timekeeping, and quality of work
Guaranteed - Jobs booked through Checkatrade are covered up to £1,000 (T&Cs apply)
Enter your postcode to connect with reputable screeding companies near you.
Find a screeding expert near you
FAQs
Small screeding projects can be manageable for experienced DIYers, but achieving a perfectly level finish across larger areas is much more challenging.
As a general rule, bonded screed should be at least 25mm thick, unbonded screed at least 50mm, and floating screed at least 65mm.
Typical screed thickness ranges from 25mm to 75mm depending on the screed type and application.
Traditional screed generally dries at around 1 day per millimetre up to 40mm thickness, although conditions and products vary.
Fibre-reinforced screed and liquid screed are often preferred because they reduce cracking and distribute heat effectively.
Yes, bonded screed is designed to be applied directly onto a prepared concrete substrate using an appropriate bonding agent.
Rapid drying can cause cracking, shrinkage and reduced strength, which may affect the finished floor later on.


See the tradespeople we've checked for your job