HOW-TO GUIDES
How to tile a splashback: step-by-step guide
Updated 07/26

Learn how to tile a splashback in just a few short steps, and transform your kitchen in no time.
What tools and materials you need before you start
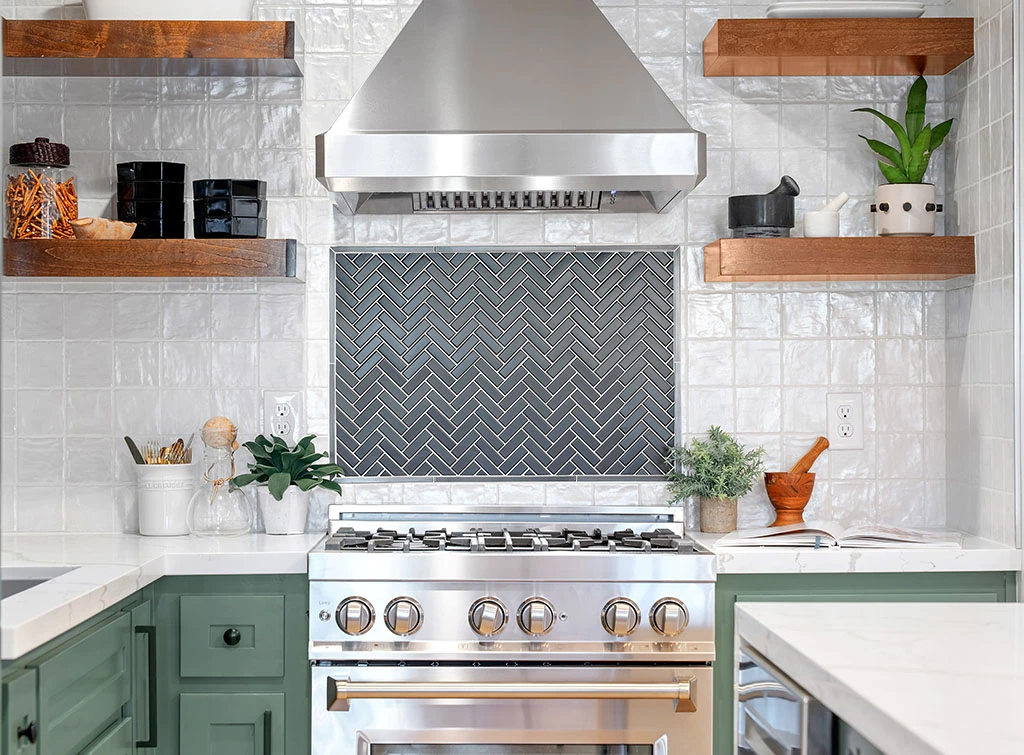
How to tile a splashback behind a cooker, hob, or sink
How to work around sockets, panels, or uneven walls
How to grout and seal for a professional finish
Whether tiling a splashback is a job you can DIY
How much it typically costs to hire a tiler
A tiled splashback protects the wall behind your hob, sink, or worktop from splashes, grease, and stains, and it's one of the easiest ways to update a tired kitchen or bathroom without a full renovation.
It also happens to be one of the more approachable tiling jobs to take on yourself.
If you want to learn how to tile a splashback, read on.
This guide walks through the process step by step, covering cooker splashbacks, sink areas, and what to do if your wall isn't quite as flat or clear as you'd like.
Tools and materials you'll need
All successful DIY jobs in the home begin with the prep.
Here's a handy list of the tools and materials you’ll need to tile a backsplash, so you’re fully prepared before you get started:
Tools:
Notched trowel spreader
Grout float
Tile cutter
Caulking gun
Spirit level (48-inch is ideal)
Tape measure
Materials:
Tiles (plus a few spares for breakages or mistakes)
Tile trim
Tile adhesive (waterproof, if tiling a wet area)
Ready-mixed grout
Tile spacers
Silicone sealant
Protective floor covering, gloves, and sugar soap
Two buckets, a clean sponge, and water
Measure your splashback area carefully before buying tiles, then add 10% extra to allow for cuts, breakages, and mistakes.
Find a skilled tiler near you
How to tile a splashback
Read our step-by-step guide on the process of what you need to do.
Step 1: Preparation
Cover your worktop and surrounding surfaces with protective sheeting
Sand down any lumps or uneven patches on the wall
Clean it all thoroughly with sugar soap and let it dry fully before you start tiling
Discovering damaged plaster behind an old splashback panel is a common issue once you strip it back. Fill any holes or missing sections with a cement-based tile adhesive rather than trying to tile straight over the gap.
Step 2: Measure and mark your centre line
Measure the width of your tiling area and mark the centre point on the wall, then mark a second centre point at the top of the area (where the tiling will stop)
Draw a vertical line connecting the two - this centre line keeps your layout symmetrical as you tile outwards
If you're tiling around an existing stainless steel or glass panel you're keeping in place, plan your layout around it first so you don't end up with an awkward sliver of cut tile at either end.

Step 3: Apply the adhesive
Choose the right adhesive for the job - a waterproof adhesive is essential in wet areas like behind a sink, and a cement-based adhesive is a safer bet over uneven or repaired plaster
Start at the bottom centre of your tiled area, use a notched trowel to apply a generous and even layer of adhesive where the first horizontal row of tiles will be placed
Comb vertical or horizontal lines into the adhesive first to expel trapped air and ensure a strong bond
Work in small sections since it sets quickly
Step 4: Lay the tiles
Place tile spacers along the worktop first to leave a small gap for caulking later, then lay your first tile at the centre line and work outwards
Use spacers between every tile for even gaps (mosaic sheets are the exception - they're pre-spaced)
Check each row with a spirit level as you go, and wipe away adhesive residue with a clean, damp sponge before it dries
Where you need a cut tile to finish a row, mark the cut line with a pencil (factoring in the spacer gap), score it with a tile cutter, then apply gentle, even pressure to snap it cleanly
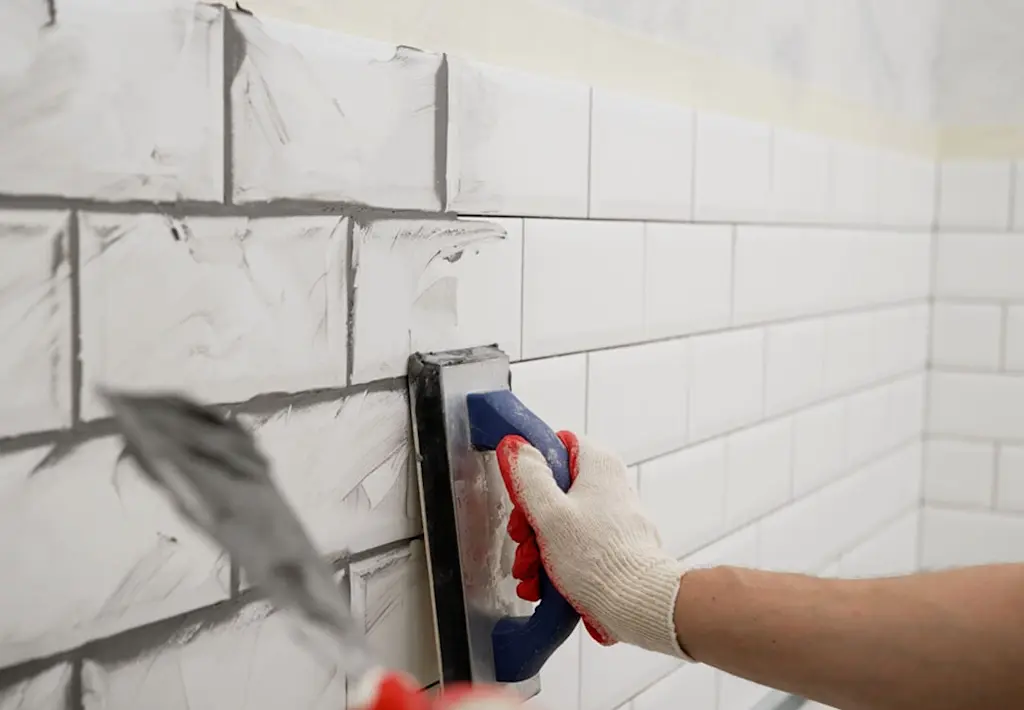
Step 5: Grout the tiles
Leave the adhesive to dry for a few hours before grouting
Choose a waterproof or anti-mould grout for kitchen and bathroom splashbacks, and mix only a small amount at a time to a thick, workable consistency
Apply grout with a float held at a 45-degree angle, pressing it firmly into the gaps, then wipe away excess after around ten minutes with a clean, barely-damp sponge.
Darker grout tends to hide grease and food splashes better than white grout around a cooker splashback, so it's worth considering even if you'd normally go lighter.
All starting to sound too much like hard work or simply haven't got the time? Get a rough idea of what a professional tiling job would cost using our interactive pricing tool below.
Or read on for the final steps!
Job Estimate Calculator

Find a skilled tiler near you
Step 6: Seal and finish
Run a line of silicone sealant along the edges of the splashback to make it watertight, particularly the horizontal gap between the worktop and the first row of tiles
Alternatively, a tile trim gives a neater finished edge and protects tile sides from chips - just make sure you've chosen the right depth to match your tiles plus adhesive thickness, and use a mitre block for any angled cuts
Some people also opt to use a grout sealer as well to protect the grout against stains
Keen to get a neat finish? Our how to apply silicone sealant guide can help with that.
Step 7: Clean
Hopefully, you’ve now got an impressive new splashback! Use a cloth to wipe away any smears, and you’re done!

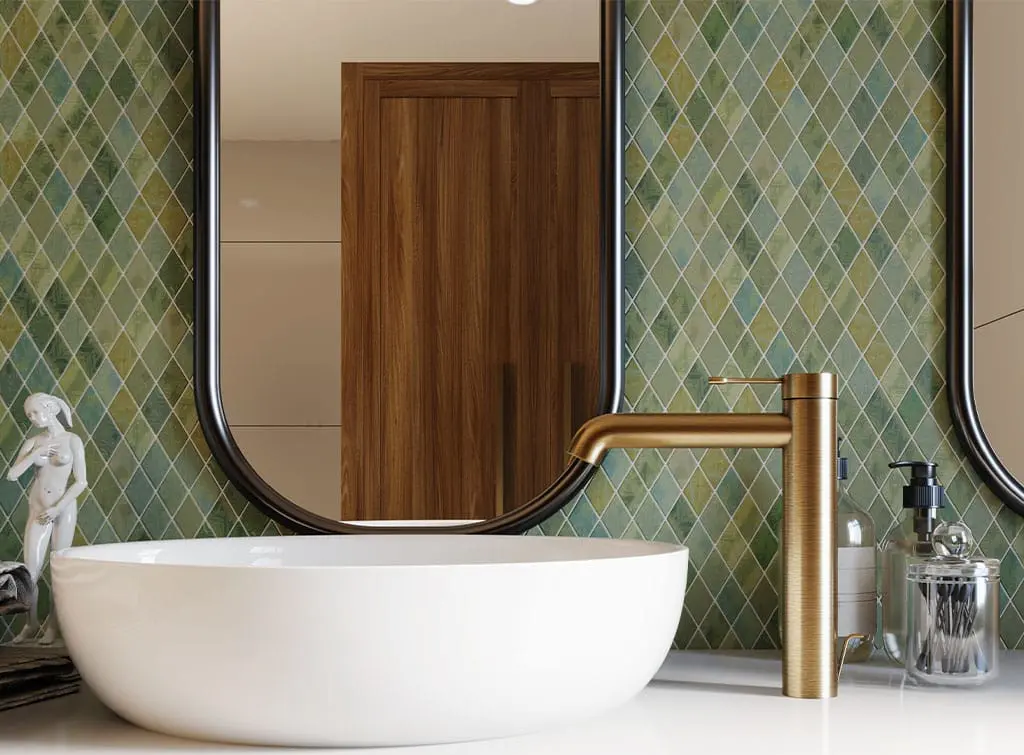
Looking for some kitchen tile ideas? From geometric tile splashback designs to subway styles, we've got it covered.
Find a skilled tiler near you
Tiling a splashback for a sink or basin
The skills and know-how to tile a splashback for a sink are exactly the same as tiling a kitchen splashback. Use our 7-step guide above to help you.
Just remember to use a waterproof adhesive and grout throughout, and don't skip the anti-mould variety if the area gets consistently damp.
Pay extra attention to sealing the join between the worktop or basin and the first row of tiles - this is the most common place water gets in.

Before you start tiling: Checklist
When to hire a tiler instead
Tiling a splashback is a manageable DIY project if your wall is flat and the area is fairly small and simple.
However it gets trickier with uneven walls, awkward socket cut-outs, an existing panel to work around, or if you want a more advanced pattern like herringbone or a mix of tile sizes.
If learning how to tile a backsplash feels like a stretch too far for your own DIY skills, search below to get quotes from experienced tilers covering your local area:
Browse checked local tilers working in your area
Enter your postcode to find a top tradesperson near you
MCA Construct
10.00
(5 reviews)Services & skills
Tiler - TilingBrick TilingNatural Stone TilesWall TilingQuartz TilingDE DECORATION
10.00
(19 reviews)Services & skills
Tiler - TilingBrick TilingQuartz TilingPorcelain TilesPlain TilesAG Oakes Tiling
10.00
(182 reviews)Services & skills
Tiler - TilingWall TilingSlate TilesNatural Stone TilesPlain TilesSolakov Tiling
10.00
(8 reviews)Services & skills
Tiler - TilingBrick TilingPorcelain TilesPlain TilesMosaic TilesReda Builders Ltd
10.00
(36 reviews)Services & skills
Tiler - TilingWall TilingFloor TilingQuartz TilingHand Made TilesIregal Renovations
10.00
(120 reviews)Services & skills
Tiler - TilingWall TilingQuartz TilingPorcelain TilesEmergency Tiling Service


Why use Checkatrade?
Checked - Every Checkatrade member must pass up to 12 checks and commit to upholding the Checkatrade Standard
Guaranteed - Jobs booked through Checkatrade are covered up to £1,000 (T&Cs apply)
Reviewed - Over 6.2 million verified reviews
This Bristol homeowner hired Checkatrade-approved Paul lingo Ceramic Tiling for their kitchen splashback tiling job:
Excellent job. Good price and attention to detail and listened to what I wanted. Good communication throughout. Would definitely use Paul Lindo again.
How much does it cost to tile a splashback?
If you decide to hire a professional tiler, costs depend on the size of the area and the tile you choose.
For a full breakdown of labour costs and what affects the price, see our tiling cost guide below.

How much does tiling cost in 2026?
Discover average tiling costs in the UK, including bathroom, kitchen, and floor tiling prices per m², alongside tips to budget wisely.
Frequently asked questions
When tiling a splashback, start at the bottom centre of the area and work outwards towards the sides. This keeps the layout symmetrical, especially important if your tiles have a pattern.
Tiling a splashback is a fairly manageable DIY job on a flat wall with few obstructions, if you've got the time. Uneven walls, sockets, or cabinets to tile around make it more difficult.
To set a tile splashback without a worktop to rest on, you'll need to screw a timber batten to the wall, levelled with a spirit level, to support the first row of tiles while the adhesive sets. Use spacers between the batten and the tiles.
Mosaic tiles on a mesh backing are among the easiest for DIYers, since they're pre-spaced and easy to trim. Peel-and-stick tiles are even simpler but aren't genuine tiles.
Tiling a cooker splashback follows the same method as a standard splashback, though it's worth choosing a darker grout and a wipeable, non-porous tile to cope with grease and heat.
Mosaic sheets don't need spacers since the tiles are pre-set on a mesh backing. Apply adhesive as normal, press the sheet into place, and use a grout float to work grout into the small gaps once dry.
A waterproof, and ideally anti-mould, tile adhesive is best for bathroom splashbacks given the consistent moisture and humidity.
It's not recommended to tile over an existing splashback panel. Remove the old panel first and check the plaster underneath is sound, filling any damage with adhesive before you tile.
See the tradespeople we've checked for your job