Blog>Expert Advice>Building a summer house
Last updated: 25 January 2022

Building a summer house
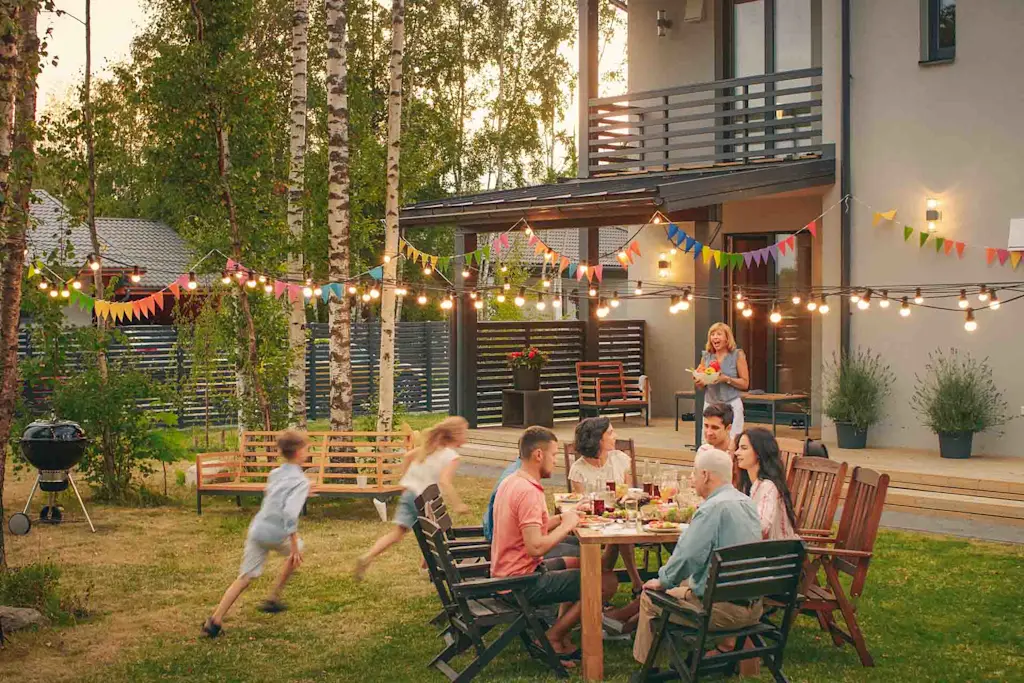
Building a summer house in the garden is a popular choice for many UK homeowners. With summer just around the corner, it's worth considering how you can best spruce up your back garden so you can enjoy the summer evenings in style.
Building a summer house in the garden is a popular choice for many UK homeowners. With summer just around the corner, it's worth considering how you can best spruce up your back garden so you can enjoy the summer evenings in style.
Summer houses come in various shapes, designs, and styles. There are ready-made versions, DIY designs, or bespoke models worth hiring a professional to help you install. Keep reading for our expert guidance on building a summer house.
Planning your summer house build

Installing a summer house in your back garden isn't as simple as it sounds. Before you get started, you need to plan each detail and draw up a cost analysis to make sure you're able to carry out the works required.
Check out our summer house ideas and summer house cost guide for more information.
Note: Summer houses sit under the umbrella of 'permitted development,' which means you don't need planning permission to build one in your garden. However, they still need to be single-story and no more than 2.5m high if less than 2m from your garden or house boundary.
How to build a summer house step by step
Before you get started, follow these planning steps:
Use some string and stakes (or chalk) to work out the rough square footage of your summer house. Note down these measurements.
Decide whether you want a ready-made summer house, DIY or professional installation. (Go to the next section if you picked DIY).
Make sure there's a solid and level base for your summer house to sit on – either paving slabs or concrete. In extreme slope cases, you might have to hire a digger to level your garden. Otherwise, you can dig the earth to level it using our 'how to level a garden' guide.
Decide on the materials and shape of your summer house. For example, double glazing and a pitched roof will cost more. (Note: Most ready-made designs will offer these options as standard).
Consider any decorative features, such as decking, landscaping, paint, and the house's overall finish. Some summer houses look great with cladding, while others look better left natural.
Once these basics are worked out, consider hiring the following professionals to help with the installation: landscaper, gardener, builder, and electrician.
See the tradespeople we've checked for your job
Fancy going DIY with your summer house build?
How to make a summer house
Unless you're a builder or experienced DIY'er, you've likely chosen a pre-made summer house design. These kits are great for various reasons, including their ease of installation, pre-checked requirements (which means no planning permission issues), and relatively quick set-up.
Before you get started, make sure you've checked the following:
Full instructions are provided.
All the required materials have been provided (screws, wood, roof etc.).
Whether the wood is pre-cut and planed (otherwise you might have to do this yourself).
The kind of construction method required (e.g. shiplap vs. tongue and groove).
Whether there are any electrics included. You need to make sure they're incorporated into the design so they're not left on external surfaces.
Once these queries have been answered, it's time to begin your installation.
Here's how to build a summer house
Depending on how complex the installation is, you can expect your summer house installation to take up to five days. As a result, make sure you begin construction during a mild week when there's next to no wind or rain. A professional installation will take less time as well as making sure it's completed to a high standard, so it's always worth considering that option.
Step one: Lay your foundations
Summer houses need a solid and firm base to rest on to ensure their longevity. That's why it's important to make sure they have a sturdy foundation. It also reduces the likelihood of leaks and subsidence.
One of the most popular ways to lay a foundation is to dig a trench and fill it with concrete. Read our how-to lay block paving guide to learn the basics. Alternatively, you can use ground screws (which are up to 2.5m long) to support your summer house. This option allows you to move your summer house at a later date without incurring large costs.
Top tip: Speak to a builder or structural engineer who'll be able to advise you on the best foundations relative to your summer house design and soil type.
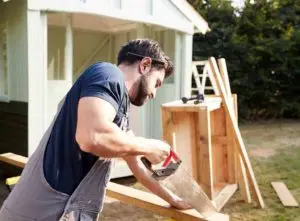
Step two: Build your summerhouse
Tools required:
Screwdriver
Handsaw
Spirit level
Mallet
Hammer
Tape measure
Drill
Ladder
Another person
DIY kit and materials
Now your foundation is laid, it's time to put together your summer house as per the instructions on your DIY kit. Before you get started, make sure you have all the parts stated in the handbook. Then, follow each step carefully, one by one.
One of the most important aspects of your summer house is the roof. You need to make sure it's sturdy, weighted and weathertight when fitted to the foundations of the summerhouse. The same goes for the windows and doors. The foundations all need to be level with appropriate guttering to ensure run-off.
Don't forget to read our 'how to build a summer house guide for more comprehensive information.
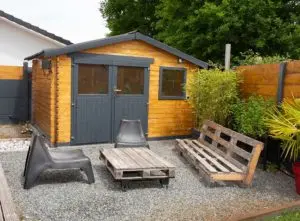
Step three: Add the finishing touches
Not all DIY kits come painted, so it's worth considering what finish you'd like on your summer house to make it attractive and weatherproof. This is also a good time to take measurements of the inside of your summer house so you can shop for furniture and accessories.
Why not check out our summer house ideas to help inspire your shopping trip? Alternatively, hire an interior designer to really help your summer house pop.
Step four: Maintain your summer house
Once your summer house is completed, it's time to enjoy it. However, to make sure it lasts, make sure you know what maintenance is required. For example, how often it requires a top-up of wood treatment preservative.
Another thing you might notice is how your wooden summerhouse shifts and settles weeks or months after installation. This is perfectly normal and just requires some extra tweaking or readjusting of doors and windows. You'll know this is the case if they stick or jam.
Most summer houses will come with a guarantee of at least 10 years. However, it's always worth doing your part to maintain it.
See the tradespeople we've checked for your job
How to build a summer house on a budget
Building a summer house on a budget begins during the planning stage. It starts when you consider the square footage, shape, and design of your house. For example, smaller designs, cheaper wood, a less extravagant roof, ground screws and a flat-packed kit will all save you money.
For professional fees, a rough estimate for a concrete building on a new concrete foundation will cost an average of £10,000, including labour. Expect to pay around £3,000 (including labour) for a basic timber cabin, £7,500 for a pre-made kit, and up to £25,000 for a custom design.
How to lay a concrete base for a summer house
Want to how to build a summerhouse base? Check out the following guides:
Alternatively, use ground screws to secure your summer house.
How to build an insulated summer house
Building and insulating a summer house is similar to building and insulating a normal property. However, it costs less due to the smaller square footage. Consider adding double glazing and roof, floor, and wall insulation to keep your summer house cosy, even in winter.
More Summer House Design / Construction Articles

See the tradespeople we've checked for your job