PLANNING GUIDES
Kitchen renovation planning guide: How to plan your project step by step
Updated 10/26
By: Tom Blake
Reviewed: Kim Staples
The kitchen is the heart of the home, so a kitchen renovation (or remodel, if you prefer) is one of the biggest projects most of us take on. Get the planning right and the rest of the project runs far more smoothly. Get it wrong and you can find out on installation day that the layout, the measurements or the order of work don't add up.
How to plan a kitchen renovation from scratch
How to pick a kitchen layout, colour scheme, and style
How to measure your kitchen accurately
What drives the cost of a kitchen renovation
What order the work usually happens in
Which tradespeople you need, when you need them, and how to hire them
This kitchen renovation planning guide takes you from first ideas through to design choices, measuring up, budgeting, demolition, and hiring the right people.
Whether you're a confident DIYer or plan to leave it all to your trusted tradespeople, it will help you make decisions in the right order.
Kitchen renovation ideas and inspiration
Every kitchen renovation starts with an idea. You might have a dream kitchen in your head, a folder of clippings, or a blank canvas.
So let's help you narrow down your colour, layout, lighting, and finishing choices before you start spending.

Choosing a kitchen colour scheme
Colour has a huge impact on how a room feels, and it's the combination of colours that does the work. A colour wheel is a simple way to build a palette.
Three common approaches to colour in interior design include:
Tonal: Pick one base colour and use different tones of it throughout. Ideal for a calm, contemporary look.
Harmonious: Pick a colour and work in its neighbours on the wheel. The colours complement each other without being too similar, which suits a themed kitchen such as farmhouse.
Complementary: Pair colours from opposite sides of the wheel for contrast and a statement look.

Before you commit to a scheme, think about the mood (neutral tones for calm, brighter colours for energy), whether the kitchen should blend with the rest of your home or make a statement, and the light and size you have to work with.
Lighter tones help a small or dark kitchen feel brighter, while larger, bright kitchens can carry darker tones.
Magazines and Pinterest boards can show you which themes you're drawn to - follow our guide to how to create a mood board for a handy way to pull your favourites together.
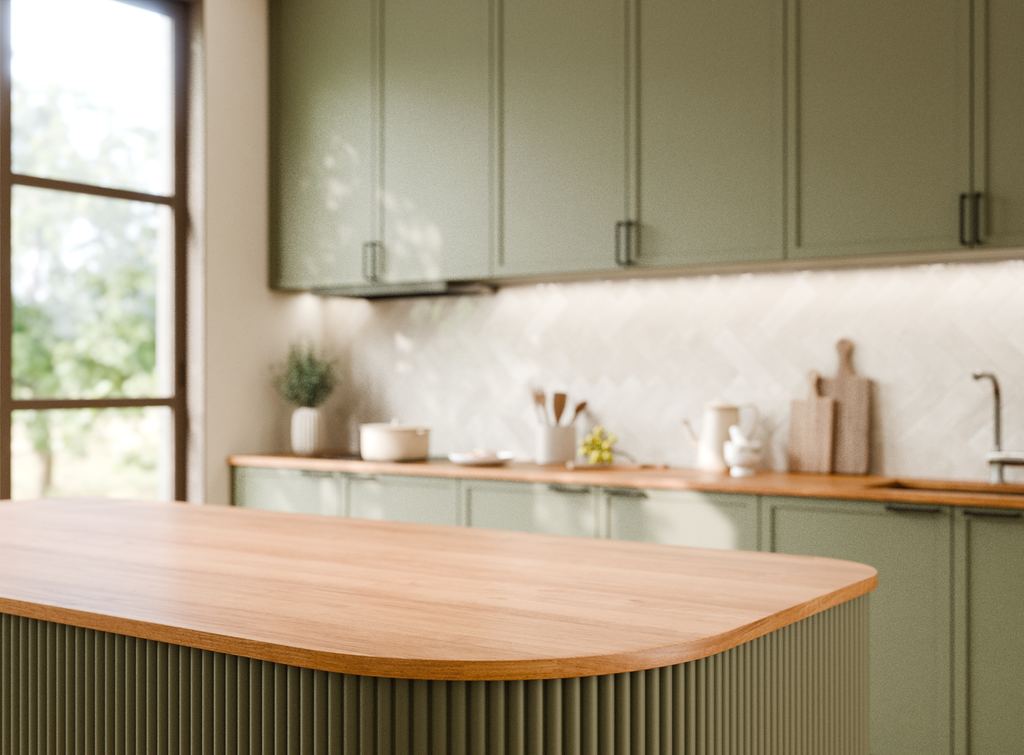
Kitchen colour ideas: 13 colour combinations to inspire your kitchen
Explore kitchen colour ideas, from sage green and dusty blue to bold orange, plus what goes with grey units and how to choose colours for a small kitchen.
Popular kitchen layout ideas
Stunning colours and finishes might make you swoon, but it's the layout that will ultimately decide whether you love using the space.
The most common kitchen plans are:
Island: Add a freestanding unit that adds worktop, storage, and seating space
Straight (single wall): Everything along one wall, good for compact spaces or open plan kitchen-diners
L-shape: Two adjoining walls, flexible and open
P-shape: An L-shape with a peninsula for extra surface and seating
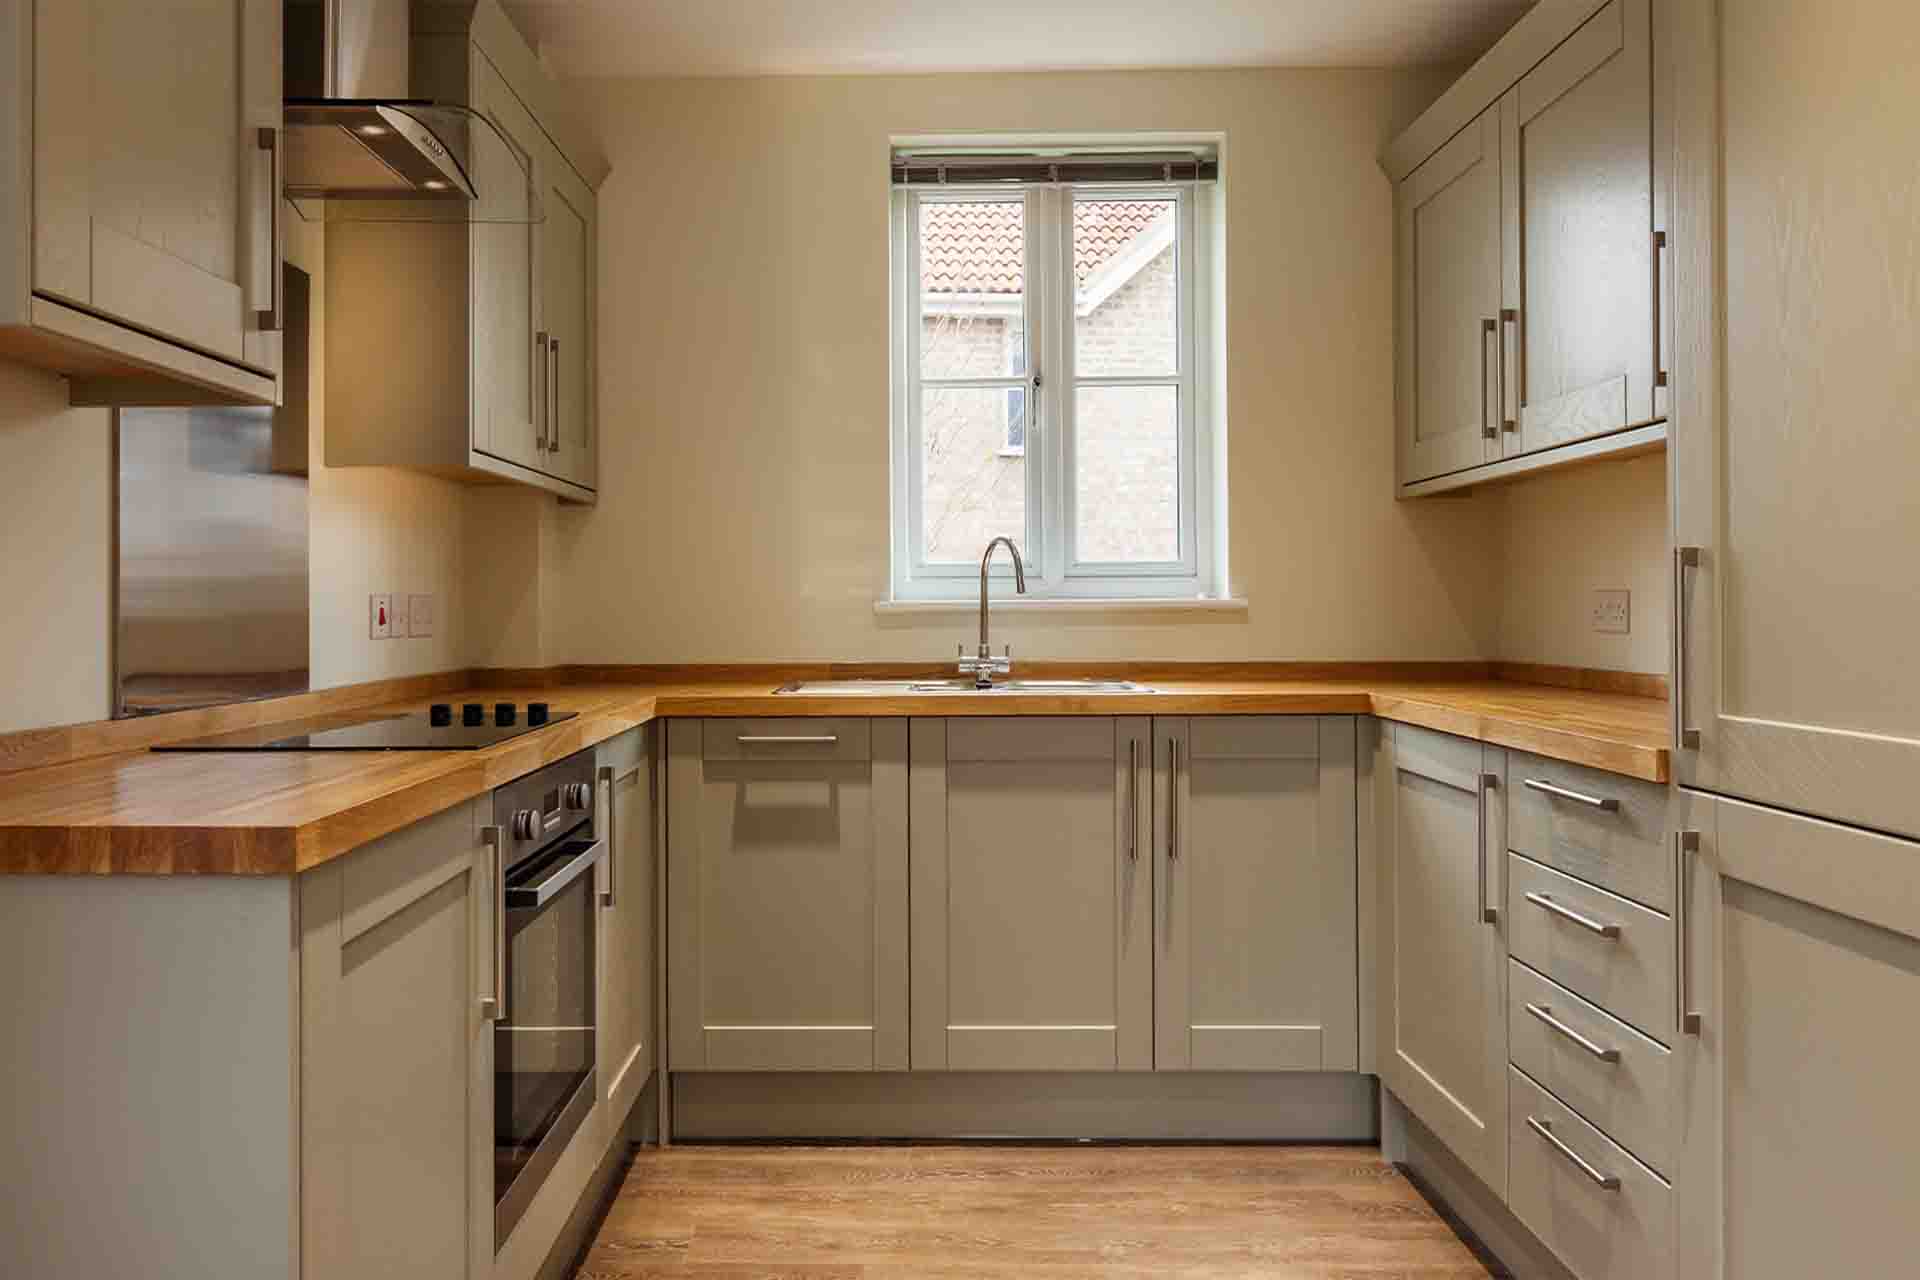
U-shape: Three walls of units, with lots of storage and worktop room
Open plan: In which the kitchen flows into the dining or living space
Galley: Two parallel runs, efficient for narrow rooms
Planning one of these layouts, or something that mixes them, is much easier with a the help of a kitchen designer. They can help turn your ideas into a plan you can price up.
Our guide to hiring a kitchen designer explains what to expect.
Find kitchen designers near you
Kitchen lighting design
Good lighting does more than just illuminate a room. Done properly, it shapes the style, mood, and atmosphere of your kitchen.
Aim to include at least one of each of these:
General (ambient) lighting spreads light around the whole kitchen, for example from a ceiling light or spotlights
Task lighting helps with jobs like food prep, for example lights above the worktops
Accent (spot) lighting draws the eye to a feature, such as artwork, a recess, or glassware in a cabinet
Kitchen splashback ideas
A splashback is functional first, but it can also be a beautiful design feature.
Tiles (e.g. porcelain, ceramic, mosaic, or metro) are versatile and good value
Glass is practical and subtle, with acrylic working well as a lower-cost alternative
Mirror bounces light around
Stainless steel and pressed metal give a sleek, industrial look
Copper is warm and dramatic
Marble has unique veining, making it a wonderful design feature
Wood is cosy, but needs treating against water and stains
Exposed brick adds rustic texture - or adds to an industrial look
For more budget-friendly options, see our cheap splashback ideas for kitchens.
Kitchen window dressings
Blinds, shutters, curtains, or window film all work in a kitchen.
Choose something washable, and if the window is above a sink, pick a waterproof or moisture-resistant material.
Shutters give a clean finish and let you adjust privacy and light, while curtains soften the look and add insulation.
If you want to make your own curtains or buy ready-made, our guide to measuring for curtains walks through the steps.
How to plan a kitchen layout
Aesthetics aside for a moment, these are the layout principles that make a kitchen easy to live in.
The work triangle

The "work triangle" is the relationship between your hob or oven, fridge, and sink, the three things you use most.
Keep them close enough that you're not carrying hot pans or heavy pots across the room, but not so tight that you can't move.
Leave a heatproof worktop beside the hob or oven and a landing space next to the fridge.
Avoid placing the oven directly next to a wall or tall cupboard. A little free surface either side makes cooking much more comfortable.
Plan your electrical sockets early too. Think about where you'll use small appliances, and include sockets at a convenient height as well as low down for things like the vacuum.
Your electrician can advise on how many you need and where.
How will you use the space?
People gravitate to the kitchen, so plan for how your household actually uses it:
Do you need a drop zone for coats, shoes, and bags before people enter the kitchen, such as a bench with storage or a utility area?
Is it just for cooking, or also for dining? A breakfast bar or island with stools may do the job, or you may want a full-sized table.
Do you want a sociable, open plan space where you can cook, entertain, and keep an eye on children?
Perfect positioning
Here are some of our top tips for positioning your units, furniture, and fixtures in a kitchen.
Keep the main walkway clear, so ovens and dishwashers don't open into it, and leave plenty of room to stand and open appliance doors comfortably.
If you're adding an island, make sure it doesn't block the area in front of your main appliances. If worktops face each other, leave enough space for two people to work at once.
Designers often place the sink first and plan around it. A spot with a view, by a window, or facing into the room all work well.
Positioning the oven or hob on an exterior wall can often make ventilation simpler and cheaper to install. Ask your fitter for advice.
Make the most of your storage
Think about what you need to store and where. You may want wall cabinets, a pantry, or larder to hide small appliances and dry goods, and open shelves, hooks, or overhead racks for equipment.
A kitchen designer can turn your measurements and wishlist into a plan you can see.
Choosing your kitchen cabinets, worktops, and flooring
Now come the big decisions. Each one affects how your kitchen looks, how well it lasts, and how far your budget stretches.
The six most popular kitchen cabinet styles

Shaker: A traditional, classic style that never really dates and combines easily with other elements and styles
Glass-fronted: Shows off what's inside and bounces light around. The trade-off is that you may want to keep the contents tidy
Tongue and groove: Vertical slats of wood, sometimes called beadboard. Textured and relaxed, popular in cottage and Scandi-style kitchens
Flat-fronted: No panels or frames, so very easy to wipe clean. Suits modern, minimalist kitchens
Plywood: Strong and durable, with an organic, warm look often seen in Scandi kitchens
Natural wood: Offers a rustic, informal feel. Needs treating so grease and moisture don't penetrate the wood
If you have a theme in mind, such as farmhouse, minimalist, or industrial, it will narrow your choices down quickly - and don't be afraid to mix styles!
The finish, the quality of the material, the hardware (e.g. handles and knobs), and extras like a spice drawer or wine rack all affect both the look and feel of your kitchen and the price you pay for it.

Kitchen cabinet design ideas: how to get the perfect blend of style and substance
Don’t know where to start with a new kitchen? Our kitchen cabinet design ideas will help you pick the perfect colour, style and storage tips.
Kitchen worktop materials: Pros and cons
Your worktop is one of the hardest-working surfaces in the room - it has to cope with spills, heat, and water as well as looking good.
Granite and quartz options sit at the higher end, while laminate can mimic them for far less money.
It's also on-trend to mix materials - for example, a premium and unique surface on an island with laminate elsewhere.

Your main options are:
Laminate: The best budget option, easy to maintain, stain resistant, and available in lots of designs. Not resistant to heat or steam, and not suitable for cutting directly on.
Granite: Luxurious, durable, and resistant to scratches, heat, water, and most stains. Fairly expensive and heavy to manoeuvre, and may need sealing, so follow your supplier's care advice.
Solid hardwood: Warm and full of character. Needs sealing and long-term care, and isn't heat resistant or suitable for cutting on.
Quartz: Easy to clean, low maintenance, non-porous, stain and scratch resistant, and available in a wide range of colours. Can be very expensive, and heat can damage it.
Glass: Reflective, non-porous, and heat resistant when toughened. But it can scratch, and needs frequent wiping to avoid water marks.
Composite (engineered stone): Consistent colour, tough, non-porous, and resistant to scratches, stains, heat, and impact. More expensive than wood or laminate.
Stainless steel: Strong, hygienic, and impervious to water, which is why it's used in commercial kitchens. Prone to scratching.
Granite and stone composites also need to be templated by a supplier, which costs extra. Straight runs are cheaper and easier to fit than curved or radius corners and chamfered edges.
Our guide to replacing kitchen worktops covers what affects the price, and our worktop ideas page has plenty of inspiration.
Visit showrooms and order samples, so you can see how a worktop looks and feels in your own home before place an order.
Choosing the best flooring for your kitchen

A kitchen floor takes a lot of punishment, so it needs to be practical as well as look good.
Think about the style you want (flagstone suits a farmhouse kitchen, polished concrete a contemporary one); its purpose (consider children, pets, muddy boots, and spills, plus underfloor heating if you want it); and your budget (hardwood and natural stone cost more, but laminate or vinyl can give a similar look for less).
Grey is a popular colour for kitchens because it's neutral and doesn't show dirt easily, while a lighter floor helps open up a dark or very small kitchen.
Here are the main flooring choices for kitchens, along with their pros and cons:
Tiles (ceramic, porcelain, natural stone): Lots of design choices available, hard-wearing, water, and stain resistant. Can be cold and hard underfoot, and takes time to install.
Hardwood: Timeless, and can be sanded and refinished. But it can be expensive, needs regular care, and can be damaged by prolonged exposure to moisture.
Terrazzo: Durable, and water and stain resistant. Cold and hard underfoot, needs proper sealing, and is one of the more costly options.
Concrete: Sleek, modern, and easy to clean when sealed. Hard and cold underfoot, and needs repolishing every few years.
Vinyl: Soft underfoot, cost-effective, and water resistant, with a huge range of designs to pick from. Shorter lifespan than wood or tile, and the floor must be level before laying - which can make it more difficult to install.
Linoleum: Made from natural materials, comfortable underfoot, and water resistant. Can discolour in direct sunlight, and needs periodic sealing.
Laminate: Wide choice of wood or stone looks, strong, and easy to install - makes a great alternative to the real thing. Prolonged moisture can cause warping, so look at water-resistant versions.
Bamboo: Durable, easy to maintain, and cheaper than hardwood. Limited styles are available though, and it can scratch, fade, and be damaged by excess water.
Cork: Comfortable, non-slip, and low maintenance. Can be easily damaged by pets and furniture, and needs sealing against spills.
For more, see our kitchen floor ideas.
How to budget for your kitchen renovation
The cost of a kitchen renovation depends on the scope of the work, the complexity of the design, and the finishes you choose.
For realistic price ranges, our kitchen renovation cost guide breaks down what people typically pay, and our kitchen fitting cost guide covers the labour side.
Whatever your budget, set one before you start. Then:
Make a list of everything you need, from the top down: lighting, paint, splashbacks, window dressings, cabinets and shelves, worktops, sink, taps, appliances, and flooring.
Add the cost of labour for anything you won't do yourself, such as a kitchen fitter, a plasterer, or an electrician. Our cost guides can help you price individual items.
Allow for services. For instance, if your island will hold a sink or appliances, you'll need new plumbing and electrics, which should be in place before the floor goes down.
Think about the boiler. If your water pressure is low or takes a long time to heat, now is the time to ask whether a new boiler fits the budget.
Add structural work if you're changing the footprint. You may need an architect (see architect fees), a structural engineer to calculate the steel beam (see structural engineer costs), a Building Regulations application and inspections, and a builder (see builder day rates).
Kitchen renovation cost calculator
Want a rough idea of where your project sits before you start comparing quotes? Answer a few questions about your kitchen and get a guide price to help you plan your budget.
Job Estimate Calculator

How to measure a kitchen
Measuring up is the foundation of your design, so measure twice to avoid costly mistakes. You'll need paper and a pencil, a tape measure, and a step ladder.
Taking your own measurements can save money, but only do it if you're confident you can get it exactly right. Many kitchen designers and suppliers will survey and measure for you, and that survey is often what their design and guarantee depend on.
Diagram 1: Floor layout
Sketch the room and measure between each fixed point. Start at the edge of the door frame architrave, measure to the corner, then to the window reveals, and carry on all the way round.
Measure the size and position of everything that will stay, such as the boiler, and include any alcoves
Mark doors and windows, including the direction they open
Mark where your water, gas, and electrics currently run
Diagram 2: Walls

Sketch each wall separately.
Include the position of windows and doors, electrical sockets, and fittings
Note the position of the gas cooker point, radiators, air vents, and the extractor fan
Add any fixed objects you'll need to work around
Diagram 3: Vertical measurements

Record the ceiling height and any other vertical distances, such as the gap between the bottom of the window reveal and the floor.
Walls aren't always straight, so take more than one measurement where needed.
How to measure a kitchen floor
Measure the length and the width, and multiply them to get the floor area. A kitchen 12ft long and 10ft wide, for example, has 120 square feet of floor.
For an L-shaped room, split it into two rectangles, work out each area and add them together:
(7 x 6 = 42) + (4 x 3 = 12) = 54 square feet

How to measure cabinet doors
If you're replacing doors only, a measuring mistake gets expensive fast.
Draw a plan of every cabinet and drawer, and double-check you haven't missed any.
Note whether each cabinet door is right or left-handed.
Open the door and measure the height and width from the back.
Measure the position of the hinge holes. Hinge positions vary between ranges, so measure from the top of the door to the centre of the top hinge hole, and from the bottom to the centre of the bottom hinge hole. Check what your supplier needs for doors with three or four hinges.
Use the same method for drawer fronts.
Do: Measure from the back of the door, work in millimetres, and measure twice.
Don't: Measure the front of the door or include the cabinet carcass.
How to measure a kitchen worktop
Sketch your worktop runs and label each piece with a letter. Work clockwise round the kitchen from the left, measure the length of each run of units (including an island if you're having one) and the depth, then add any overhang your supplier recommends.
Worktop depth and thickness vary by range, so confirm the exact sizes with your supplier.
Multiply the length by the width, divide by 1,000,000 if you've measured in millimetres, and you have the area in square metres to price different materials.
Once you've chosen your material, add the position of any cut-outs your supplier will need to know about, such as the sink and drainage grooves, hob, tap holes and pop-up sockets, and recesses.

How to measure a splashback and a sink
For a splashback, measure the height and width of the area, plus the length of any upstand and the window sills if you want the splashback to continue across them.
For a sink, how you measure depends on whether it's undermount (sits under the worktop, rim hidden) or top-mount (a visible lip rests on the worktop). Measure the length and width inside the sink, above the curve at the bottom, and measure the depth with a straight edge laid across the top.
If you're replacing a top-mount sink in an existing worktop, measure the cut-out too.
For a new sink in a new worktop, check the inside of the base cabinet so the sink fits with room for taps and plumbing.
If you'd rather not measure up yourself, a kitchen designer can survey and plan your kitchen for you.
Find kitchen designers near you
What order does a kitchen renovation happen in?
Getting the order wrong is one of the most expensive planning mistakes: it's how you end up cutting into a new floor to reach a pipe.
Every project is different, so ask your fitter to confirm the sequence, but the work typically runs like this:
Planning and ordering: Finalise the design, measurements, and budget, then order your units, worktops. and appliances. Be sure to check the delivery lead times.
Strip out: Disconnect and remove the old kitchen, appliances, and any unwanted fixtures.
Structural work: Any wall removal, steel beam, or extension work should be done here, with the right approvals in place.
First fix: Includes plumbing, electrical cables, and pipework in walls and floors, plus any gas work, including adding or moving radiators.
Plastering and making good: Skim walls and ceilings, then let them dry.
Flooring and decorating: Lay the floor and paint the ceilings and walls. Your fitter will tell you whether the floor should go down before or after the units for your chosen flooring.
Units and worktops: Install base and wall units, then templated or cut worktops.
Second fix: Fit sinks, taps, hob, oven and appliances, sockets, switches, and lighting, then splashbacks and finishing touches.
Final checks: Test everything, and make sure any certificates are issued and filed away.
For more details on what happens in practice, and how long it usually takes, in how long does a kitchen renovation take.
Permissions and regulations
Kitchen renovations don't usually need formal approval such as planning permission, but some work does:
Electrical work: In England, electrical work in kitchens, and any new circuits, is notifiable under Part P of the Building Regulations. It should be carried out by a registered electrician, or notified to building control in advance.
Gas work: Gas appliances should only be installed, moved, or disconnected by a Gas Safe registered engineer. That includes fitting a gas hob or oven.
Structural changes: Removing a load-bearing wall needs Building Regulations approval. A structural engineer can handle this and calculate what's required.
Extensions: Extending the kitchen may need planning permission as well as Building Regulations approval, depending on the work.

Planning a kitchen extension: Your complete guide
Kitchen extension design and layout When you’re planning a kitchen extension, it’s essential that you have a good idea of the design and layout of your kitchen as a whole before you begin thinking about a kitchen extension. Getting the planning stage right can save numerous problems further down the
A guide to kitchen demolition
The strip-out is the one phase where DIY can save money, and you don't need specialist skills to remove a kitchen.
But it's tiring, and you must avoid damaging water, gas, electrics, or structural elements. If you're unsure about how to tackle it, hire a tradesperson or removals service.
Before you start, empty all the cabinets and drawers, and box up what you're keeping. If you need to clear a lot of waste, you may need to hire a skip.
Safety first
You must isolate the utilities before demolition begins:
Electricity: Switch off the kitchen circuits at the consumer unit (fuse box)
Water: Turn off the internal stop tap, usually under the sink or in an airing cupboard. To isolate the whole property, find the external stop tap
Gas: If your cooker or hob runs on gas, don't disconnect or cap it off yourself. A Gas Safe registered engineer should do this and reconnect your appliances later
DIY kitchen demolition
Put down the sledgehammer! Reckless demolition can damage ceilings, walls, plumbing, and electrics and cost you time and money.
Instead, go carefully and gradually, pulling out one thing at a time. You'll usually want an extra pair of hands to move heavy fixtures such as worktops, sinks, and wall cabinets.
Follow our guide to DIY kitchen demolition, which covers removing worktops, drawers, base units and wall cabinets, plus tiles and vinyl or lino flooring.
For demolition costs, see our kitchen fitting cost guide, or ask your kitchen supplier whether they will remove the old kitchen before the new one goes in.
DIY or hire a tradesperson?
Depending on the scale of your renovation and your confidence, you may be able to save money by doing some of the work yourself.
For the best results, though, a qualified, experienced tradesperson is the best call - and some jobs, such as gas and most electrical work, should only be done by someone who can issue the right certificate on completion.
These guides are suitable for confident DIYers:
Who to call for each stage of the job
A kitchen renovation often involves several tradespeople working in sequence. For a bigger job with structural work, a builder can coordinate them all.
Depending on your plan you may then need a kitchen fitter, an electrician, a plumber, or a plasterer.

How to find a trusted kitchen fitter
For the best results, always use a tradesperson you can trust.
Start by searching for a local kitchen company or fitter, read reviews from real customers, and compare quotes.
Ask each one to confirm what's included, whether they will handle the strip-out and disposal, and how they will coordinate the other trades.
To get started, enter your postcode into our search tool. We'll show you all the Checkatrade tradespeople who offer the services you need in your area.
Find a kitchen fitter near you
You can also post a job and we'll send it to tradespeople who are checked by us and reviewed by real people.
Plus, if you book through us, you'll be covered by the Checkatrade Guarantee up to £1,000 (T&Cs apply).

Need reassurance? All tradespeople pass up to 12 checks before joining, and we keep checking after.
Your kitchen renovation planning checklist
Work through this list to get a full plan in place for your kitchen renovation.

Open plan kitchen checklist
Before deciding which ideas you love most, think about:
Kitchen renovation FAQs
No, you usually don't need planning permission for a kitchen renovation, especially if it's a like-for-like refit.
But some aspects of the work is regulated and subject to building regs approval: new electrical circuits and kitchen electrical work, gas work, removing a load-bearing wall, and any extension work.
Check with your local authority's building control if you're unsure.
Many people do, but expect disruption, dust and no cooking facilities for a while. Set up a temporary kitchen in another room with a microwave, kettle and small fridge, and ask your fitter when the water, gas and electricity will be off.
Speak to a fitter or designer before you order. They can survey the room, confirm your measurements and flag problems with services or structure. Ordering first can leave you with units that don't fit the real space.
The scope of the work, whether you're changing the layout, the quality of the units and worktop, your appliances, flooring and lighting, and the labour involved. Moving plumbing, gas or electrics, or making structural changes, adds to the price. See our kitchen renovation cost guide for typical ranges.
If the layout and carcasses are sound, refreshing the doors costs much less than a full renovation. Options include replacement kitchen doors, painting kitchen cabinets or kitchen door wrapping.
Common regrets include poor storage, not enough worktop space and skimping on lighting. Our kitchen remodel regrets guide covers what to avoid.

See the tradespeople we've checked for your job